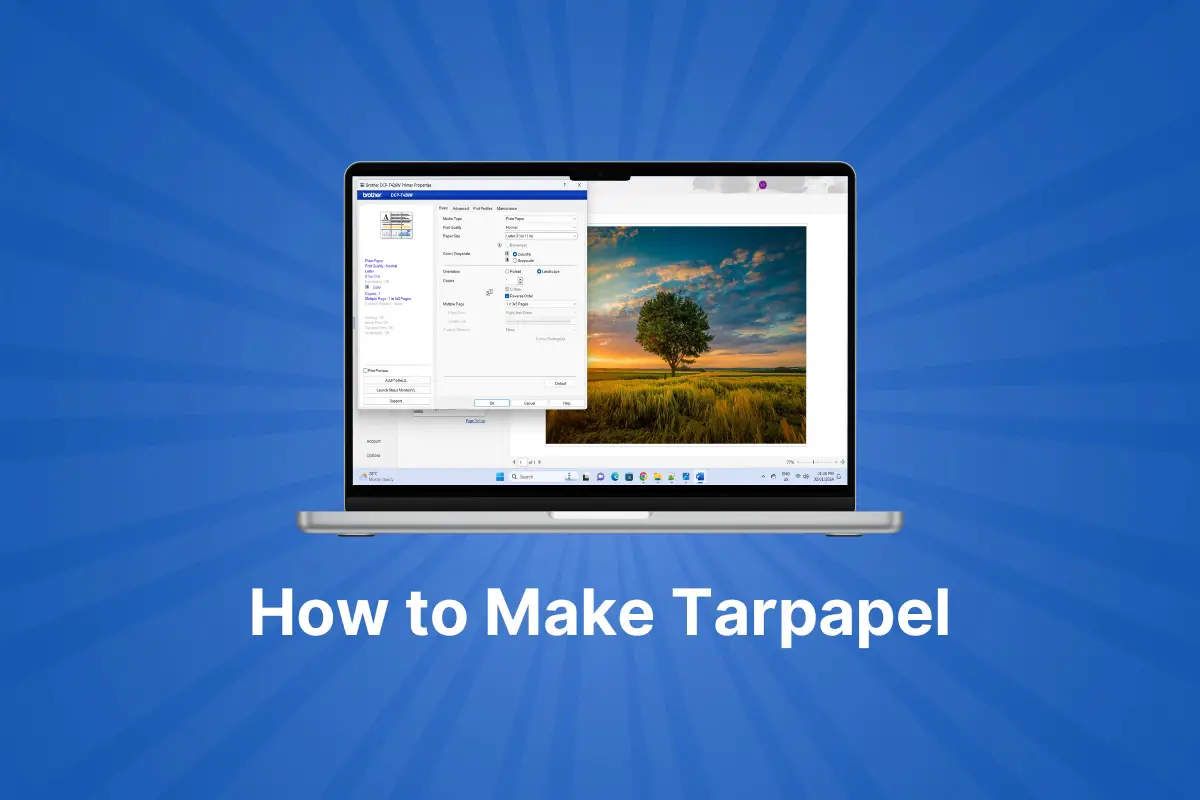
Do you want to make a tarpaulin but don’t have the money and time? Why not make a tarpapel instead? A tarpapel (or block poster) is a cheaper and more economical alternative to the tarpaulin, and we’ll teach you how to create one using Microsoft Word.
In the Philippines, most people use printed tarpaulins as banners to celebrate a momentous occasion such as a birthday or passing the board exam. Tarpaulins are usually produced in printing shops and can cost a significant sum of money due to the amount of ink and materials involved.
As an alternative, some people have started creating their own tarpaulins called “tarpapel,” which is an amalgam of “tarpaulin” and “papel” (paper in English). Also called a block poster in other countries, a tarpapel is relatively fast and easy to make as long as you have the know-how and equipment (any color printer will do).
So if you don’t know how to make a tarpapel or block poster using Microsoft Word, don’t worry because we’ll guide you every step of the way.
How to Make a Tarpapel Using Microsoft Word
Before you start creating your tarpapel, make sure that your printer is already connected to your computer and properly configured.
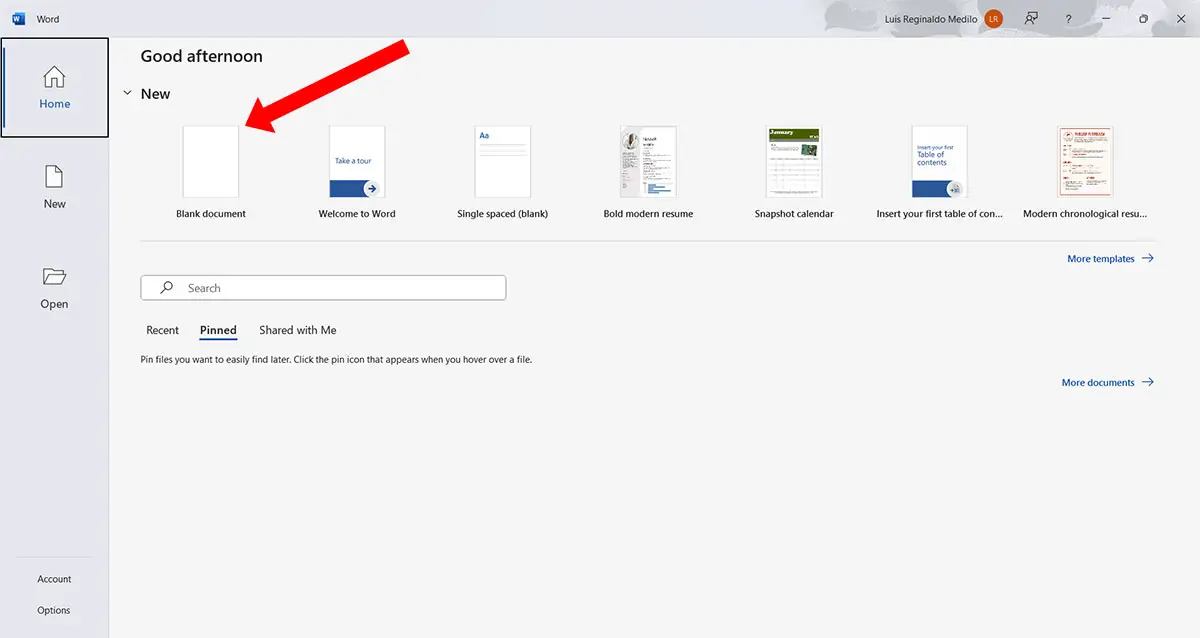
Step 1: Create a new blank document
Open Microsoft Word and create a new document by clicking “Blank Document” or by pressing Ctrl + N on your keyboard.
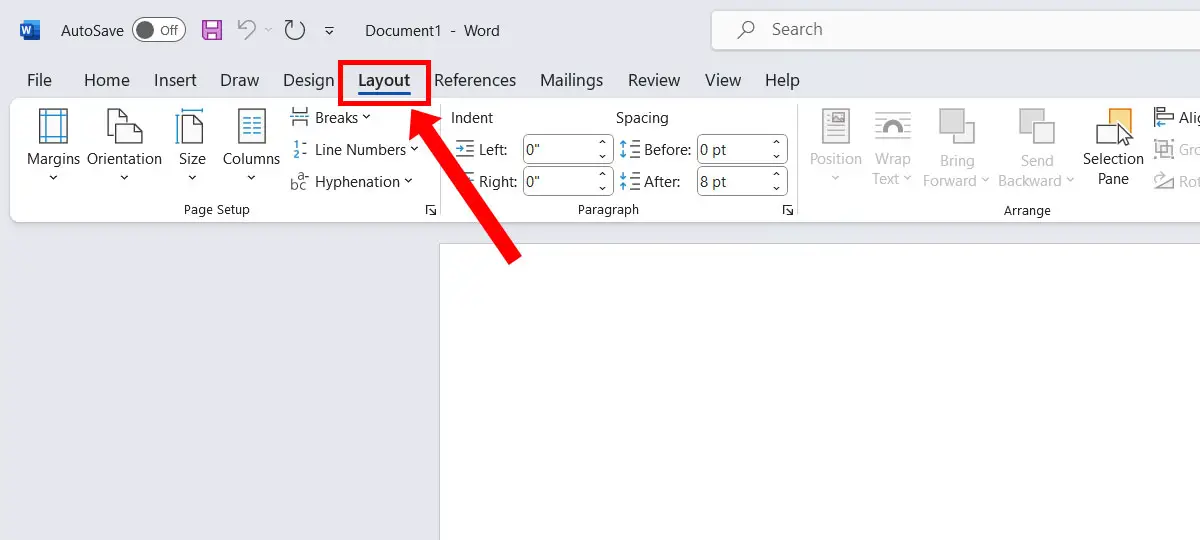
Step 2: Click the Layout tab
On the Microsoft Word menu bar, click the “Layout” tab (refer to the screenshot image below).
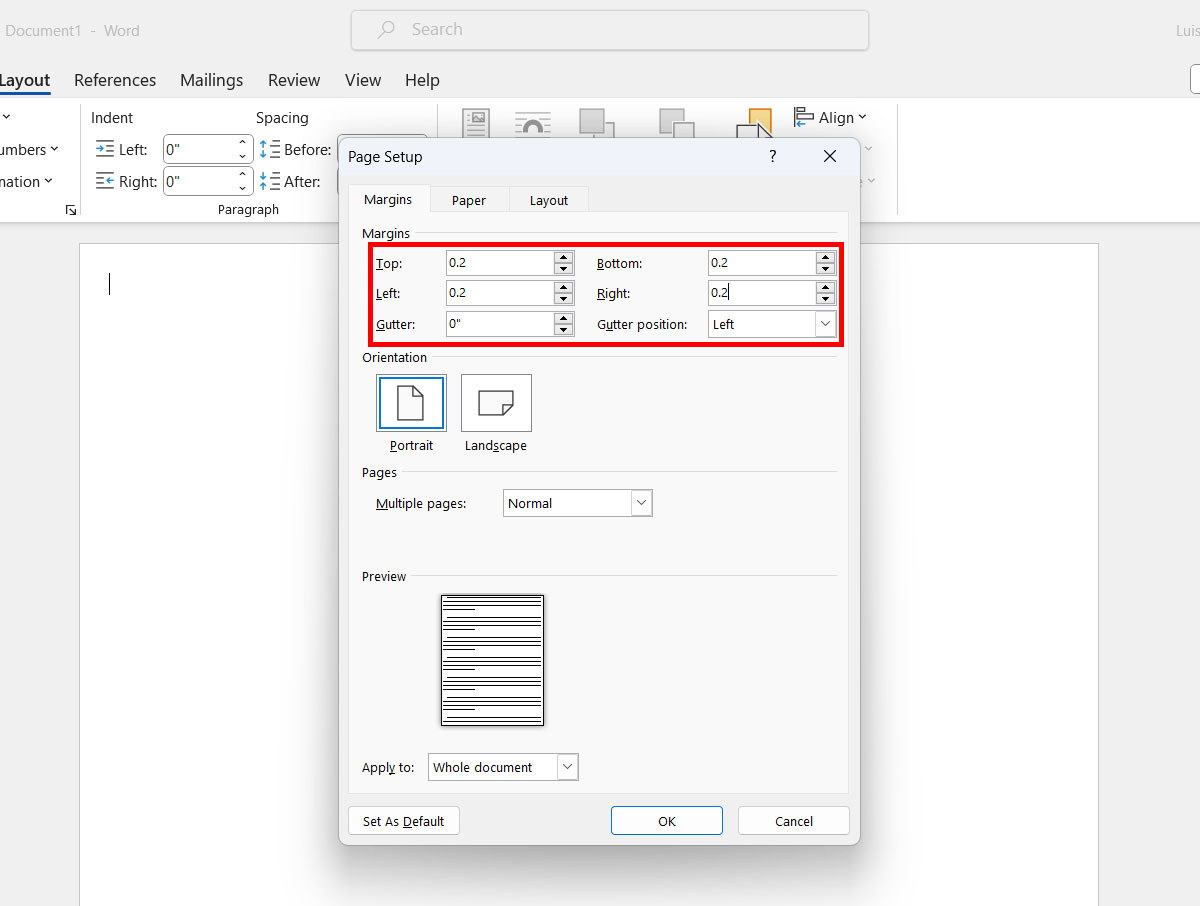
Step 3: Set the document margins
First, you need to set the margins for your document. You can use the default margin setting which is 1″, but for the best results, you can change it to 0.2″ or even 0 (zero). Note that if you set them to 0, some margins will be outside the printable area and may not be printed.
Click the “Margins” button and select your preferred margin settings.
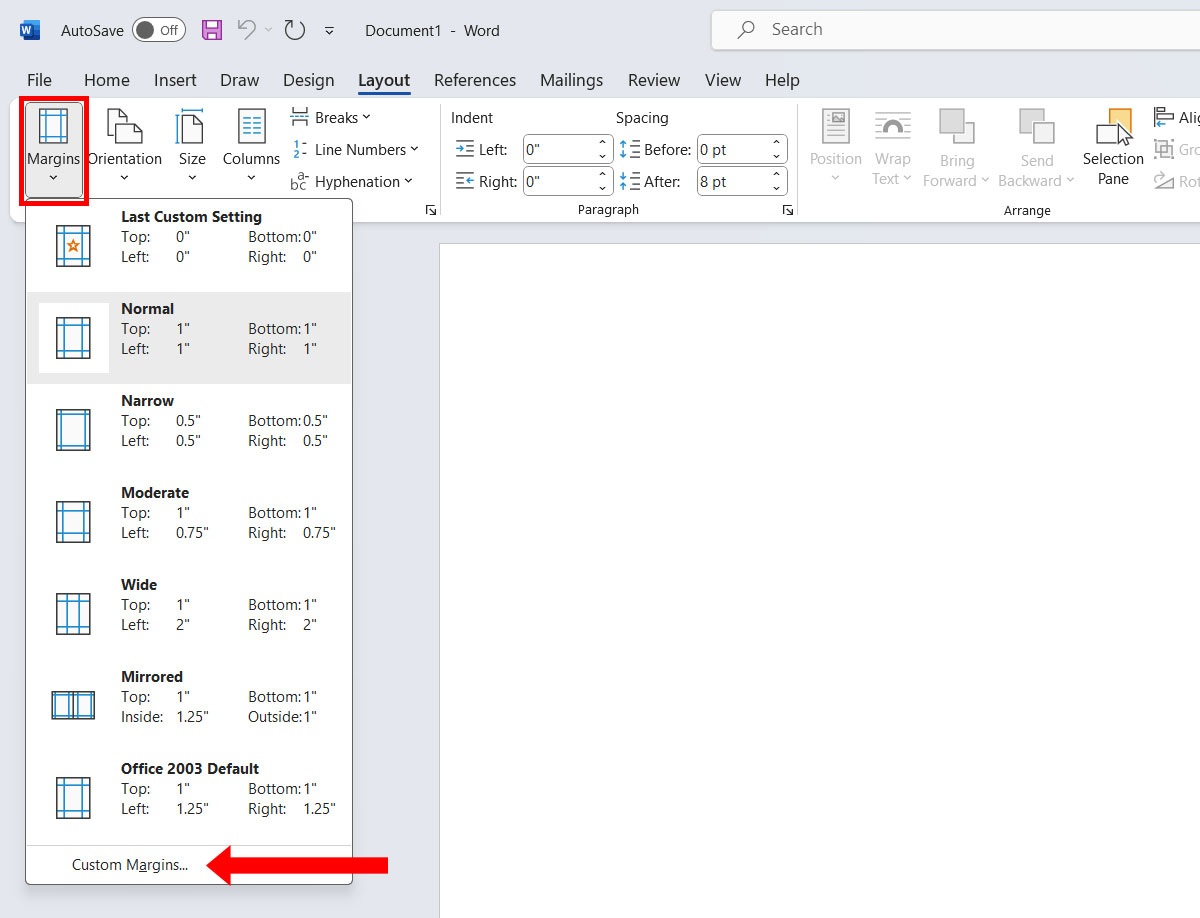
Let’s say that you’ll set the margins to 0.2″. Click “Custom Margins” on the dropdown menu.
On the Page Setup dialog, change the top, bottom, left and right margins to 0.2″ (or whatever margin you prefer). When you’re done, click “OK.”
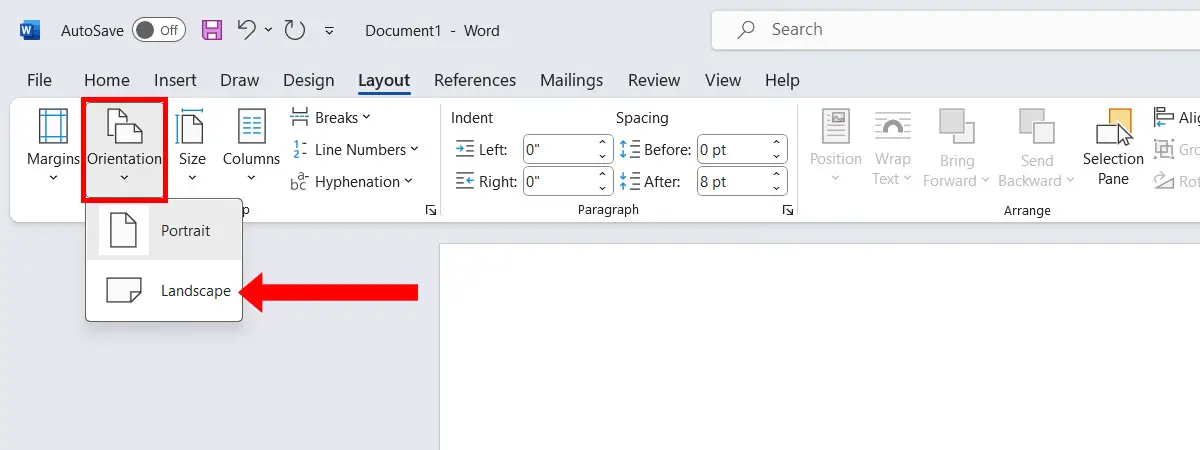
Step 4: Set the orientation
If you want to change the orientation to landscape mode or horizontal orientation, click the “Orientation” button and then select “Landscape.”
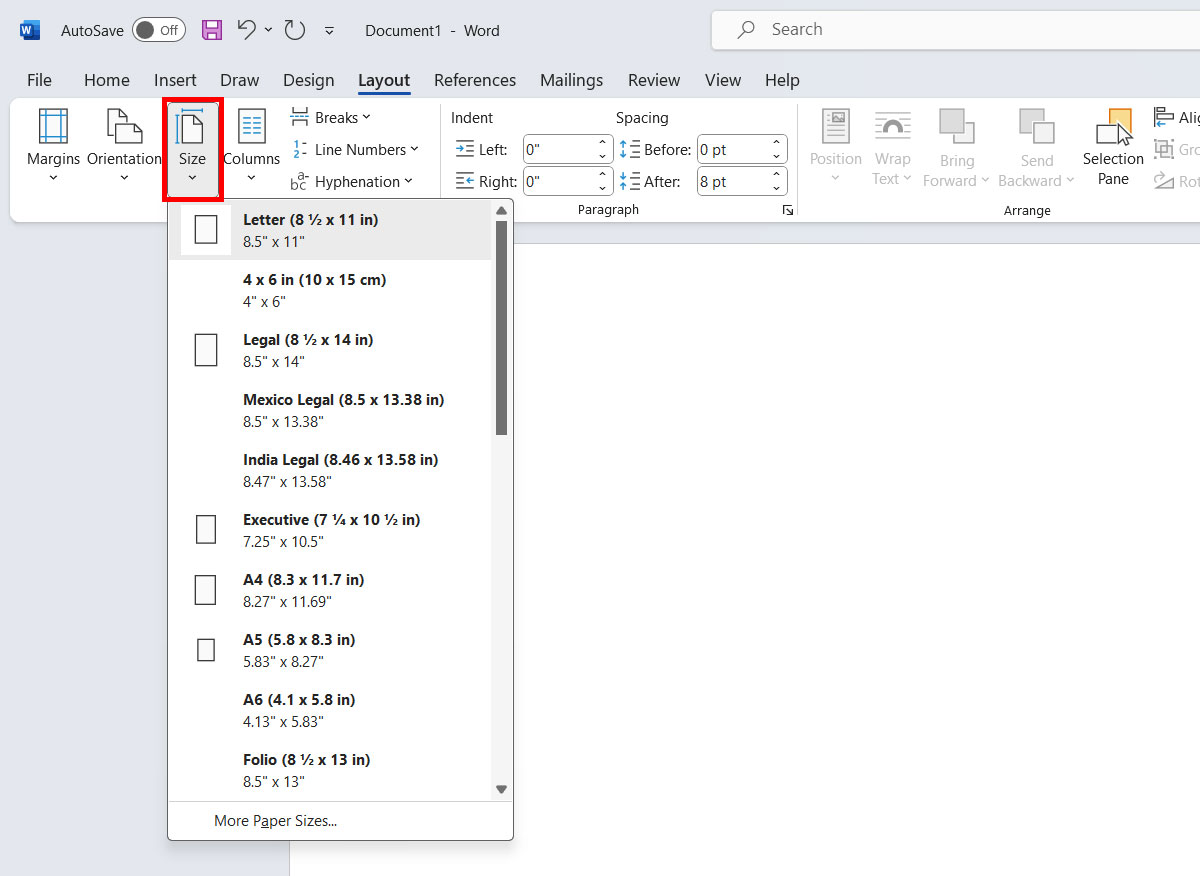
Step 5: Set the document size
Now, set the document size based on your printer paper. If your paper is short bondpaper (8.5″ x 11″), then it’s best to select “Letter” size. However, if your paper is long bondpaper (8.5″ x 13″), then choose “Folio.”
To change the document size, click the “Size” button and select your preferred document size.
Step 6: Insert the picture into your document
Now that you have set the margins, orientation and size of your tarpapel, it’s time to insert the picture into your document.
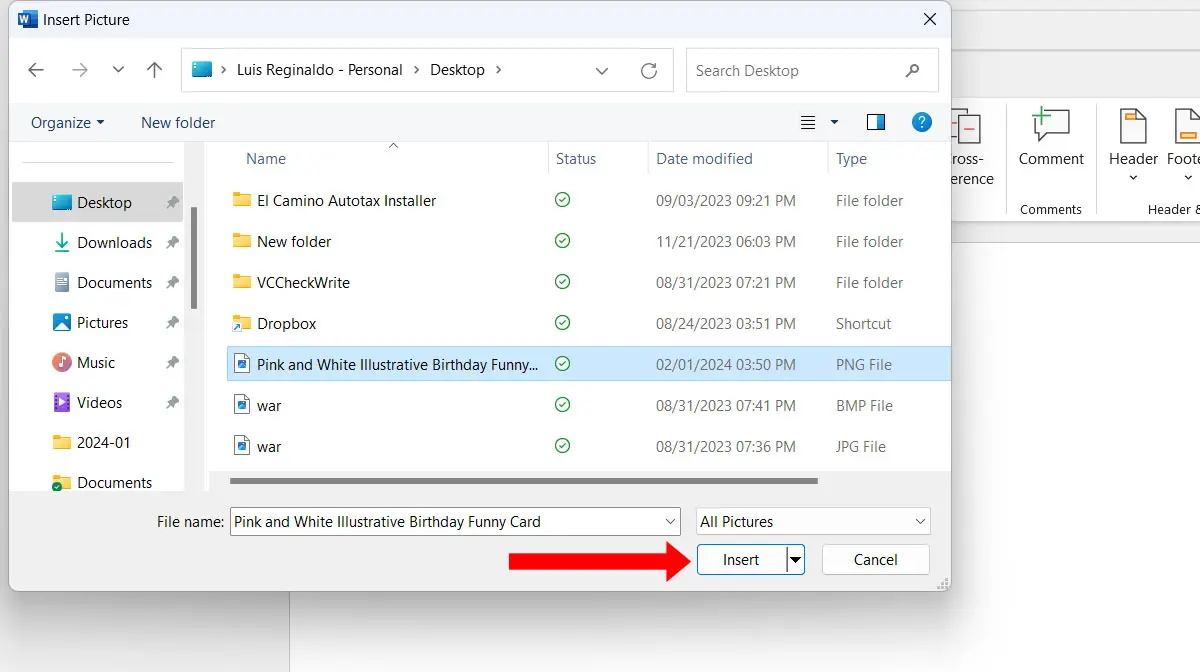
Click the “Insert” tab on menu bar and then click the “Pictures” button. Select “This Device…”
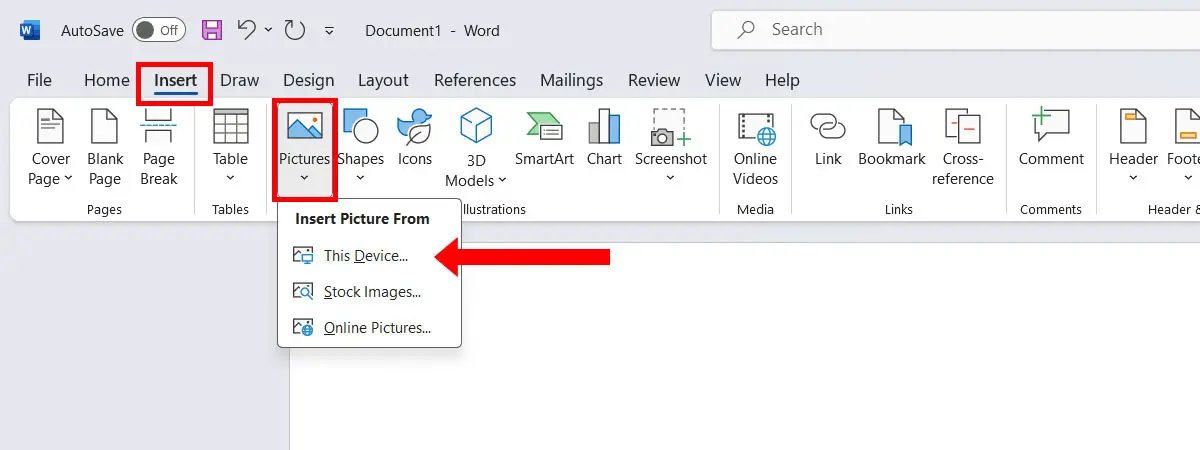
Browse to the folder where the picture is saved and then select it. Click “Insert” to place the picture in your document.
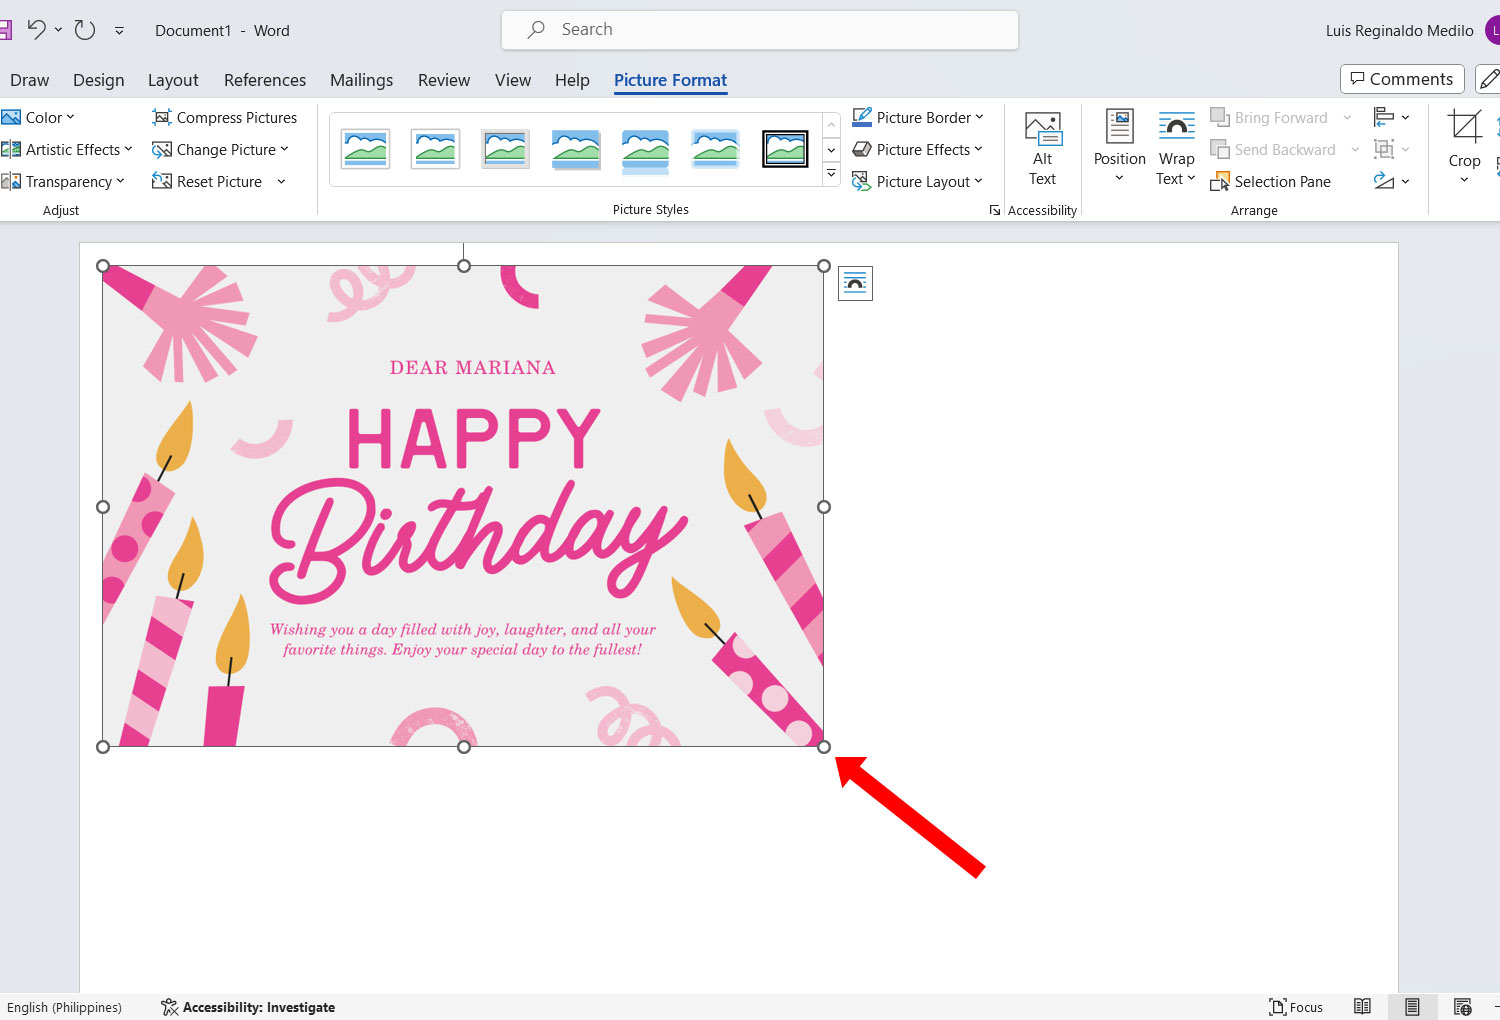
Step 7: Resize the picture
After inserting the picture, you can resize it by dragging its edges. You can also edit the picture or add styling (e.g. borders, shadows, frames, etc.) by clicking the appropriate buttons on the Picture Format menu.
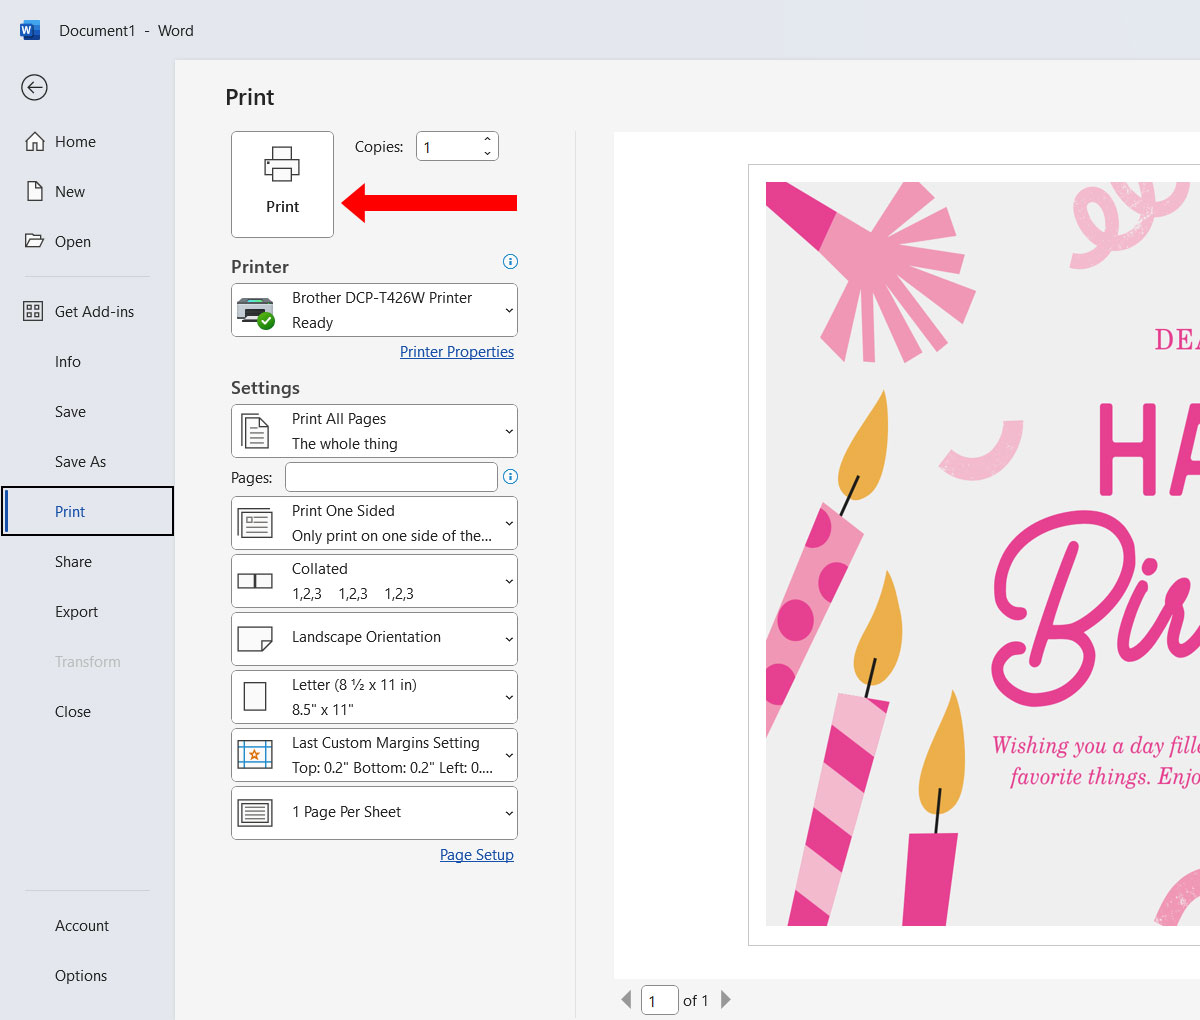
Step 8: Open the Print dialog
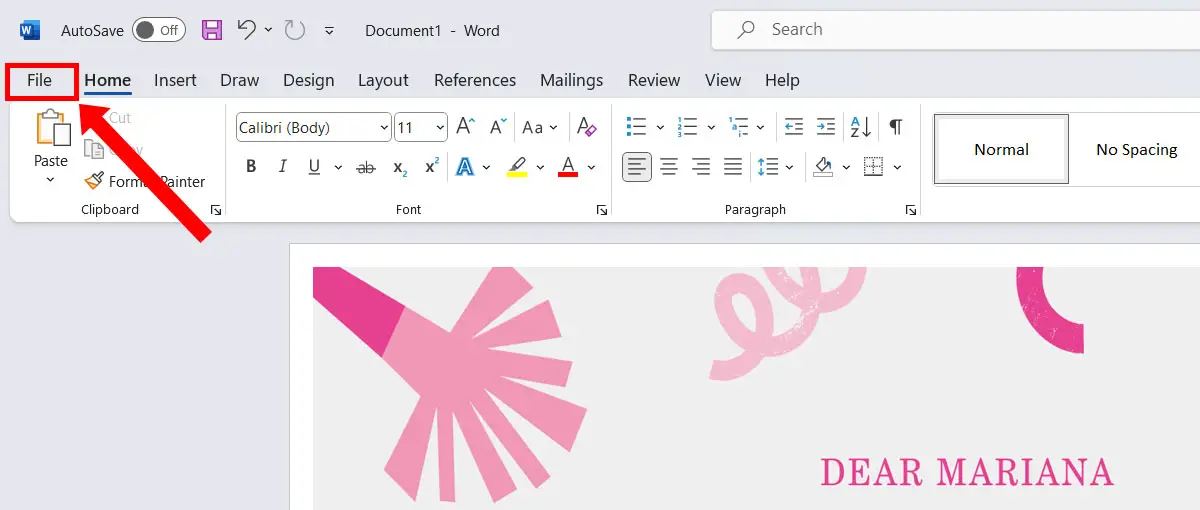
After resizing the picture, proceed to printing by click the “File” tab.
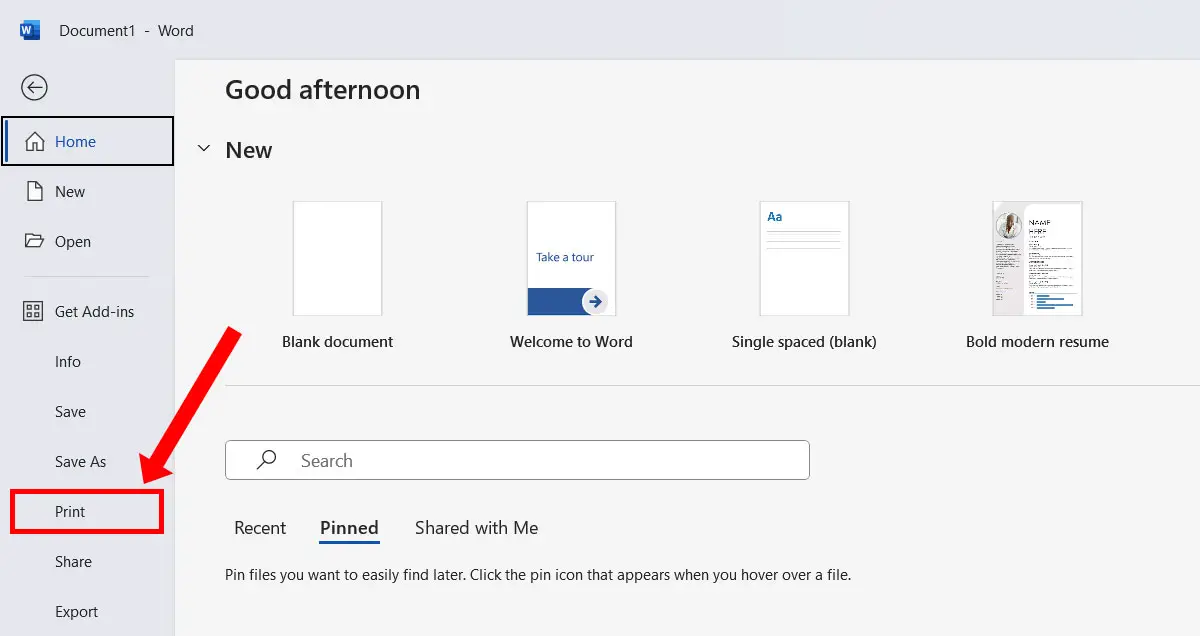
Click “Print” to open the Print dialog.
You can also press Ctrl + P on your keyboard to open the Print dialog directly.
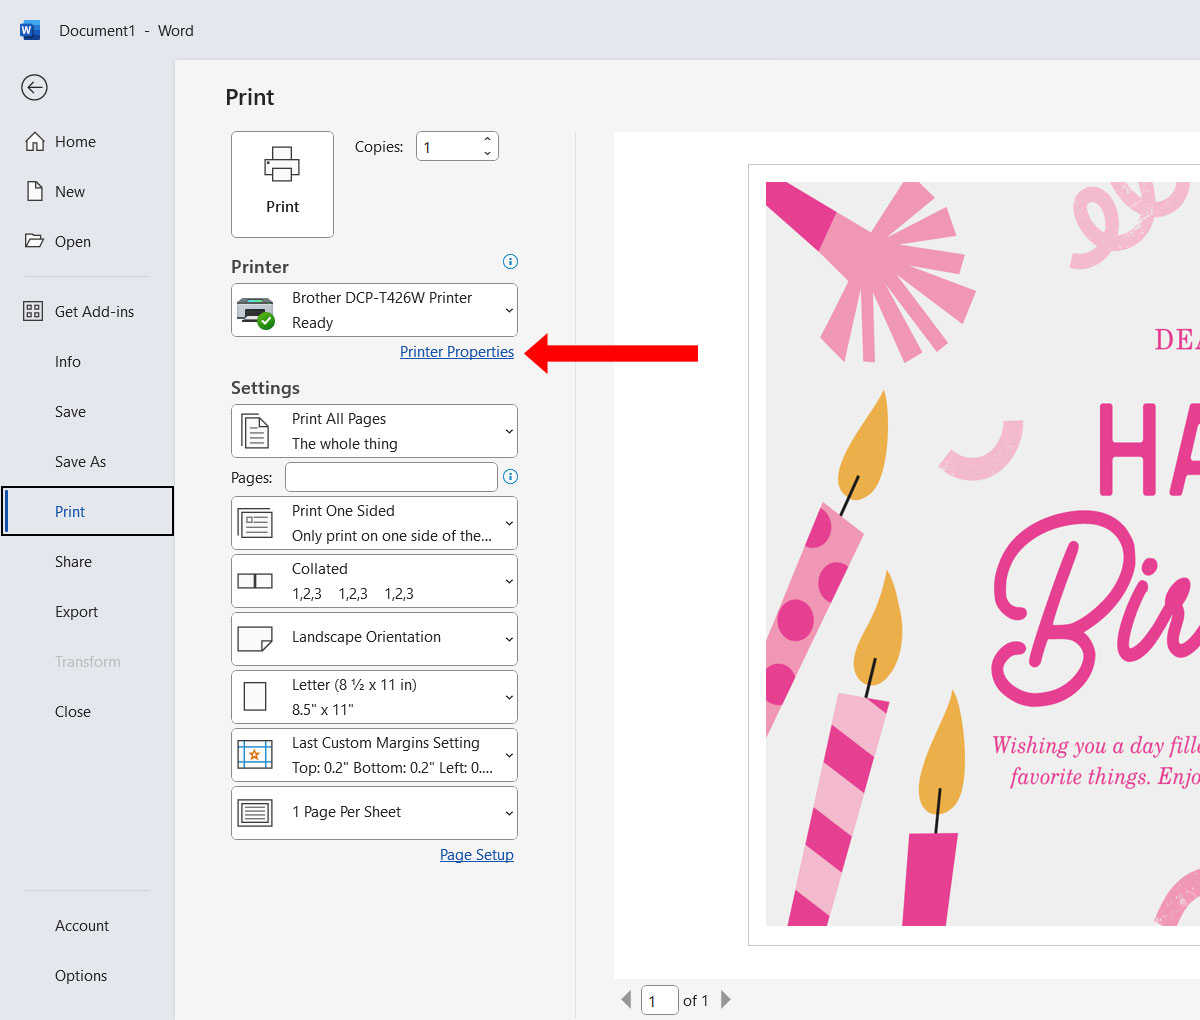
Step 9: Change the printer properties
Don’t print your tarpapel yet. You need to change a few settings first.
Choose your printer (or use the default printer) and then click “Printer Properties.”
Step 10: Select the Multiple Page option
On the Printer Properties dialog, find the “Multiple Page” (or “Multi-Page”) setting.
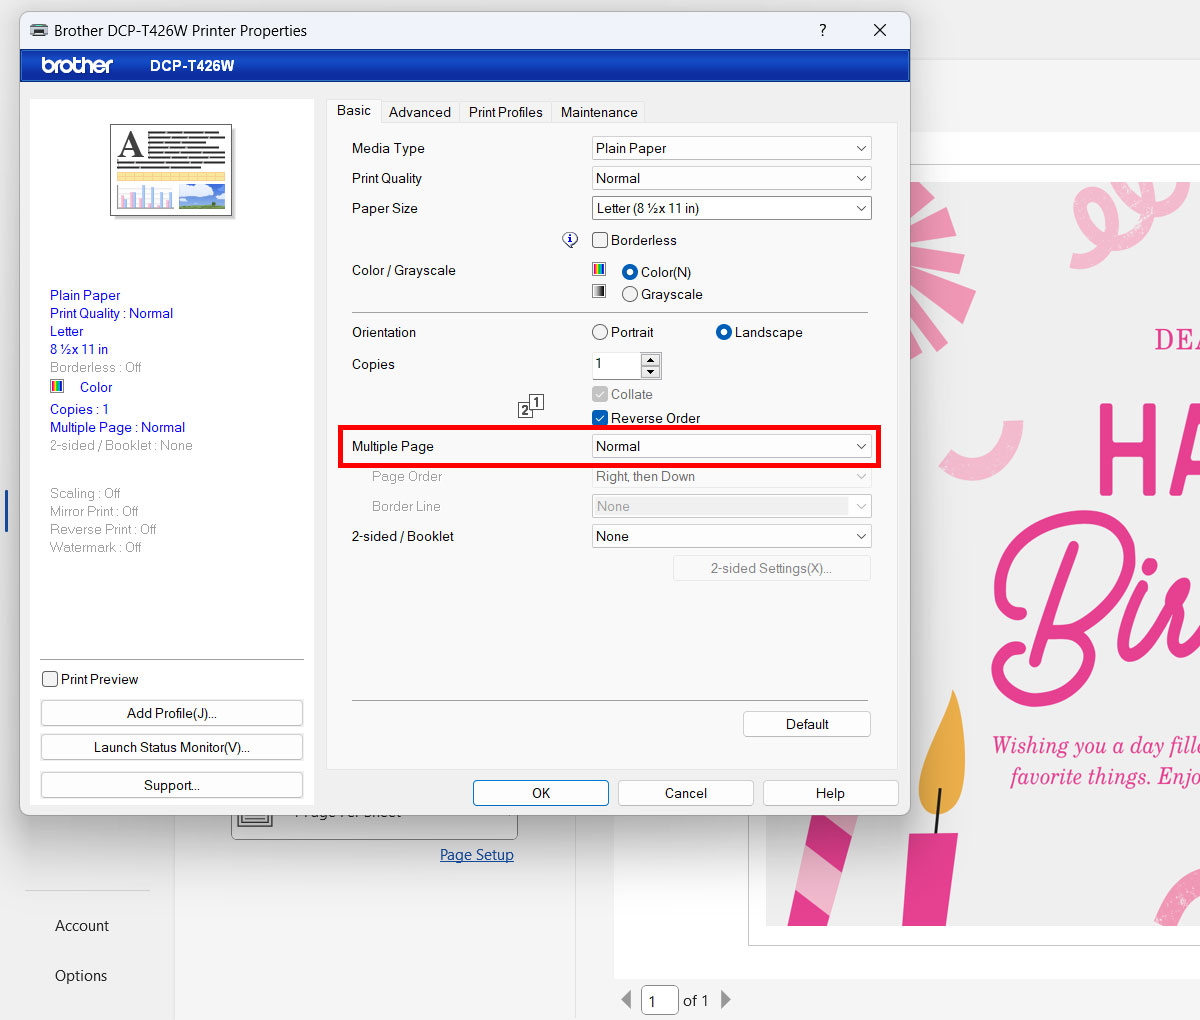
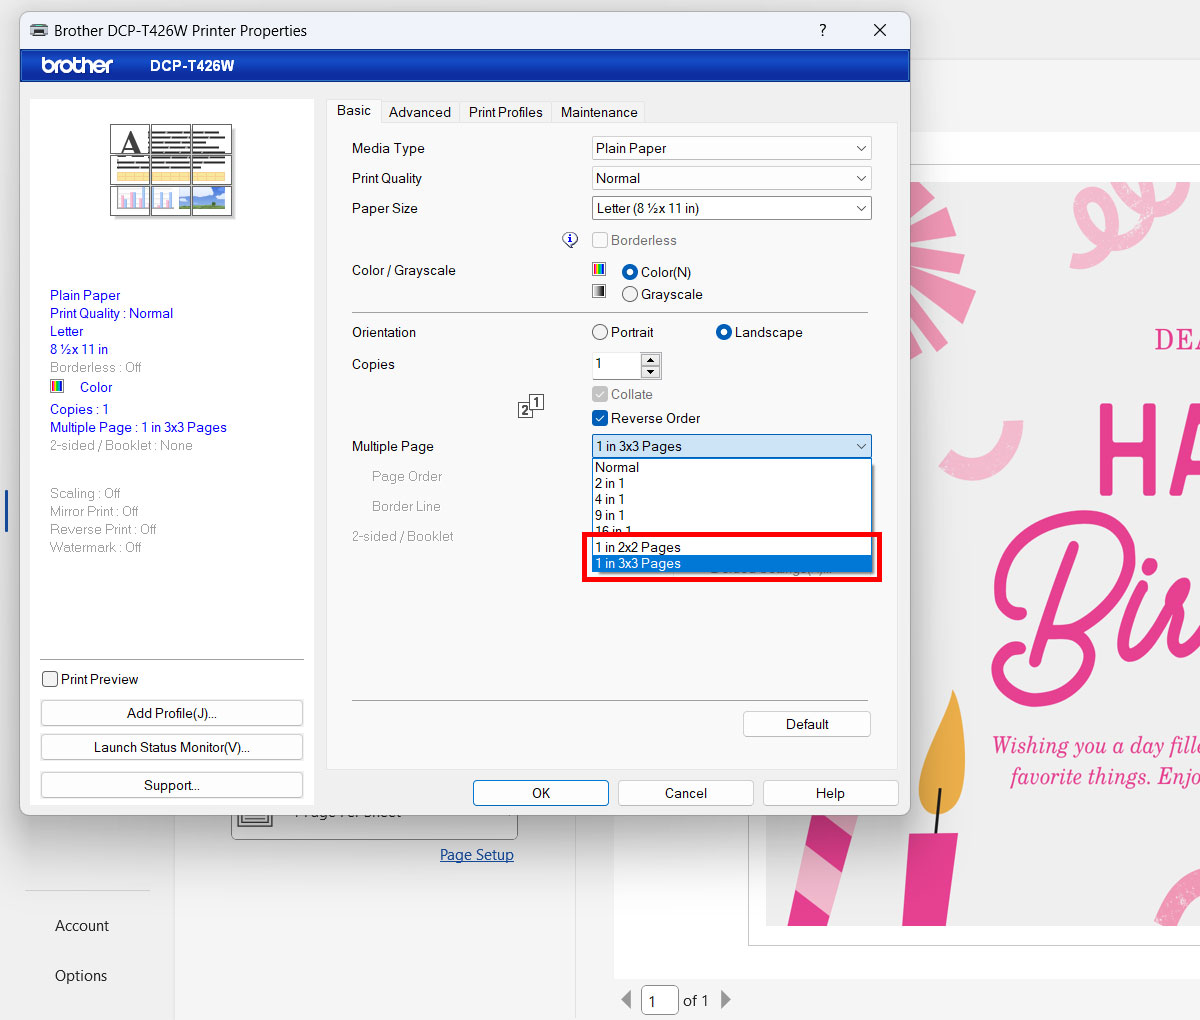
Click the “Multiple Page” dropdown box and select “1 in 3×3 Pages” or “3×3 Poster.”
Depending on your printer, you will immediately see a preview of how the tarpapel looks like. For Brother printers, the preview will be shown on the left pane. For Epson printers, you’ll need to click the “Settings” button to see the preview.
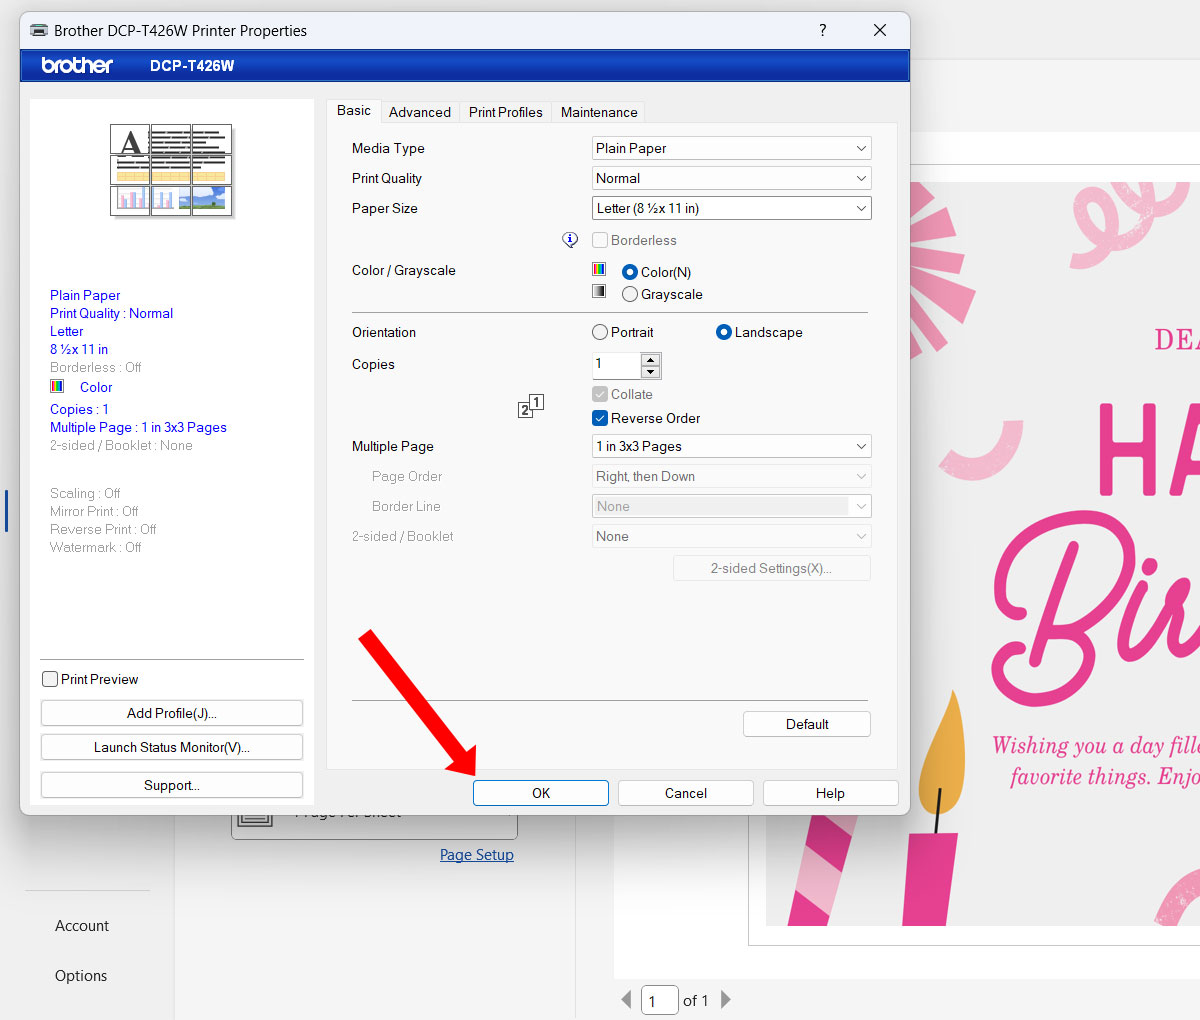
Afterwards, click “OK” to apply the new setting.
Step 11: Print the tarpapel
The last step is to print your document as a tarpapel.
Make sure that your printer has enough paper in the feeder. If you selected “3×3” in the “Multiple Page” setting, for example, then you will need a total of nine sheets of paper (3 x 3 = 9).
Click the “Print” button to start printing.
The printer will print your tarpapel starting from the top-left portion. Be patient as the printing will take some time.
When all the sheets of paper have been printed, assemble your tarpapel by gluing them into a bigger piece of cardboard or cartolina, or by taping them together.
Frequently Asked Questions
Why is my tarpapel blurry or pixelated?
If your tarpapel is blurry or pixelated, it means that your picture is too small. Please use a larger picture with a higher resolution. Canva allows you to enlarge an image without reducing its quality.
What types of images can be used for my tarpapel?
You can use any image format that can be inserted in Microsoft Word, such as JPEG, PNG, GIF and BMP.
How can I remove the excess margins?
Since most printers cannot print on the entire piece of paper, you will have to leave small margins on the sides. Use a pair of scissors or a paper cutter to remove the extra margins.
Wrapping Up
Making tarpapel is not only easy, it’s also a fun and enjoyable experience for people of all ages. So the next time you want to have a tarpaulin made but don’t have the time and money, just remember that you can make a paper-based substitute using Microsoft Word. And it’s friendlier to the environment, too!


