Have you always wanted to open a Landbank savings account, but don’t have the time to visit the nearest Landbank branch? The good news is that you can now open a Landbank account online using your mobile phone. It’s so easy and convenient!
- 100% Digital Process: You can open a Landbank savings account in less than 30 minutes using the Landbank mobile app, eliminating the need to visit a physical branch for the initial application.
- Zero Initial Deposit: The “LANDBANK PISO Plus” option allows users to open an account with no initial deposit or maintaining balance required.
- Simple Requirements: Applicants must be Filipino citizens at least 18 years old with a valid ID (such as a National ID, Driver’s License or Passport) and a smartphone with an active Internet connection.
- Instant Access: Upon successful registration and identity verification via a selfie and ID scan, you will receive your account number via email and can immediately use Landbank’s online banking services.
Opening a bank account used to be a lengthy and time-consuming process; you had to visit the bank, approach the staff, and fill out some paperwork. Nowadays, you can open a bank account in the comforts and convenience of your home, thanks to the power of the Internet.
The Land Bank of the Philippines (a.k.a. Landbank) offers a convenient and hassle-free way to open a savings account without visiting any of their branches. Previously, clients had to apply via the Landbank Digital Onboarding System (DOBS) and then proceed to the branch to complete the application.
With the new DOBS Mobile platform, you simply download the Landbank mobile app and complete the application process on your smartphone. You will be able to open a savings account without going to the nearest Landbank branch – and it takes less than 30 minutes!
So if you don’t have a bank account yet, now is a good time to open one! It’s totally free to open a Landbank savings account, and I’ll teach you exactly how to do it in this article.
Your money is protected: Deposits with LandBank are insured by the Philippine Deposit Insurance Corporation (PDIC) for up to ₱1,000,000 per depositor.
Table of Contents
Requirements to Open a Landbank Savings Account
Before we proceed with the account opening, let’s go over the requirements to open a Landbank savings account.
These are the eligibility requirements for those who wish to open a Landbank account:
- At least 18 years old
- Must be a Filipino citizen
- Must have a local or international mobile number
- FATCA if applicable (for U.S. persons only)
You also need to prepare these requirements to open a Landbank account:
- A smartphone with stable Internet connection
- Landbank mobile banking app (download from Google Play or the App Store)
- Active mobile number and email address
- An acceptable valid ID such as:
- Barangay certificate or city ID (with photo)
- Driver’s license
- Philippine National ID (PhilSys)
- Passport
- Professional Regulation Commission (PRC) ID
- Unified Multi-Purpose ID (UMID)
- Social Security System (SSS) ID
If you don’t have any of the aforementioned IDs, unfortunately, you will not be able to open a Landbank account. I suggest getting a barangay certificate as it’s probably the easiest to obtain among the list of acceptable IDs.
Step-by-Step Guide to Open a Landbank Account Online
Now that you’ve complied with the requirements for opening a Landbank account, let’s head straight to the application process. I’ve prepared this step-by-step guide (with screenshots) for you to follow. Take note that some screenshots are not included due to security restrictions, so be sure to read the instructions carefully.
Step 1: Download and Install the Landbank Mobile App
The first thing you can do is to download the Landbank mobile banking app from Google Play (for Android users) or the App Store (for iOS users).
Once the Landbank app is installed on your phone, open it and allow it to send notifications when you’re prompted.
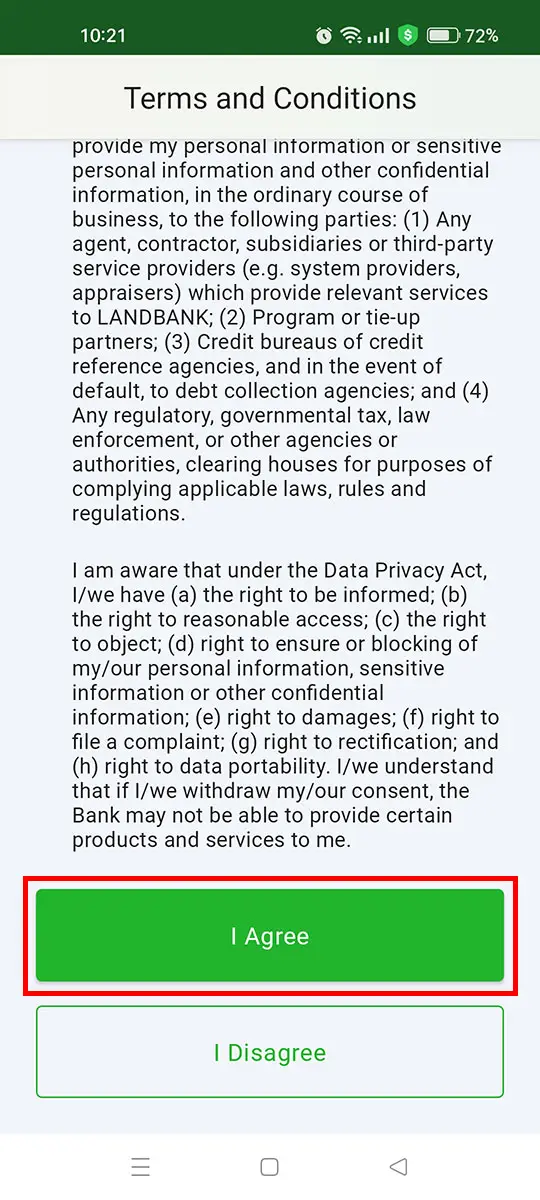
Step 2: Accept the Terms and Conditions
Take the time to read the Terms and Conditions page. Scroll down and press “I Agree.”
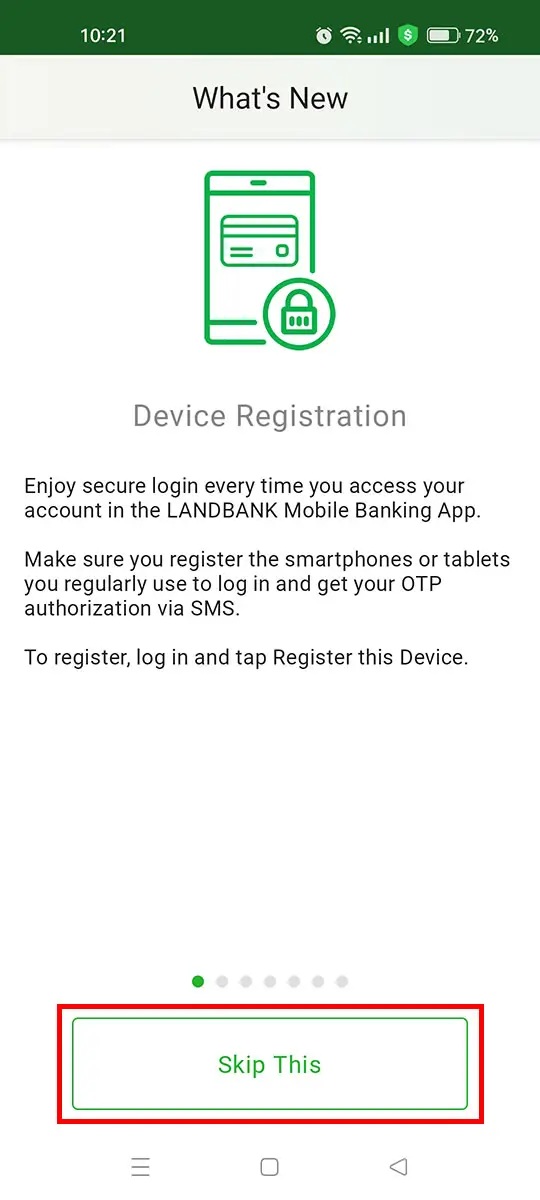
The app will show you several “What’s New” messages. You can either read all these messages or just tap “Skip This” to dismiss them altogether.
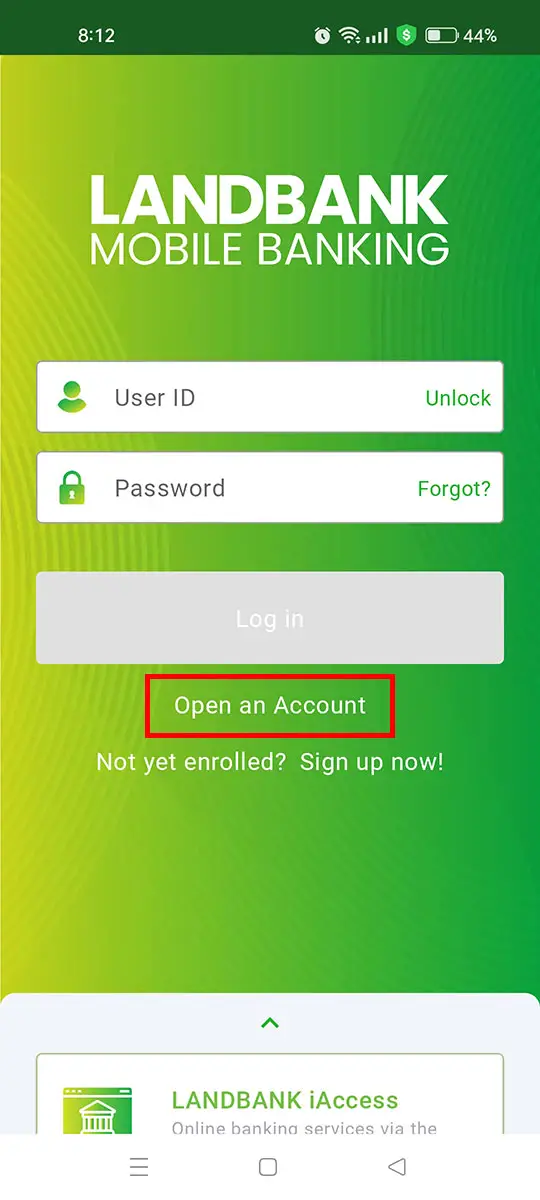
Step 3: Select “Open an Account”
You’re now in the login screen. Since you don’t have an account yet, tap the “Open an Account” link located below the login form (refer to the screenshot below).
On the next screen (“Welcome to DOBS Mobile”), press the “Continue” button.

Step 4: Select Your Product
Select “I would like to open a LANDBANK account.” If you have a pending application or if you want to delete an existing one, choose the appropriate option.
Now, choose the product that you want to open. You have three options:
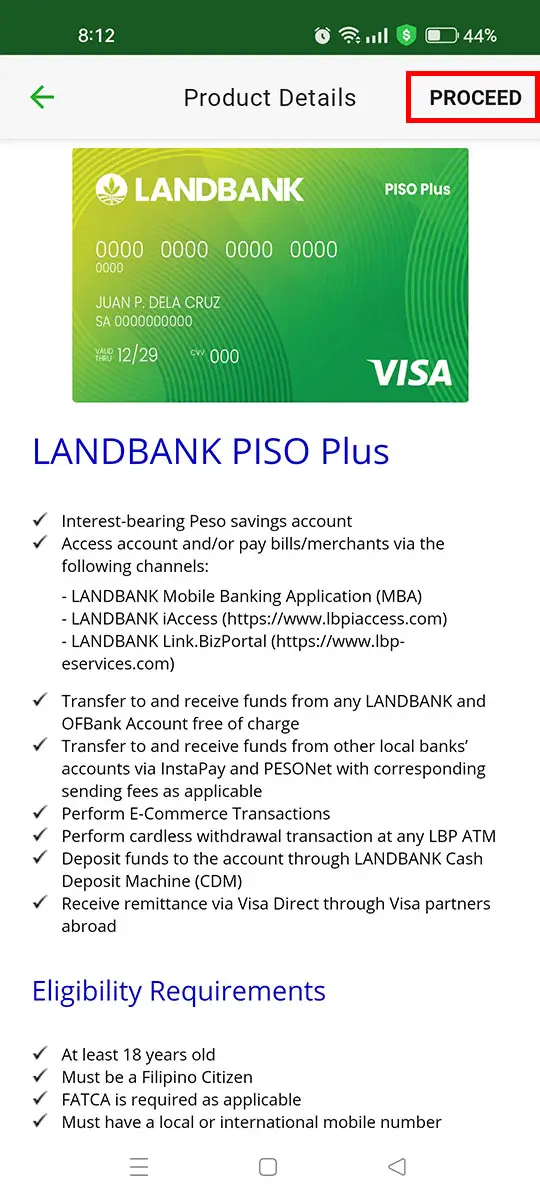
- LANDBANK PISO Plus – A deposit account with no initial deposit and maintaining balance required. It can hold up to ₱50,000 deposit balance. Note: If your balance exceeds ₱50,000, the account is automatically frozen. You’ll need to visit your home branch to convert it to a regular savings account.
- LANDBANK Visa Debit – A regular savings account that can hold more than ₱50,000 balance.
- LANDBANK GoBayani – A regular savings account specially designed for overseas Filipinos (OF) and overseas Filipino workers (OFW). It has no initial deposit and maintaining balance required.
For the purpose of this tutorial, I selected “LANDBANK PISO Plus” since it doesn’t require an initial deposit and maintaining balance.
PISO Plus users, take note: The PISO Plus has a daily debit limit of ₱10,000 and a monthly debit limit of ₱50,000. Also, if your account balance exceeds ₱50,000, an auto “Hold all Fund” feature will activate and freeze your account. You’ll need to visit your home branch to convert it to a regular savings account before you can transact again.


Review the important details about your product. To continue, press “PROCEED” on the top-right corner.
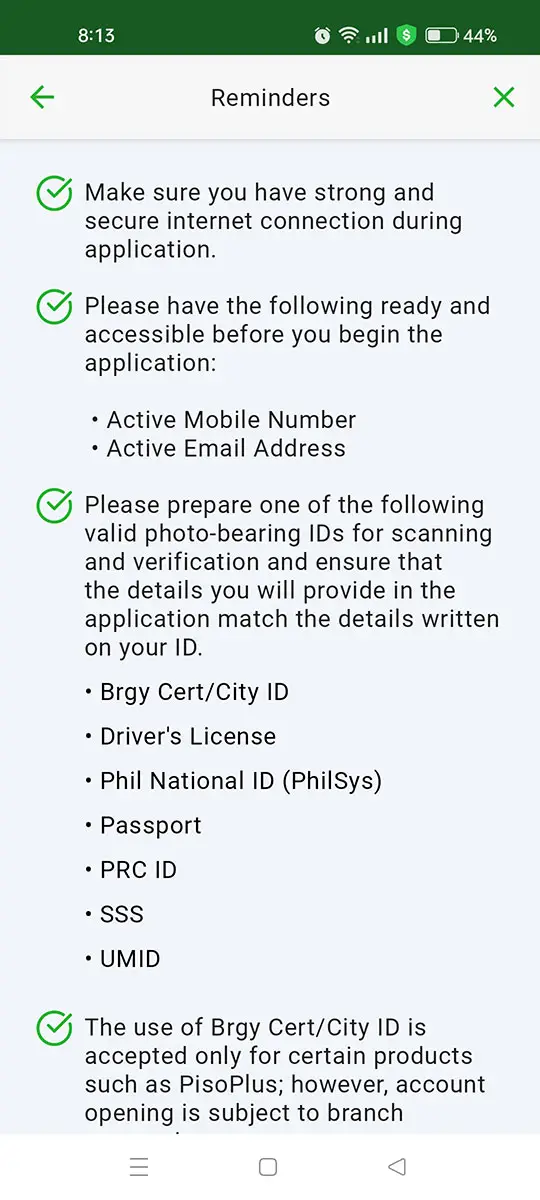
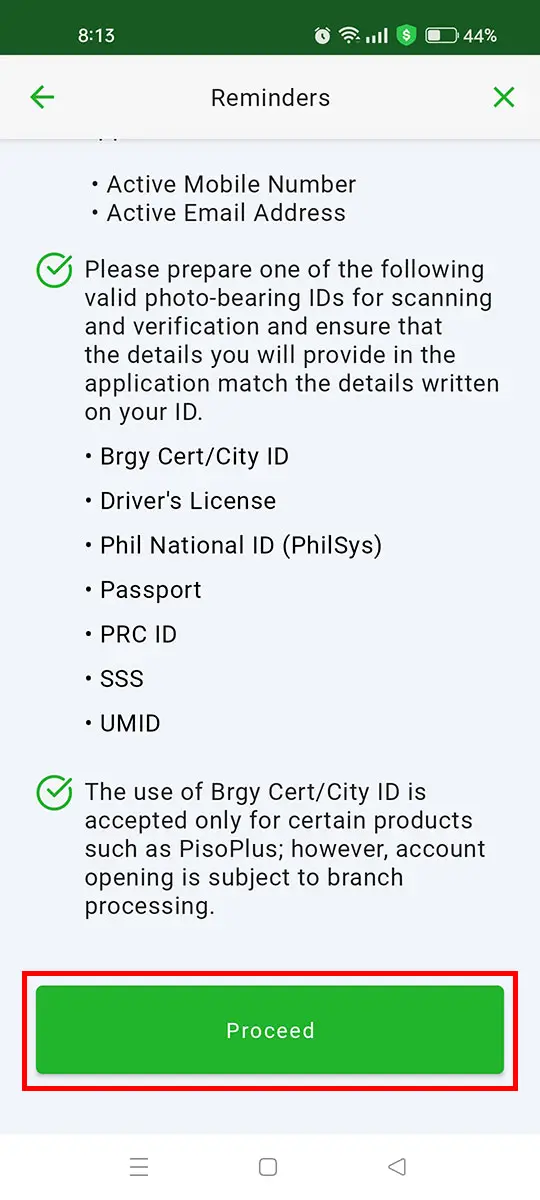
Read the reminders and scroll down until you reach the “Proceed” button, and then tap it.
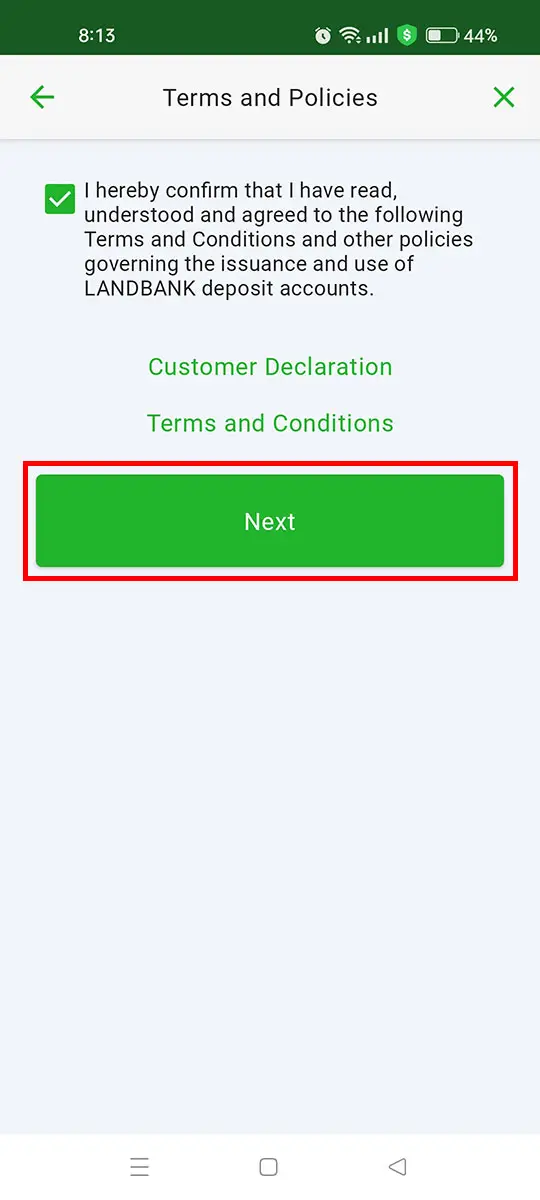
Tick the checkbox for “I hereby confirm that I have read, understood and agreed to the following Terms and Conditions…”
If you prefer, you may click “Customer Declaration” and “Terms and Conditions” to read them. Press “Next” to continue to the next step.
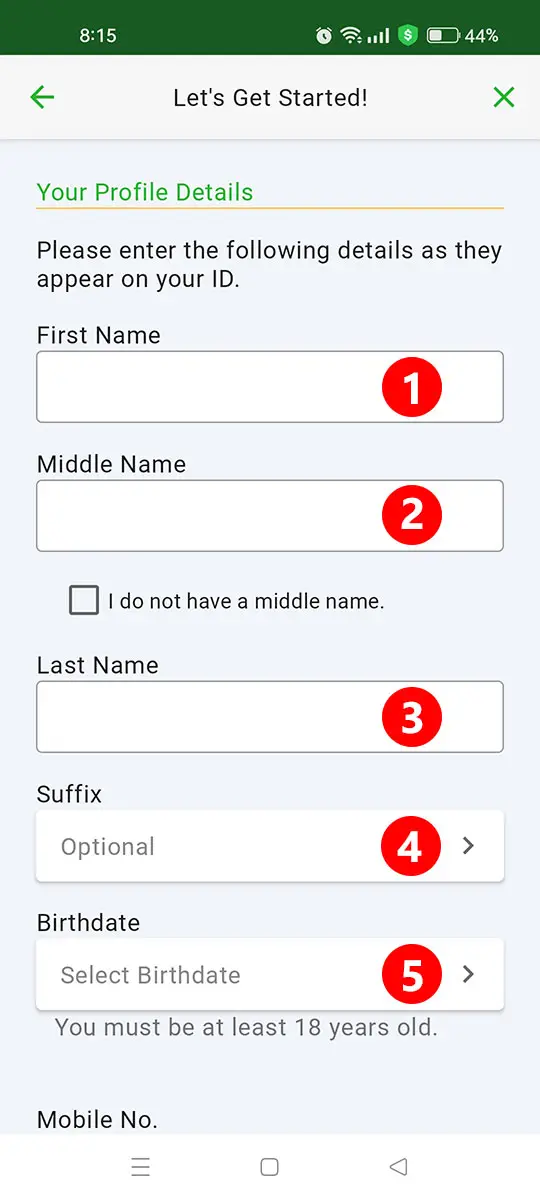
Step 5: Enter Your Profile Details
Enter your profile information as follows:
- First Name – Enter your first name or given name.
- Middle Name – If you don’t have a middle name, tick the checkbox for “I do not have a middle name.”
- Last Name – Enter your surname or family name.
- Suffix (optional) – If your name has a suffix like “Jr.” or “III,” indicate it here.
- Birthdate – Indicate your date of birth using the calendar date picker. Note that you must be at least 18 years old to open an account.
- Mobile No. – Provide your cellphone number including the country code (+63 for the Philippines). You should only type the 10-digit number starting with “9.” For example: 9123456789.
- Residential Number (optional) – If you have a telephone number, include it along with the country code and area code.
- Email Address – Enter an active email address where Landbank will send your account details and other important information.
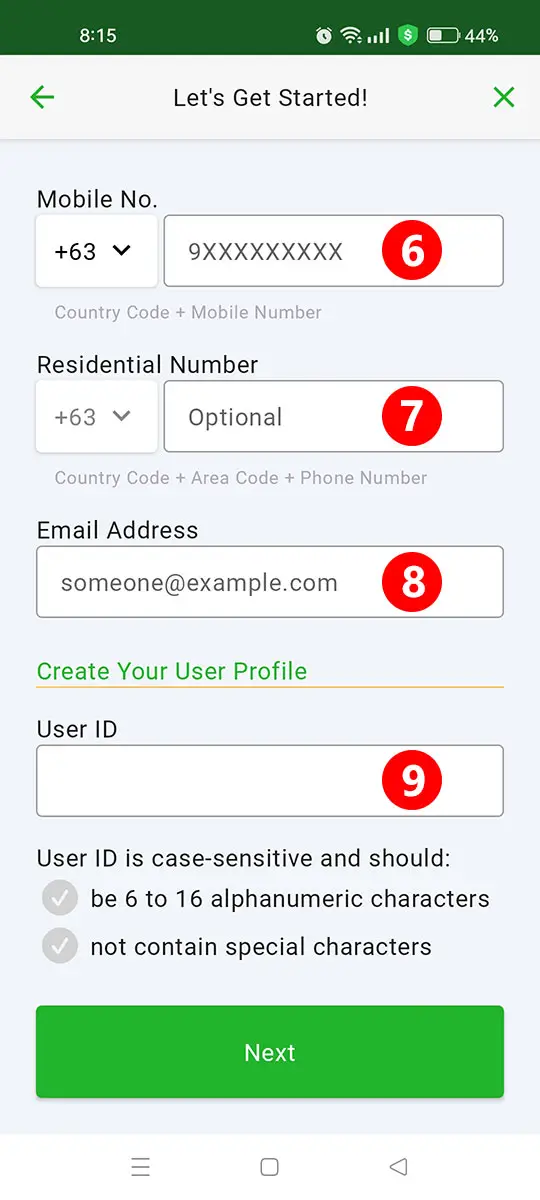
Step 6: Set Your User ID and Password
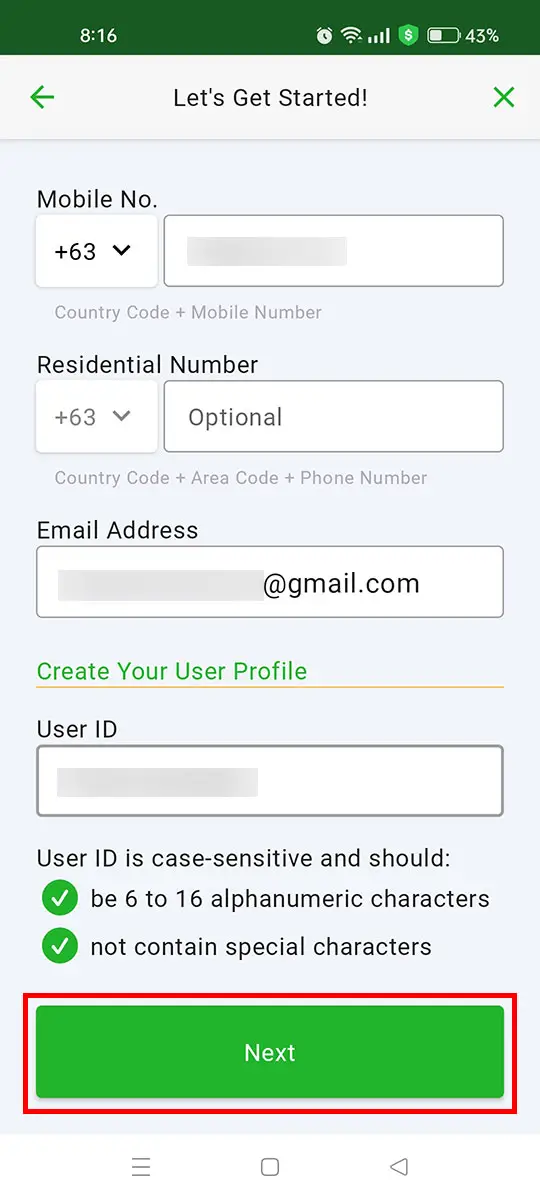
After inputting your profile details, nominate a user ID to represent your Landbank account. The user ID must have 6 to 16 alphanumeric characters and not contain special characters.
After nominating a user ID, press the “Next” button to continue.
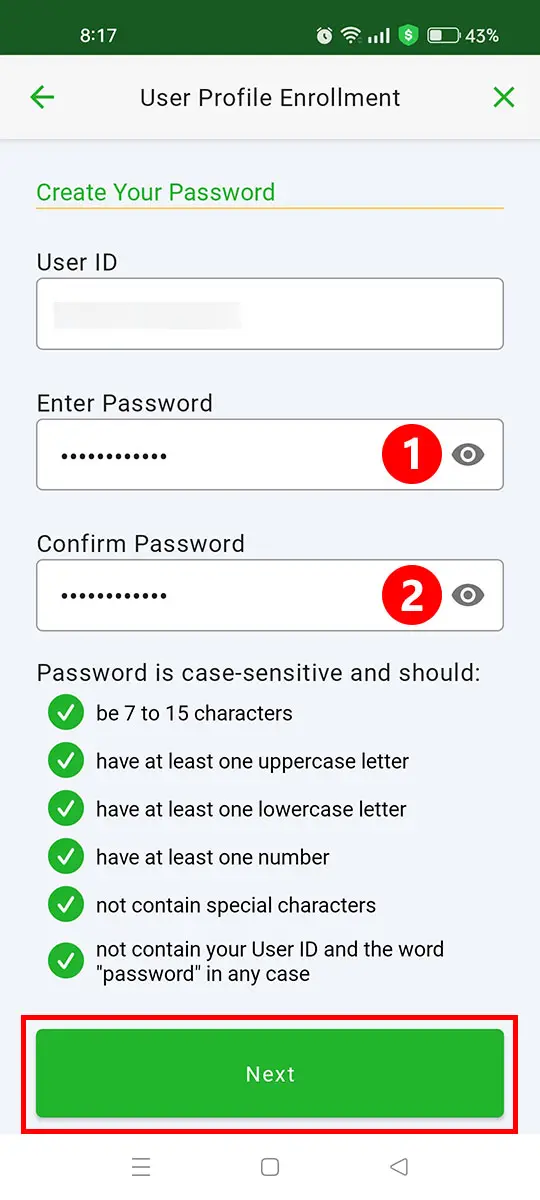
Create a account password by entering it in the “Enter Password” and “Confirm Password” fields. Take note of the requirements for creating a strong password.
Press “Next” to set your Landbank user ID and password.
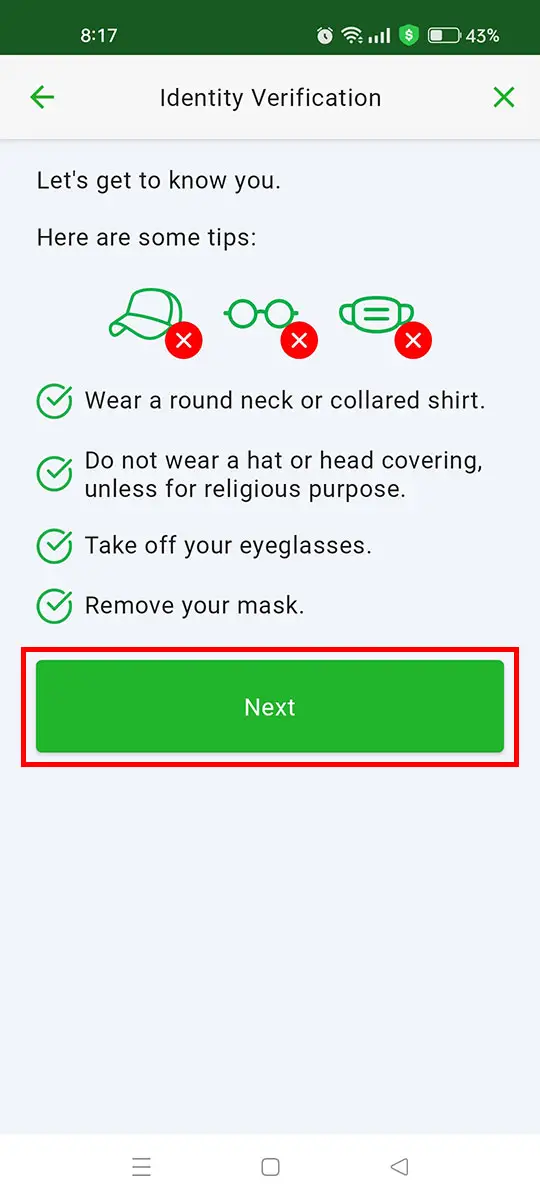
Step 7: Take a Selfie Photo
The next step is to verify your identity by taking a selfie photo. Read the reminders and tips for taking the selfie and then press “Next.”
Follow the instructions to record the selfie. For example, you may be told to move your face closer to the camera.
It might take a few attempts to get this right. But don’t worry, your selfie recording will eventually be accepted.
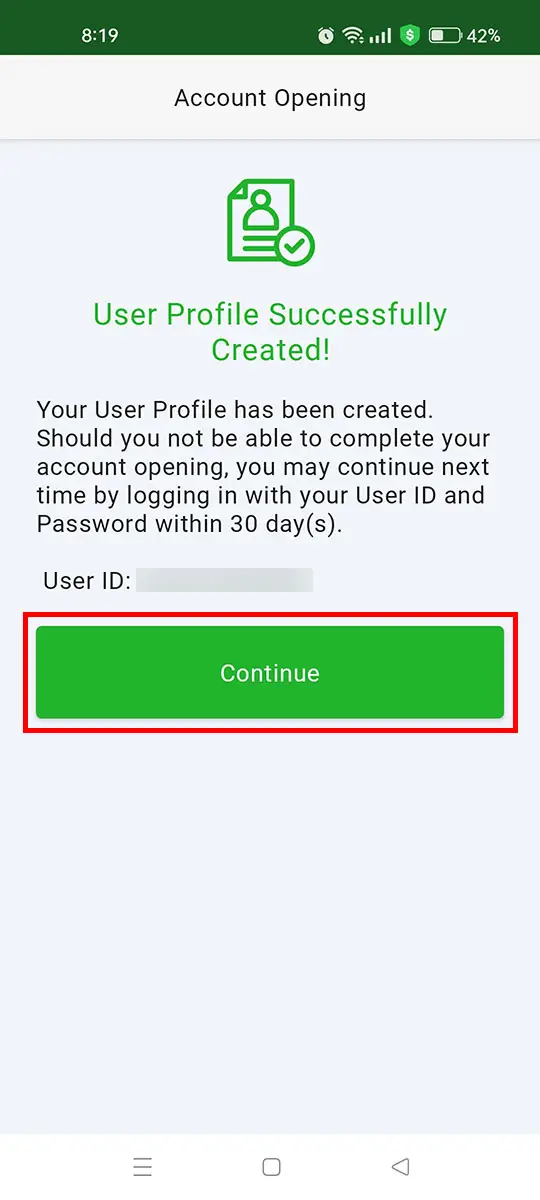
Once you’ve successfully passed the identity verification phase, your Landbank user profile will be automatically created. Press the “Continue” button to continue your application.
If you can’t complete your application now, you may come back anytime within the next 30 days. Simply login using your user ID and password to continue with the account opening.
Step 8: Submit Your Supporting Document
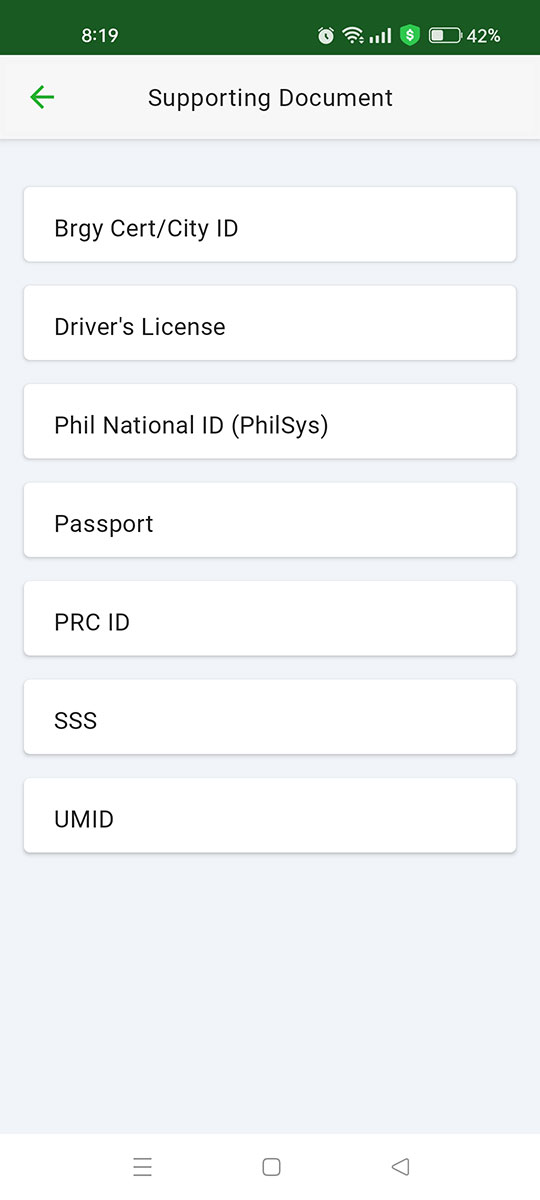
Next, you’re going to submit your supporting identification document or ID.
Tap the “Select” field and choose the document that you already have:
- Barangay Certificate/City ID
- Driver’s License
- Philippine National ID (PhilSys)
- Passport
- PRC ID
- SSS ID
- UMID
Press “Next” after selecting your document.

You’ll be asked to scan your document. Read the tips on how to scan your ID, and then press “Next.”
Follow the on-screen instructions to take a clear photo of your ID. If there is an error (which usually happens when your personal details are unreadable), try again until your photo is accepted.

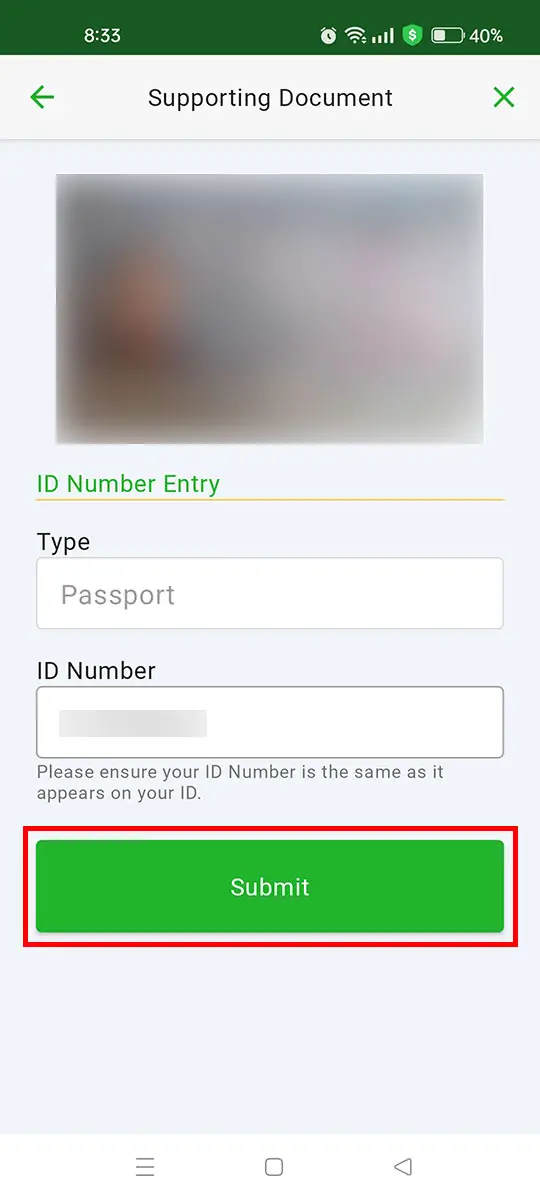
After your photo is accepted, review its details and make sure that the ID number is the same as it appears on your ID.
Press “Submit” to upload your document and to proceed to the next step.
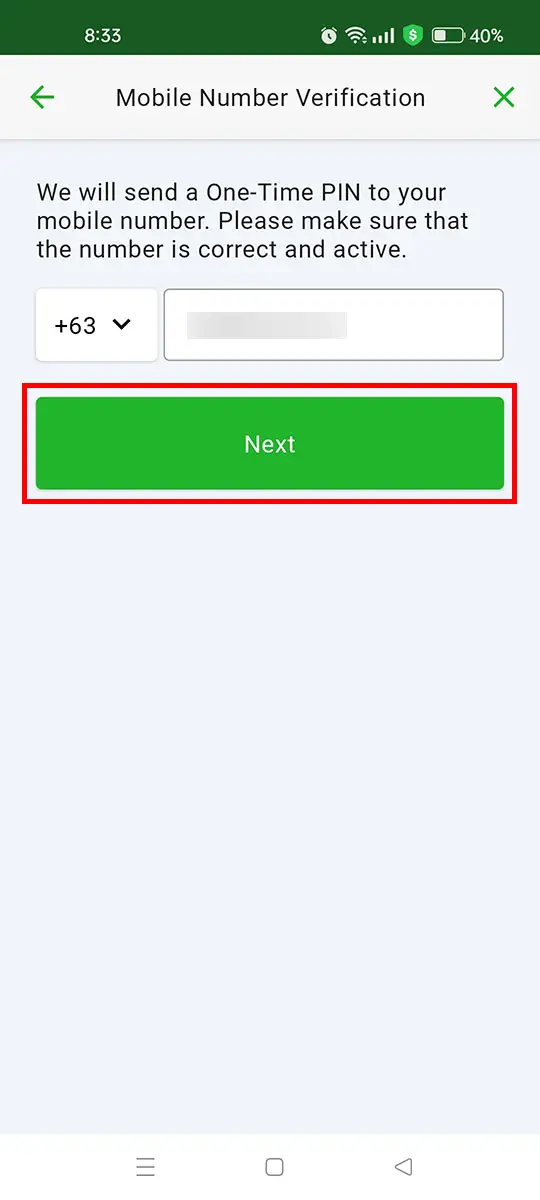
Step 9: Verify Your Mobile Number and Email
Verify your mobile number by entering the one-time PIN (OTP) that will be sent to your provided mobile number.
Make sure that the mobile number is correct and active, and then tap “Next.”
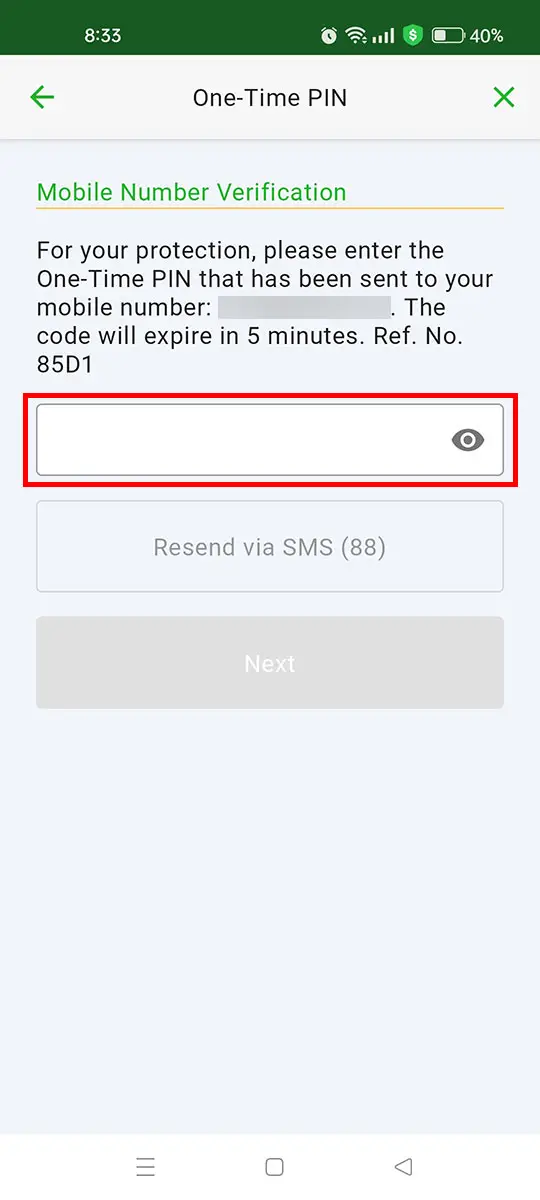
Enter the six-digit OTP and press “Next.” If you didn’t receive an OTP, select “Resend via SMS” to generate a new one.
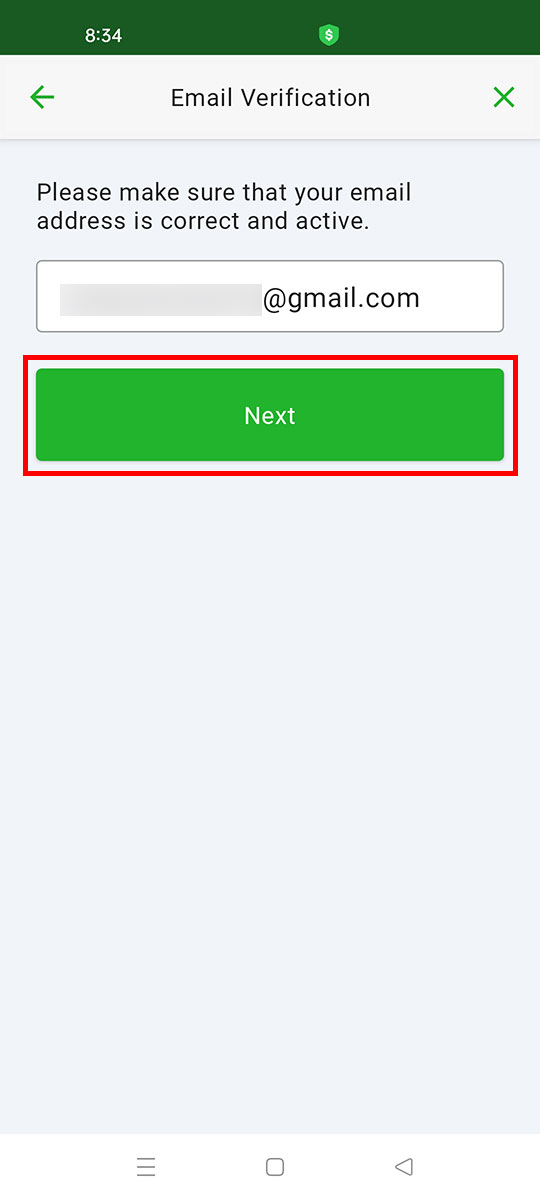
Also check that your provided email address is correct, and then press “Next.”

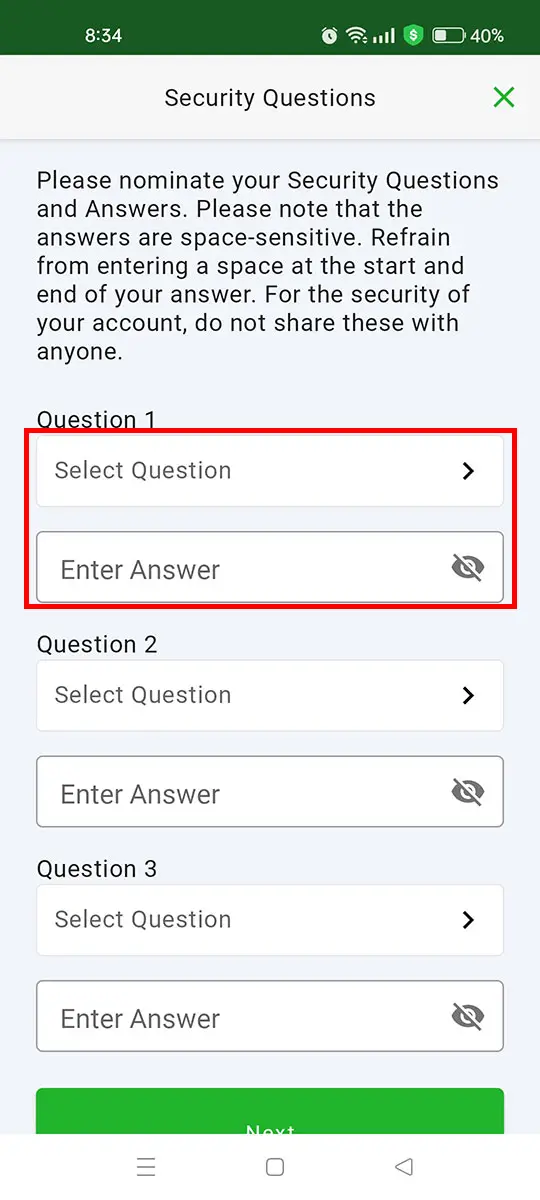
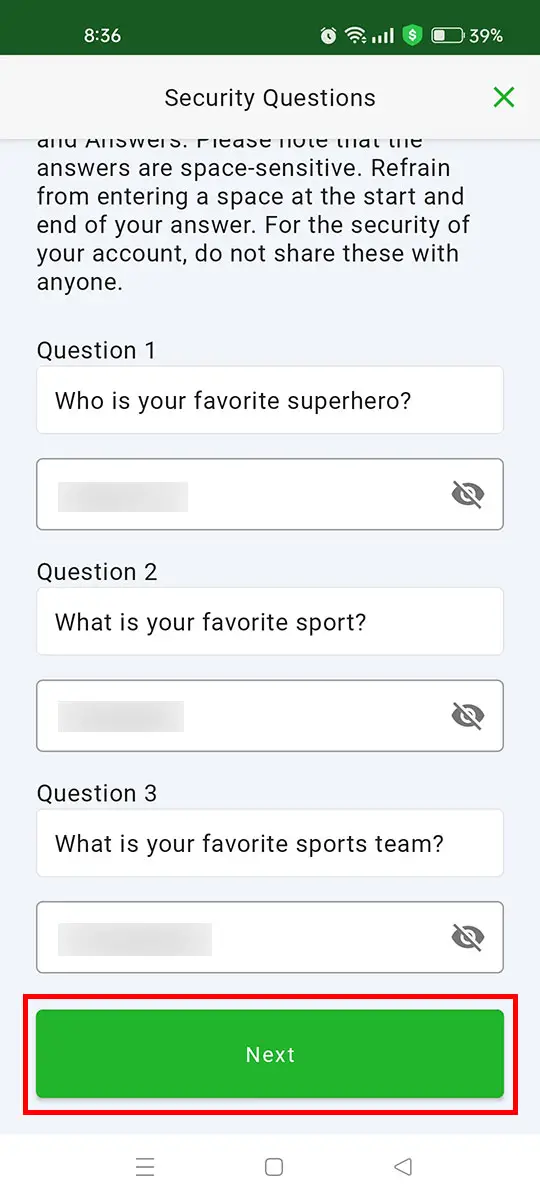
Step 10: Nominate Your Security Questions
You will be asked to nominate three (3) security questions and answers. These security questions will be used for account-related transactions such as resetting your password, so be sure to memorize them and don’t share them with anyone.
Tap “Select Question” to choose your security question (e.g. “Who is your favorite superhero?”) and then enter the corresponding answer (e.g. “Batman”).
Press “Next” to continue.
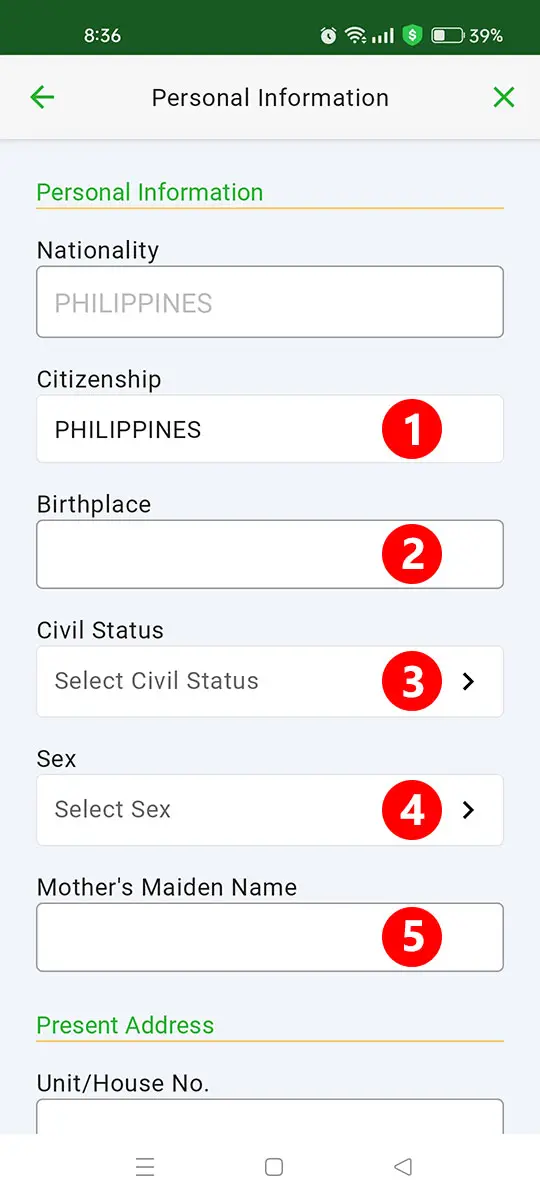
Step 11: Enter Your Personal Information
Enter your personal details as follows:
- Citizenship – Select the country of your citizenship. This should be “PHILIPPINES.”
- Birthplace – Indicate the place (city/municipality and province) where you were born.
- Civil Status – Choose your marital status, whether you’re “Single”, “Married”, or something else.
- Sex – Indicate your biological sex, whether you’re “Male” or “Female.”
- Mother’s Maiden Name – Type the complete name of your mother before her marriage.
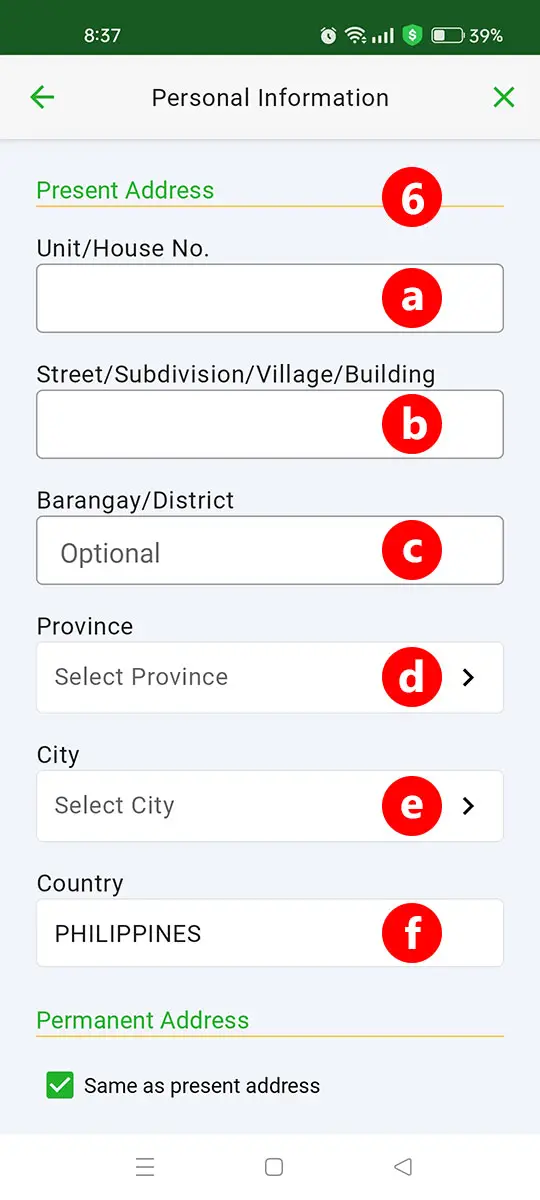
- Present Address – Enter the address where you are presently residing.
- Unit/House No.
- Street/Subdivision/Village/Building
- Barangay/District – This is optional.
- Province
- City
- Country
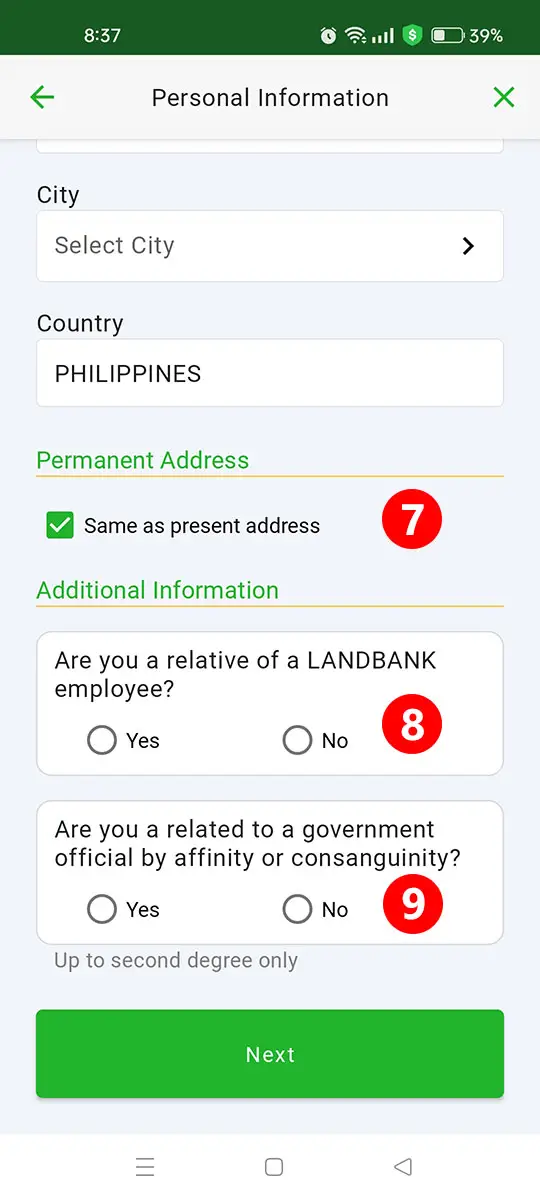
- Permanent Address – Uncheck “Same as present address” if your permanent address is different from your present address, and then enter your permanent address.
- Are you a relative of a Landbank employee? – If you have a relative who is a Landbank employee, select “Yes.” Otherwise, choose “No.”
- Are you related to a government official by affinity or consanguinity? – If you have a relative (up to the second degree) who is a government official, either by blood (consanguinity) or as a consequence of marriage (affinity), select “Yes.” Otherwise, choose “No.”
Press “Next” when you’re done.

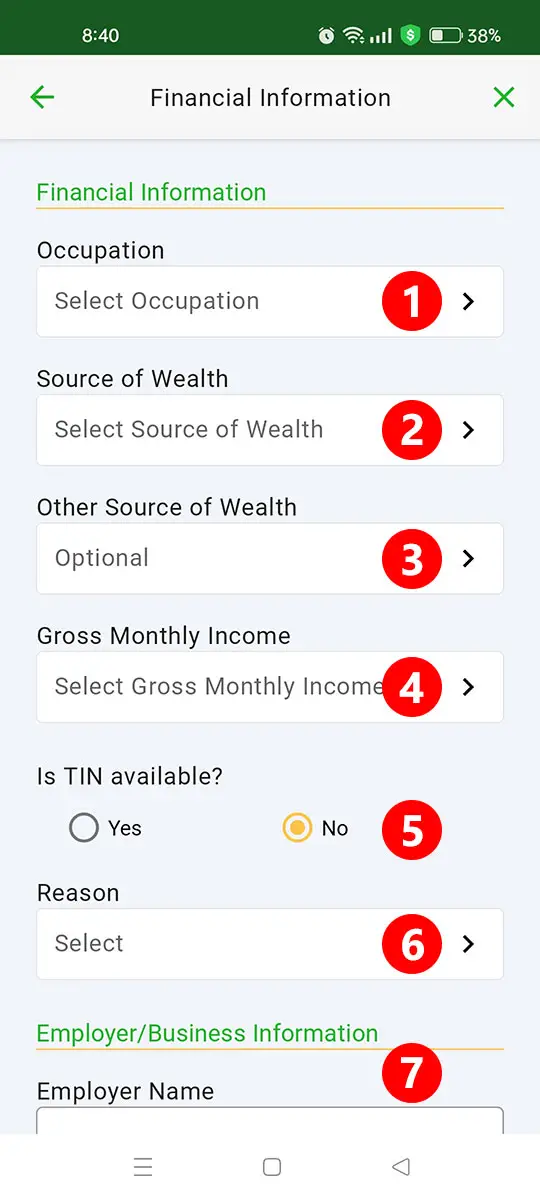
Step 12: Enter Your Financial Information
Enter or select the details of your financial status as follows:
- Occupation – Select your occupation. For example: “Employed” or “Retired.”
- Source of Wealth – Select your source of wealth or income. For example: “Salary/Honoraria” or “Pension.”
- Other Source of Wealth (optional) – If you have another source of income, indicate it here.
- Gross Monthly Income – Select the range of your gross monthly income (before taxes and deductions). For example: “Php 30,000& Below.”
- Is TIN Available? – If you have a tax identification number (TIN), select “Yes.” Otherwise, choose “No.”
- Reason/TIN – If you answered “Yes” to the question above, select the reason why you don’t have a TIN. If you answered “No,” enter your TIN.
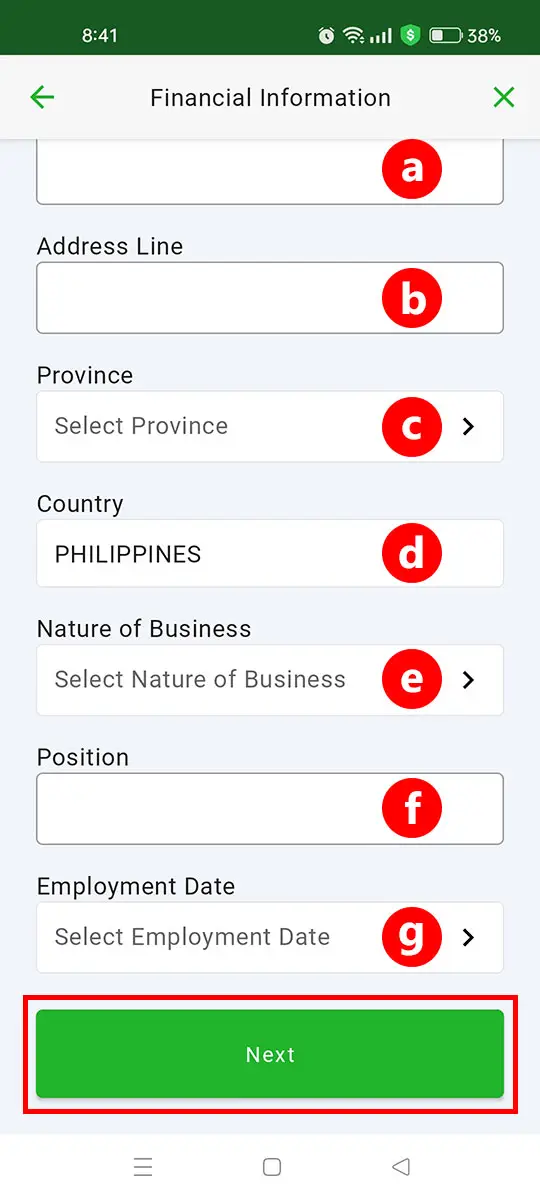
- Employer/Business Information – If you’re employed, provide your employment details.
- Employer Name – Enter the name of your employer or company.
- Address Line – Enter the office address of your company/employer.
- Province
- Country
- Nature of Business – Select the type of business of your company/employer. For example: “Manufacturing.”
- Position – Enter the name of your job or position (up to 15 characters).
- Employment Date – Using the calendar date picker, indicate the exact date when you started work.
Press “Next” when you’re done.
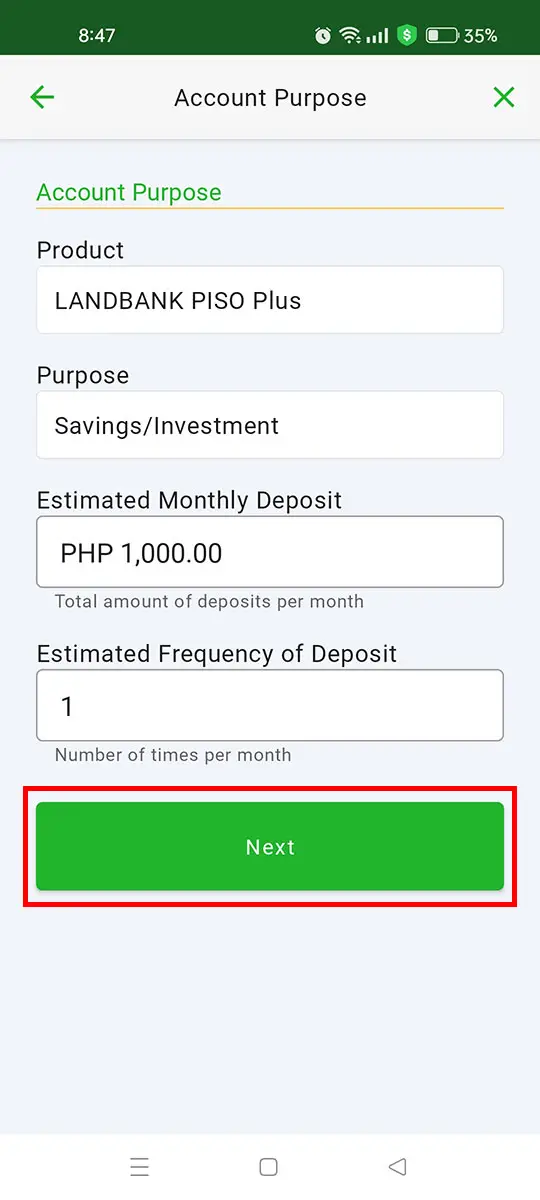
Step 13: Indicate Your Account Purpose
Next, provide the following information:
- Purpose – Select your purpose for creating a Landbank account. For example: “Savings/Investment.”
- Estimated Monthly Deposit – Indicate the total amount of money that you plan to deposit to your account every month.
- Estimated Frequency of Deposit – Indicate the number of times per month that you will deposit money to your account.
Press “Next” to proceed to the next step.

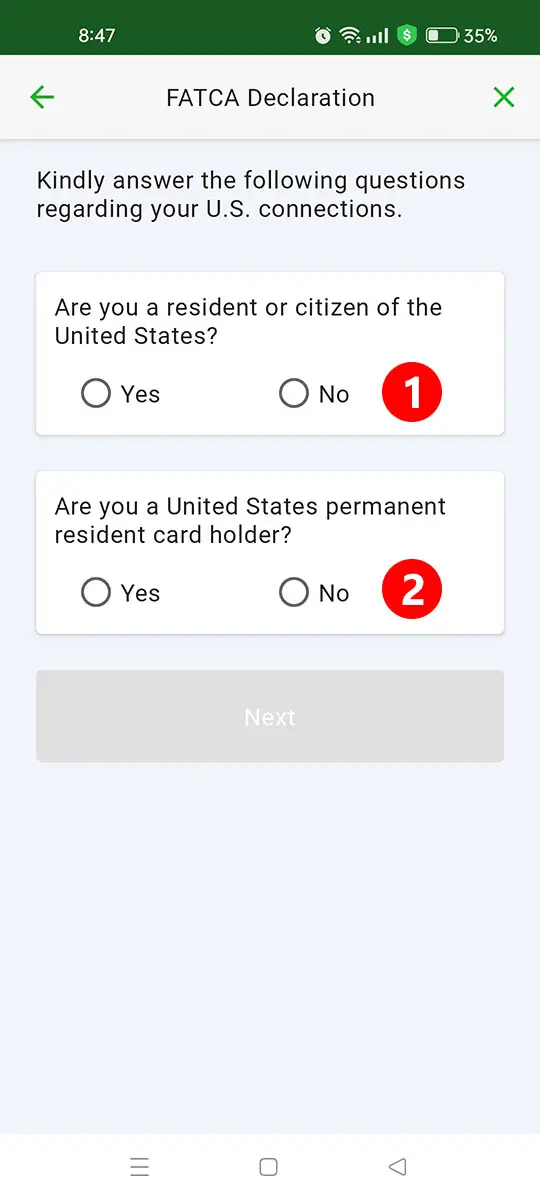
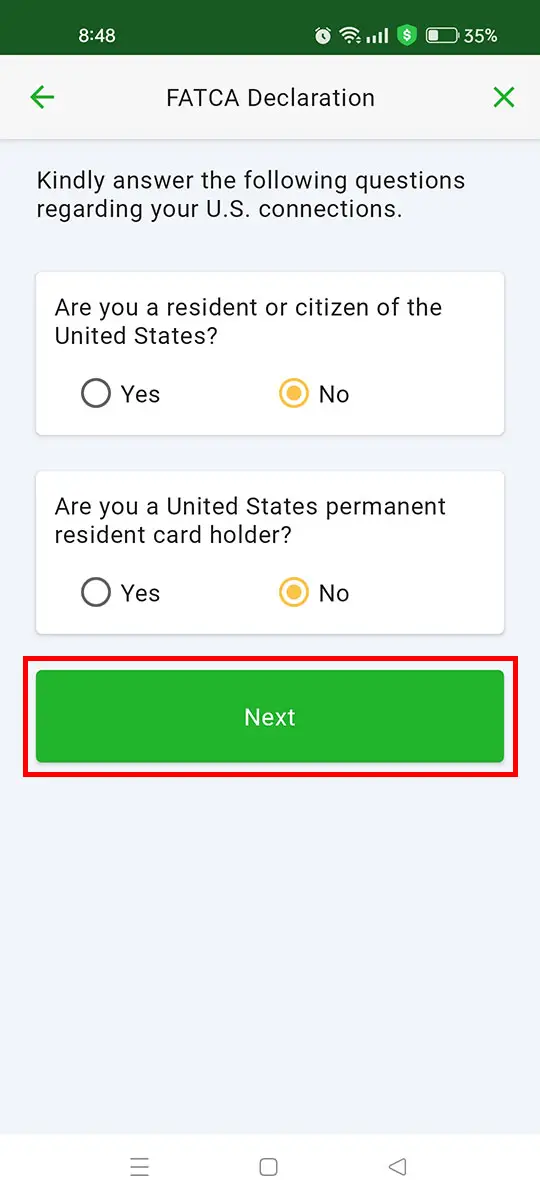
Step 14: Answer the FATCA Declaration
The Foreign Account Tax Compliance Act (FATCA) requires financial institutions to report on the foreign assets held by U.S. persons.
For the FATCA declaration, answer the following questions:
- Are you a resident or citizen of the United States?
- Are you a United States permanent resident card holder?
You should answer “No” to both questions, except if you’re a resident, a citizen, or a Green Card holder of the United States of America.
Press “Next” when you’re done.
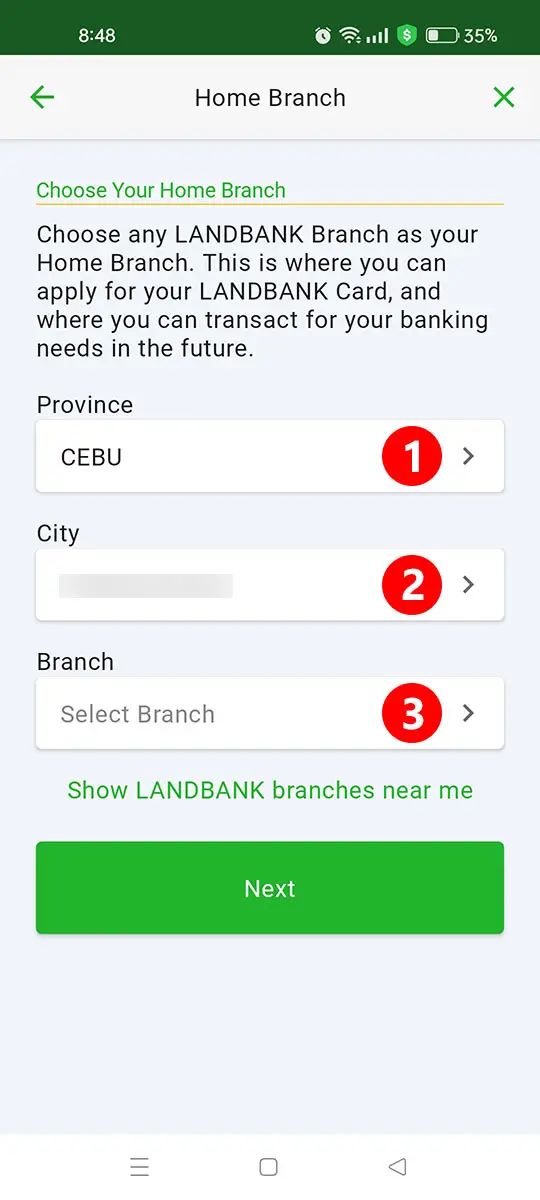
Step 15: Choose Your Home Branch
In the penultimate step, select the Landbank branch which will serve as your “home branch” and where you can apply for your Landbank card and perform other banking transactions. Ideally, this should be the branch nearest to your home.
Do the following to choose your home branch:
- Province – Select the province where your preferred branch is located. For example: “Cebu.”
- City – Next, choose the city or municipality where the Landbank branch is located.
- Branch – Finally, select the name and address of your chosen Landbank servicing branch.
You can also click “Show LANDBANK branches near me” to display the branches close to your current location.
After choosing your home branch, tap “Next” to continue.

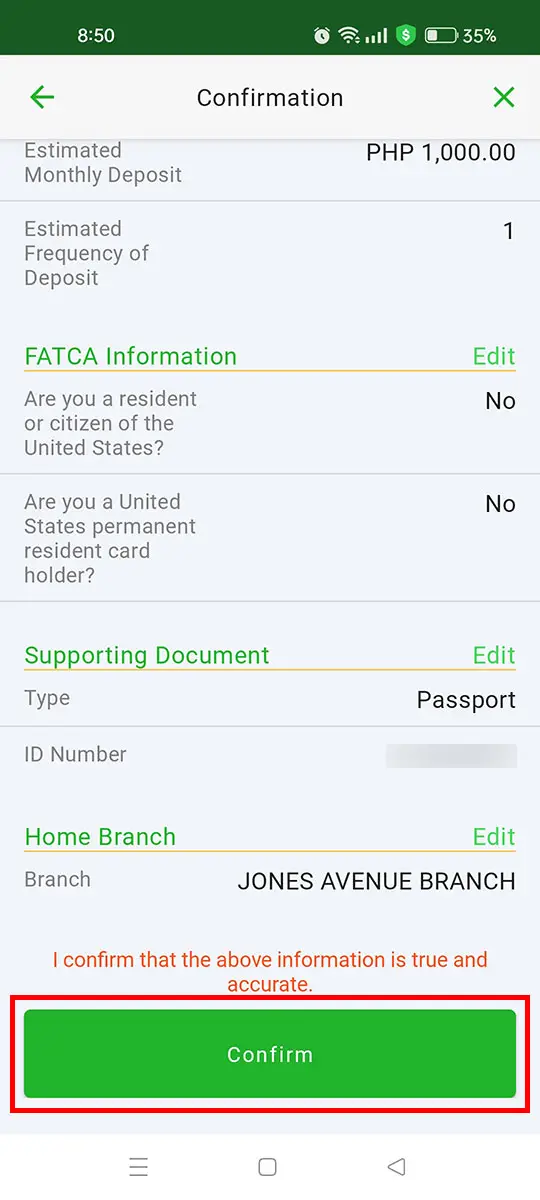
Step 16: Review and Submit Your Application
Take the time to review your provided information, making sure that all your details are correct and accurate. If you want to change something, just tap “Edit” to modify the information.
Finally, press “Confirm” to submit your application.
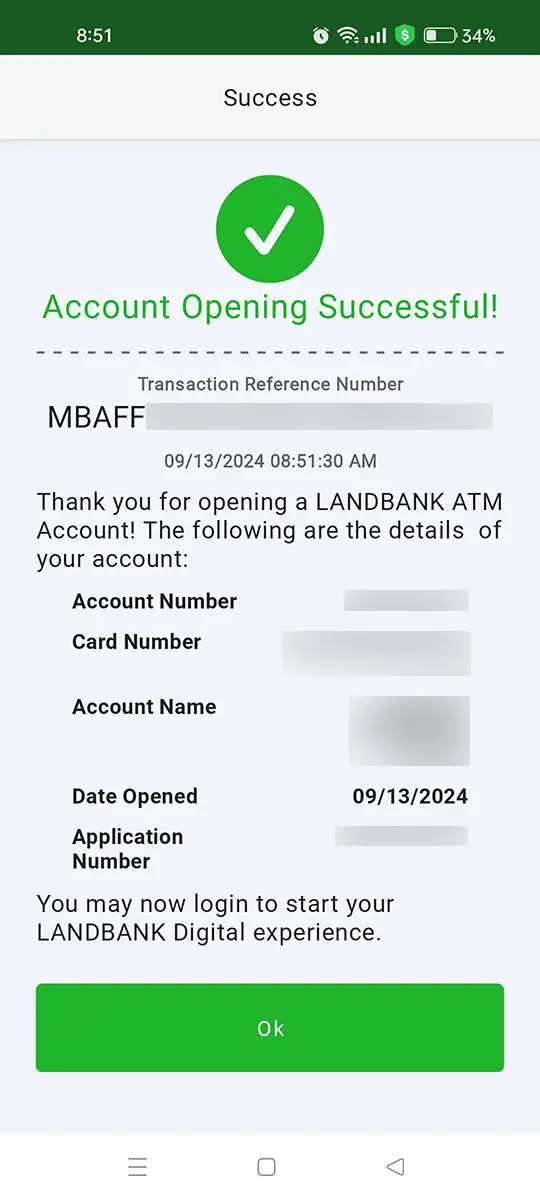
Congratulations! You’ve successfully opened a Landbank savings account online. You will receive an email containing your Landbank account number and other important information.
If you want to get your physical Landbank debit card, visit your nominated servicing branch and present the ID you used during account opening.
You can now login to Landbank online banking using your user ID and password. Be sure to register your device and enable biometrics authentication for a more secure banking experience.
Frequently Asked Questions
Can I open a Landbank savings account without visiting the bank?
Yes! You can open a Landbank account 100% online using the DOBS Mobile platform through the Landbank mobile app. The entire process can be completed on your smartphone in less than 30 minutes.
Is there a fee to open a Landbank account online?
No, opening a Landbank savings account online is completely free of charge.
Is an initial deposit required?
No initial deposit is required for the LANDBANK PISO Plus and LANDBANK GoBayani accounts.
Who is eligible to open a Landbank account online?
To open a Landbank account online, you must be at least 18 years old, a Filipino citizen, and have a local or international mobile number.
What documents do I need to open an account?
You need a valid ID (Philippine National ID, Passport, Driver’s License, UMID, SSS ID, PRC ID, or Barangay Certificate/City ID with photo).
What if I don’t have any of the accepted IDs?
Unfortunately, you cannot open a Landbank account without a valid ID. You can get a barangay certificate which is the easiest to obtain among the accepted IDs.
How long does the online application take?
The entire application process takes less than 30 minutes.
What happens during the selfie verification step?
You’ll be asked to take a selfie to verify your identity. Follow the on-screen instructions (like moving your face closer to the camera). It may take a few attempts to get accepted.
What if I can’t complete my application in one sitting?
You can return within 30 days to continue your application. Simply log in using your user ID and password.
What is a “home branch” and why do I need to choose one?
Your home branch is the Landbank branch where you can apply for a physical debit card and perform other banking transactions. Ideally, choose the branch nearest to your home.
How will I receive my Landbank account number?
After successful application, you’ll receive an email containing your Landbank account number and other important information.
How do I get a physical Landbank debit card?
Visit your nominated servicing branch (home branch) and present the ID you used during account opening.
Can I use my account immediately after opening?
Yes! You can log in to Landbank online banking using your user ID and password right away.
What are the transaction limits of the LANDBANK PISO Plus?
The PISO Plus has a daily debit limit of ₱10,000 across all channels and a monthly debit limit of ₱50,000. Your monthly aggregate deposit is also capped at ₱50,000. If your balance exceeds ₱50,000, the account will be automatically frozen until you visit your home branch to convert it to a regular savings account.
Does the LANDBANK PISO Plus earn interest?
Yes, but only if you maintain a minimum balance of ₱2,000. The interest rate is 0.05% per annum. If your balance falls below ₱2,000, you won’t earn interest for that period.
Are my LandBank deposits protected?
Yes. Your deposits are insured by the Philippine Deposit Insurance Corporation (PDIC) for up to ₱1,000,000 per depositor.
Final Words
It’s really amazing that you can easily open a Landbank account online using only your mobile phone. In less than 30 minutes, you’ll have your own savings account that you can deposit your hard-earned money into. Great news for those who still don’t have a bank account!
Need help? Simply email [email protected] or call the Landbank hotline numbers (+63)(2)8-405-7000 and 1-800-10-405-7000 (PLDT toll-free).