Have you ever wondered what is the actual size of a wallet photo or picture? Or perhaps you want to make a wallet size picture so that you don’t have to visit the photography studio. In this article, we’ll share with you the standard dimensions of a wallet photo as well as how to create your own wallet size picture using Microsoft Word.
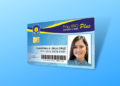
A wallet size picture, as the name implies, is a photograph that fits inside the picture slot of a traditional wallet. As we all know, a typical wallet is made up of a cash compartment and several card slots for your credit cards and ATM cards.
Most wallets have a picture slot, usually on the left-hand side, with a clear plastic window. This is where you usually place your wallet size picture (or that of your spouse or partner) or your ID cards.
Since wallets differ by make and size, there is no universally accepted standard with regard to the dimensions of a wallet photo. Larger wallets can accommodate 3″ x 4″ photos, while the smaller ones only have room for 2″ x 3″ pictures. If you are planning to make your own wallet size picture, we recommend measuring the area of the picture slot to ensure that your photo fits there.
Do you know that you can make your own wallet size picture on your computer using Microsoft Word? You don’t need to rush to the photography studio to have your picture taken.
Just take a photo using your smartphone and create a wallet size picture that you can use for personal or business purposes. It may not be as good as the ones taken by professional photographers, but your photo will do the trick especially if you have a high-quality printer.
So let’s get started with creating your own wallet size photo! But first, you must know the exact dimensions of a wallet size picture.
What Size is a Wallet Photo or Picture?
These are the standard dimensions of a wallet size photo or picture:
- The wallet size in inches is 2″ x 3″.
- The wallet size in centimeters (cm) is 5.08 cm x 7.62 cm.
- The wallet size in millimeters (mm) is 50.8 mm x 76.2 mm.
- The wallet size in pixels is 600 x 900 pixels at 300 ppi resolution.
Take note that some wallets have bigger picture compartments than the standard wallet photo size of 2″ x 3″. Some wallets can accommodate 2.5″ x 3.5″ (2R) and 3″ x 4″ photos. To convert these dimensions to centimeters (cm) and millimeters (mm), you can use this handy calculator.
How to Make a Wallet Size Picture in Microsoft Word
Now that you already know the dimensions, it’s time to make your own wallet size photo using Microsoft Word. Prepare the source image that you will use for this task (if it’s in your smartphone, just transfer the image to your computer) and open the Word application.
Create a new blank document by clicking File > New > Blank Document (or by pressing Ctrl + N on the keyboard).
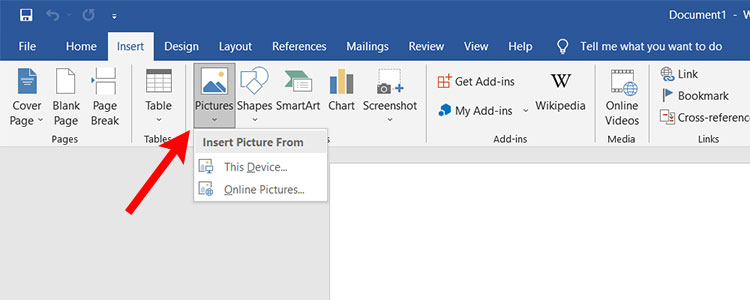
On the main menu, click the Insert tab and then select Pictures. Insert the picture from your computer by clicking This Device on the dropdown menu.
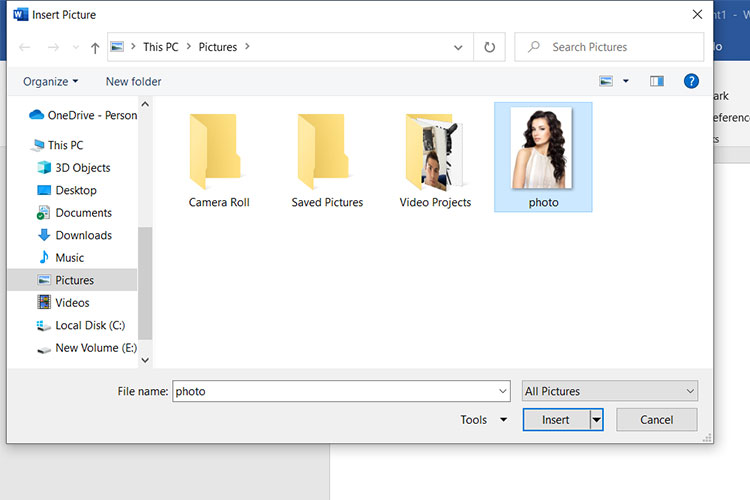
Choose the source image that you want to make into a wallet size picture. After selecting the image, click the Insert button.
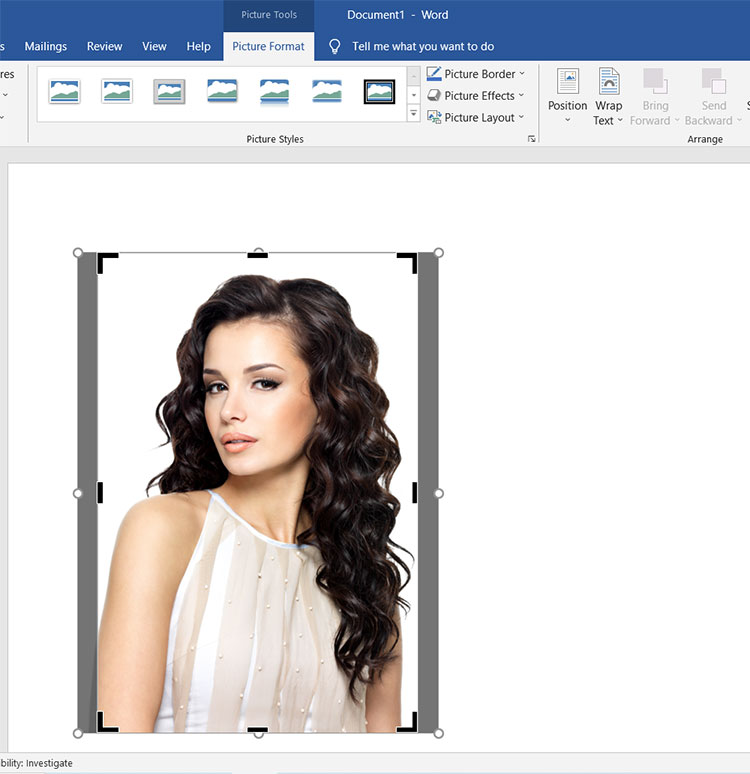
The source image is now inserted into your Word document. Make sure that the image is still being selected (as indicated by a grey boundary line) and then click the Crop button under the Picture Format menu (if you can’t see the Picture Format menu, simply double-click the inserted image).
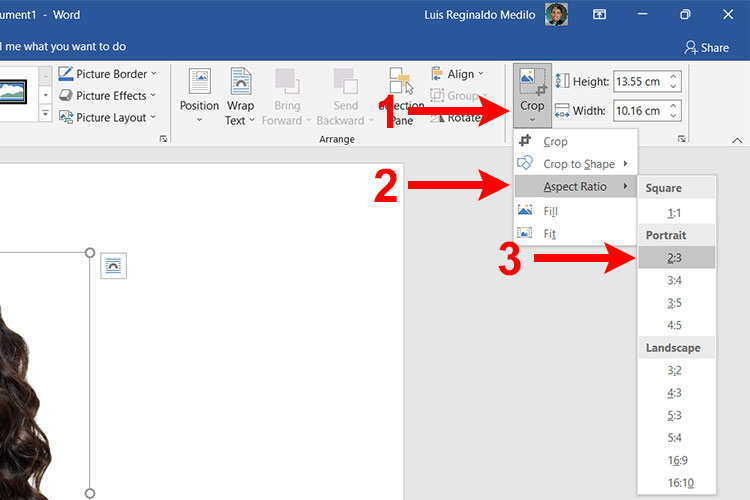
On the Crop submenu, click Aspect Ratio and then click 2:3.
You will notice that your photo is now being covered by a canvas area which has thick black lines on the corners and sides. Parts of the picture that are outside this canvas area will not be excluded from the final image after the cropping is done.
Feel free to increase or decrease the size of the photo by dragging the corners. You can also drag the picture around the canvas area to determine which parts of the image will be included in the wallet photo.
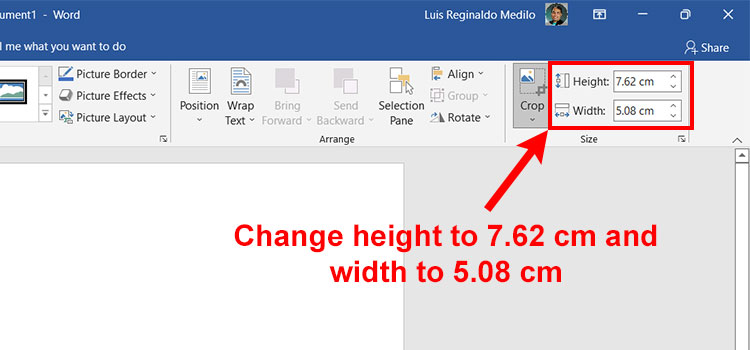
Once you’re happy with the way the picture looks, it’s time to resize it to wallet size. To resize the photo to 2″ x 3″ wallet size, change the height to 7.62 cm and the width to 5.08 cm. The height and width dimensions are located next to the Crop button on the Picture Format menu.
Since the aspect ratio is already set to 2:3, you can simply change the height to 7.62 cm and Word will automatically set the width to 5.08 cm.
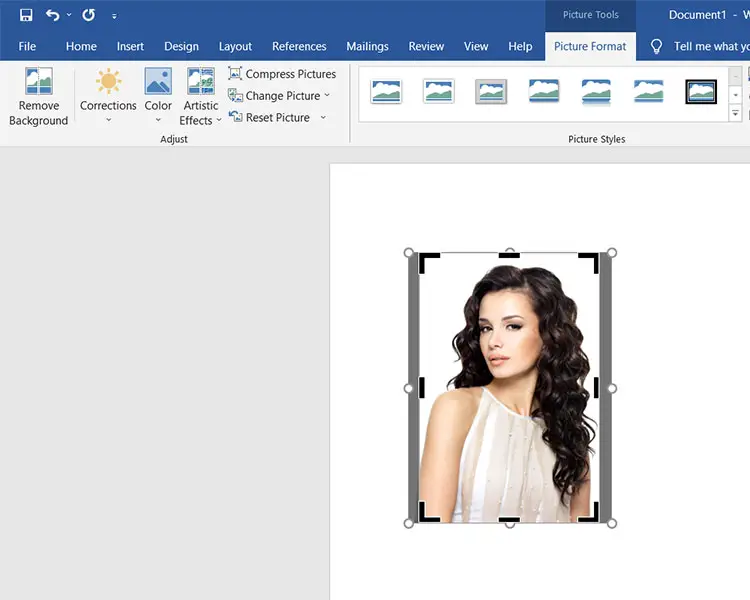
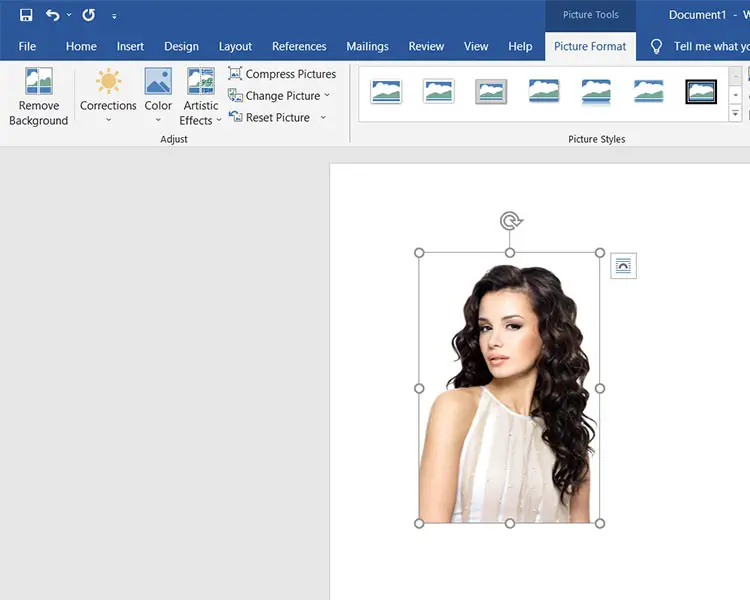
The photo has now been resized to 2″ x 3″ wallet size. Complete the cropping by clicking anywhere outside the picture or by clicking the Crop button once more.
That’s it! You have successfully created a wallet size picture using Microsoft Word. Print your wallet photo by clicking File > Print or by pressing Ctrl + P.
If you want to save the document for future use, click File > Save or press Ctrl + S.
Is your picture too dark or too bright? You can edit your photo in Word itself by taking advantage of its built-in image editing features. Simply double-click the photo to show the Picture Format menu and from there, you can edit and customize your wallet photo to your liking.
Here are some image editing options that are available in Microsoft Word:
- Remove Background – Easily remove the background of your picture with one click.
- Corrections – Increase or decrease your photo’s brightness, contrast and sharpness.
- Color – Change the color of your picture to enhance its quality.
- Artistic Effects – Apply special effects to your photo to make it appear like a sketch or painting.
- Picture Styles – Add frames or drop shadows to your picture.
- Picture Border – Choose the color, width and line style of the border or outline.
- Picture Effects – Add visual effects (e.g. shadow, reflection, glow) to the picture.
- Picture Layout – Convert the picture to a SmartArt graphic to arrange, resize and caption it.
How to Save Your Wallet Size Picture as JPEG or PNG
Do you want to save your wallet photo as an image file, so that you can attach it to your other documents? Yes, you can save your newly created wallet size picture as a JPEG or PNG file instead of as a Word document.
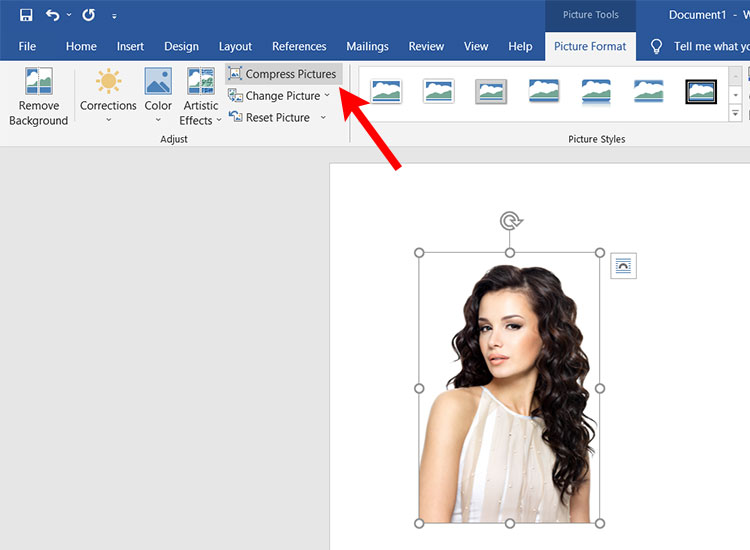
Start by double-clicking the picture to activate the Picture Format menu. Afterwards, click Compress Pictures.
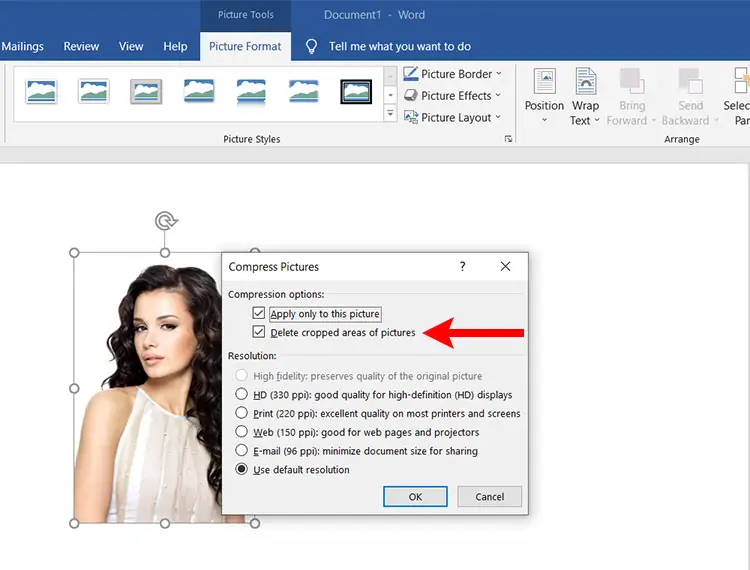
The Compress Pictures dialog will appear. Make sure that under Compression Options, the “Delete cropped areas of pictures” box is checked.
Under Resolution, you can choose your desired resolution (e.g. HD, print, web). The default resolution is fine in most cases.
Click OK to apply your changes.
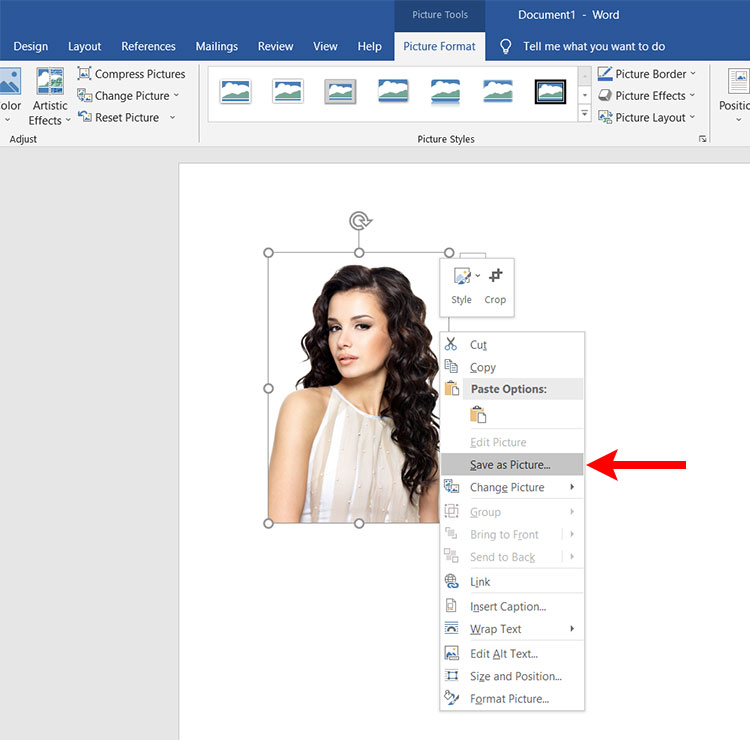
Make sure that the picture is still selected, and then right-click on it. A context menu will appear with a few options such as cut, copy, paste, etc.
Select “Save as Picture.”
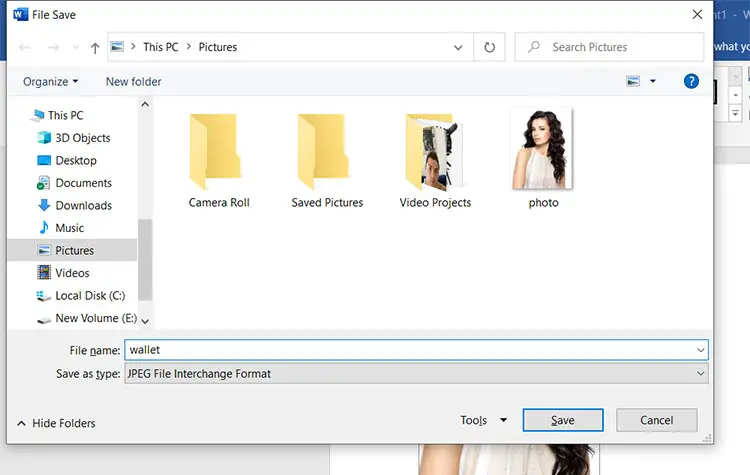
To save the picture to your computer, enter the preferred file name and select the file type. We recommend either Portable Network Graphics (PNG) or JPEG File Interchange Format as the file type.
Click Save to save your picture as JPEG or PNG.
You can now insert your generated image file into your resumes, application forms and other documents. You can also attach it to your emails or upload it to your social media and website accounts.
What is the Size of a Wallet Photo in Pixels?
Let’s say that you want to create a wallet size picture in Adobe Photoshop or any other graphic design software. Since pixel dimensions are normally used in graphic design, you’d want to determine the exact dimensions in pixels for a wallet size photo.
What you can do is to convert the photo size to pixels. To convert the picture size to pixels, multiply its dimensions in inches with the preferred image resolution. The formula for converting inches to pixels is the following:
Inches x Resolution = Pixels
If the image resolution is 300 ppi (the ideal resolution for printing and photography), then the wallet photo size in pixels is 600 x 900 pixels (2 inches x 300 ppi = 600 pixels and 3 inches x 300 ppi = 900 pixels).
You can use this inches to pixels converter to determine the correct pixel dimensions for your photo based on your desired image resolution.
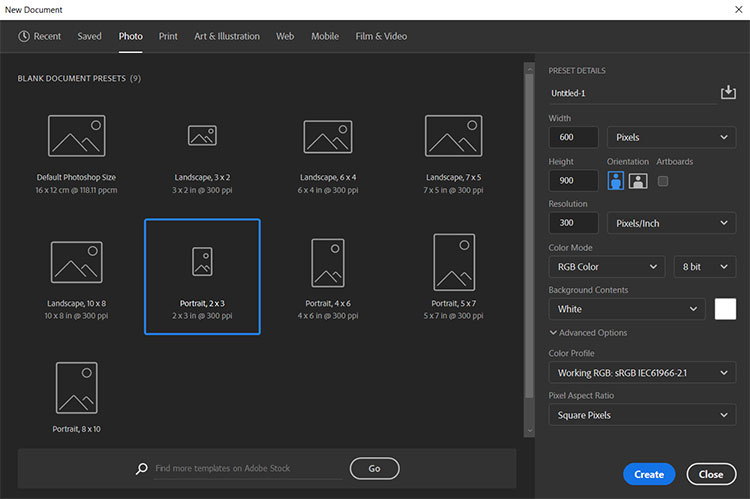
In Adobe Photoshop, you can make a wallet size picture by clicking “Create new” and then selecting “Portrait, 2 x 3” under the “Photo” tab. You can also create a custom document and enter the correct dimensions into the Width and Height fields. For an image with 300 ppi resolution, the width is 600 pixels and the height is 900 pixels.
Bonus: How to Remove Background From Photo
One problem you might encounter when using your smartphone photo to create a wallet picture is how to remove the background. You can either hire a graphic designer to remove the background (if you don’t know how to do it yourself) or you can use a background removal tool like Remove.bg.
There are several online tools (such as Canva or even Microsoft Word) that you can use to remove the background from a photo, but we recommend Remove.bg. It uses AI technology to detect and automatically remove the background from your photo with just one click.
Sign up to Remove.bg and then upload your photo (maximum file size is 12MB). Remove.bg will then automatically remove the background from your photo. If you’re not completely satisfied with the result, click Edit to erase or restore parts of the picture. You can also add a background design from their library or upload your own background photo.
With a free Remove.bg account, you can download a preview image in “good quality” for free. To download high-definition photos, you will have to buy credits. However, the preview image that you can download for free is good enough for most wallet size pictures.
Final Thoughts
If you don’t have the time or the money to have a wallet size photo taken at a photography studio, you can go the DIY route and make one yourself. Thanks to readily available software like Microsoft Word and Adobe Photoshop, you can transform an ordinary smartphone photo into a wallet picture that you can be proud of.
If you have any questions and clarifications about how to make a wallet photo as well as its dimensions, feel free to comment below.