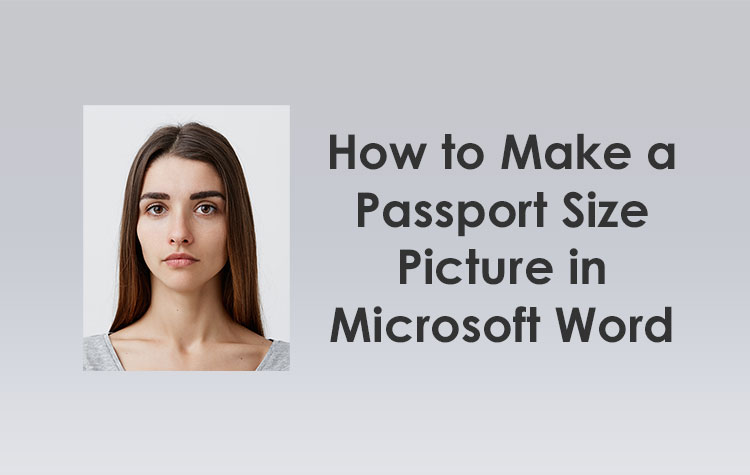
Do you want to have your own passport size picture but you don’t have the time and money to hire the services of a photography studio? Why not turn your ordinary smartphone picture into a passport size photo with the help of readily available software like Microsoft Word?
A passport size picture is a photograph – whether digital or printed – that is more or less the same size as a regular passport photo. A passport photo is an image that is imprinted on the data page of the passport, alongside personal information such as name and date of birth.
In previous years and before the introduction of biometric passports or electronic passports, passport applicants had to provide their own passport photos taken with the help of professional photographers and photo studios.
These days, passport photos are normally taken on-site during the application process, and applicants no longer need to provide their own photos. This is apparently a change for the better as it discourages forgery, identity theft and falsification of passports.
Nevertheless, passport size pictures remain a requirement of many companies and government institutions, particularly for job and visa applications. If you haven’t had a passport before, you might have no idea how big or small a passport photo is.
But don’t worry, because I’ll reveal the exact dimensions of a passport size picture and I’ll also teach you how to create this type of photo in Microsoft Word.
What is the Size of a Passport Picture or Photo?
The actual size of a passport photo depends on the country. In the Philippines, the exact dimensions of a passport size picture is 3.5 cm x 4.5 cm.
Take note of the following dimensions for a Philippine passport size picture:
- The passport picture size in inches is 1.377″ x 1.77″.
- The passport picture size in centimeters (cm) is 3.5 cm x 4.5 cm.
- The passport picture size in millimeters (mm) is 35 mm x 45 mm.
- The passport picture size in pixels is 413 x 531 pixels at 300 ppi resolution.
In the United States, the standard dimensions of a passport size photo is 2″ x 2″ or 5.08 cm x 5.08 cm.
How to Make a Passport Size Picture in Microsoft Word
I recommend having your passport size picture taken at a photography studio by a professional photographer. Although it costs a little bit of money, you are almost guaranteed to get a high-quality photo. Plus, you can request specific requirements such as incorporating a name tag or using a colored background.
But if you don’t have the time (or the money) to visit a photography studio to have your passport size picture taken, you can use Microsoft Word to create one yourself! Once you’ve learned how to make a passport size picture, you can create all kinds of photos such as 1×1 photos and wallet size photos using Word.
Here’s a step-by-step guide in creating a passport-size photo using Microsoft Word:
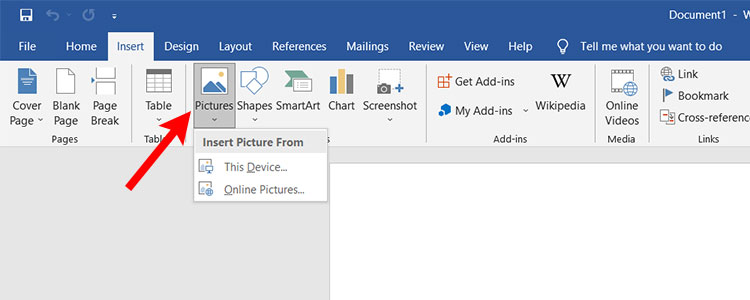
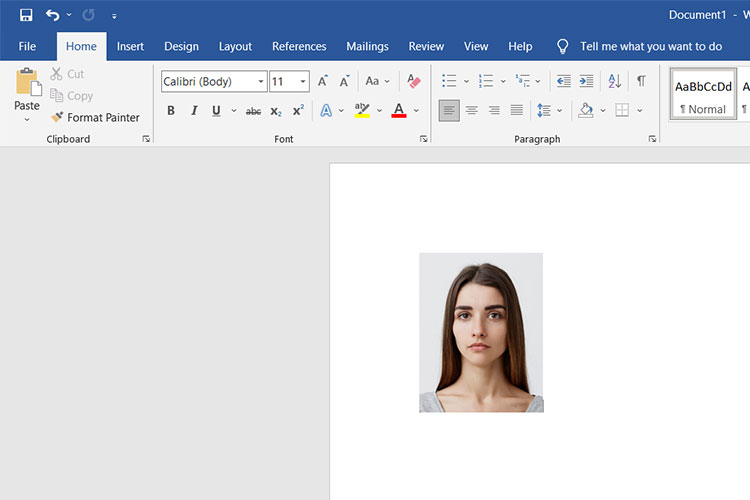
First, open a new Word document and click the Insert tab. Click the Pictures button and select This Device to upload the source photo from your computer.
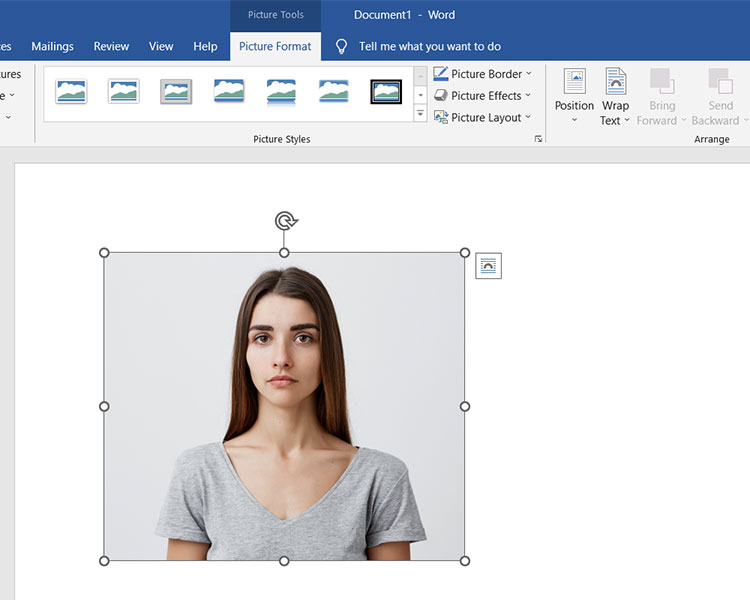
Select the photo that you want to turn into a passport size picture and then click Insert.
Once your photo is inserted, you can resize it by dragging the corners. Be careful not to drag the sides as it might result in a skewed image.
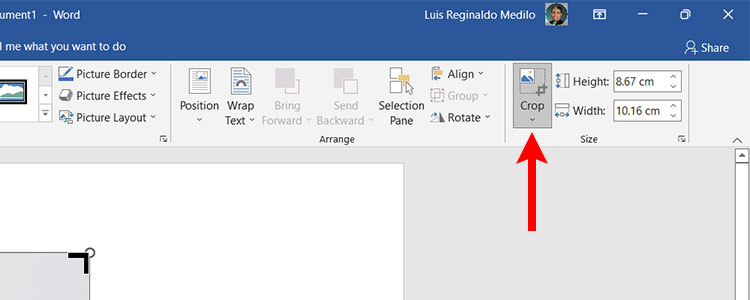
Now it’s time to crop your picture. Make sure that the Picture Format menu is still active (if not, just double-click the picture) and then click the Crop button as shown on the screenshot below.
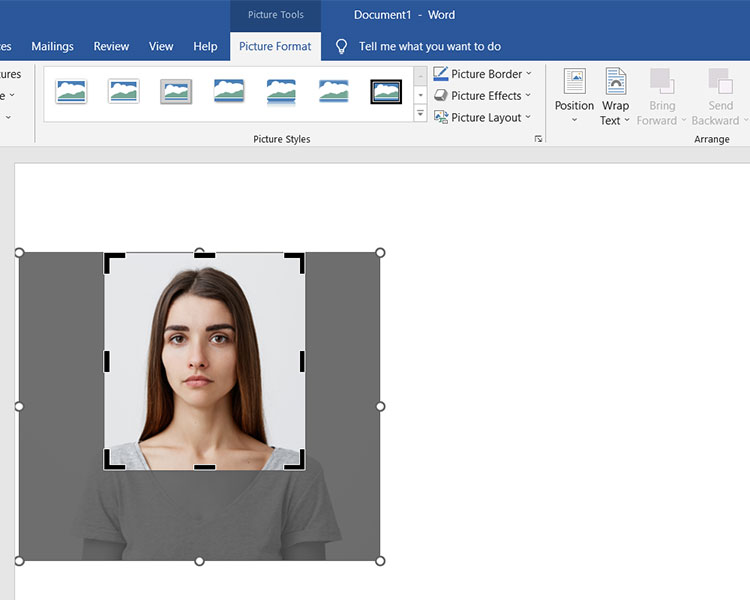
The cropping tool of Word is now activated. Crop the picture by dragging around the sides and corners of the box. Everything outside the box will be cropped out in the final photo. You can also move the picture around by dragging it using your mouse.
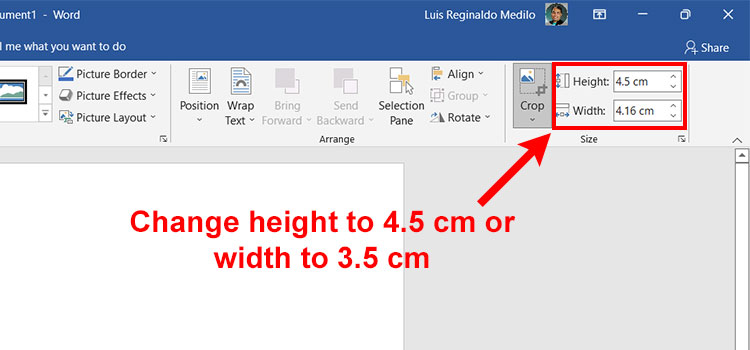
Next, you will have to change either the height or width of the picture to correspond with the actual dimensions of the passport size photo. Make sure that the Picture Format menu is still active (if not, just double-click the picture).
If the passport picture size is 3.5 cm x 4.5 cm, change the Height to 4.5 cm or the Width to 3.5 cm. You cannot change both proportions because the aspect ratio of the image is locked. So you will have to change either the height or the width.
Take note that when changing the height, the width must not be less than the recommended width of the passport photo. Otherwise, you will have to change the width instead to ensure that the proportions of the photo are equal to or greater than the recommended dimensions.
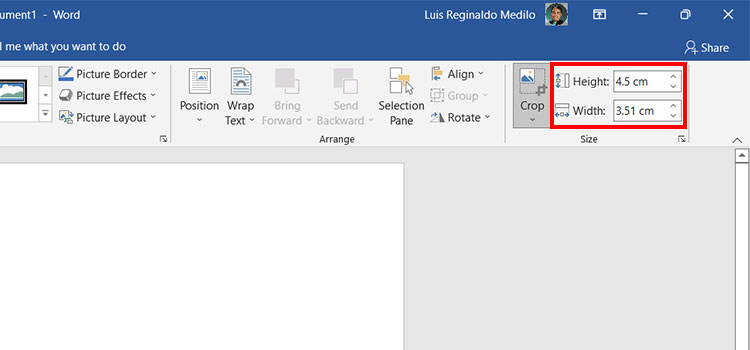
The next step is to crop the picture further in order to achieve the desired width. Go back to your inserted picture and continue cropping until you get the exact width (or close to it). Make sure that while cropping, the height remains the same. To undo any changes in case of mistakes, just press Ctrl + Z.
However, sometimes it’s impossible to get the exact dimensions by cropping the picture. In the example below, the best possible width achieved was only 3.51 cm (instead of exactly 3.5 cm).
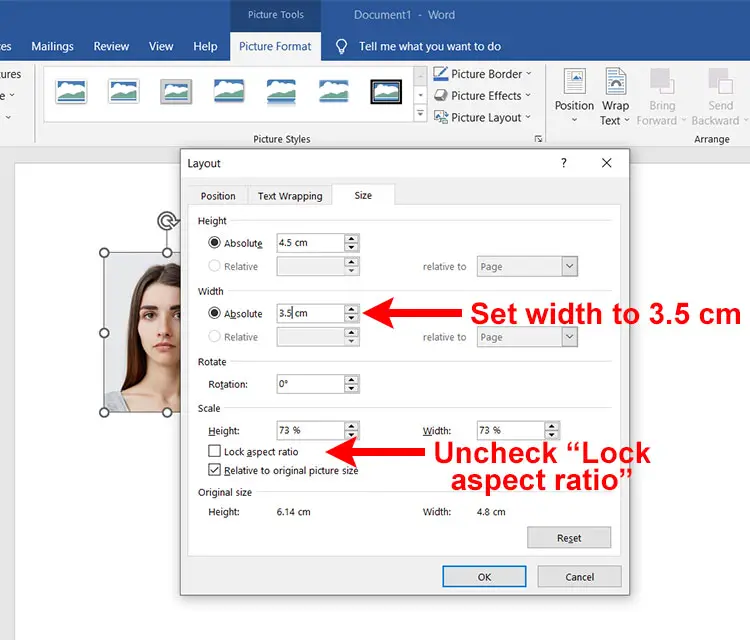
That’s okay because we can achieve the exact size by unlocking the aspect ratio. The difference is very small so there will be no noticeable distortion of the photo.
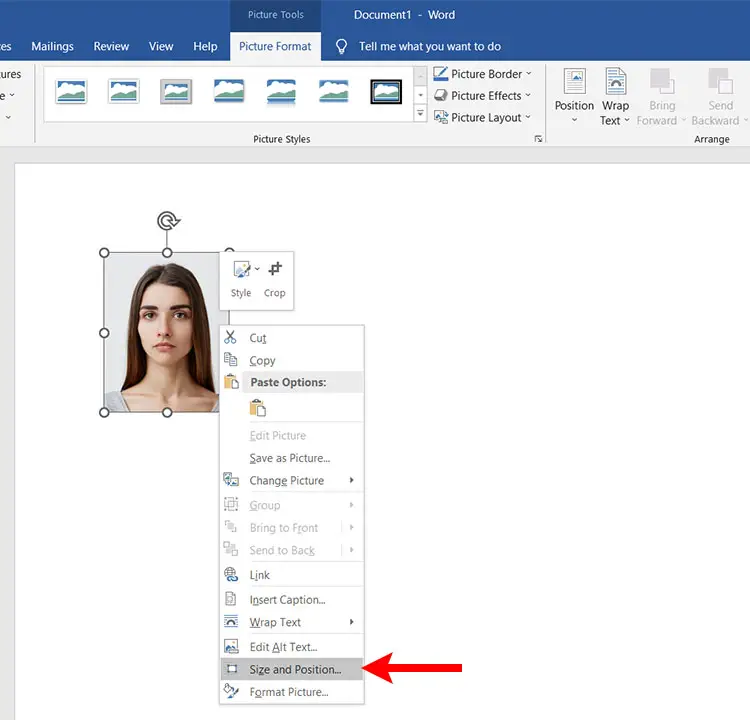
Click anywhere outside the picture to complete cropping, and then right-click on it. On the context (right-click) menu, click Size and Position.
The Layout dialog will appear with options to change the height and width of your photo. Unlock the aspect ratio first by unchecking the box for “Lock aspect ratio.”
Afterwards, change the width to the exact recommended width (in this case, 3.5 cm). Click OK to apply your changes.
Congratulations! You have successfully created your own passport size picture that you can use for your job applications, among other things.
Go ahead and print your passport size photo in Word by clicking File > Print or by pressing Ctrl + P. For best results, use an color inkjet printer and a high-quality photo paper.
You can also save the Word document by clicking File > Save or by pressing Ctrl + S.
If you want to improve the quality and appearance of your passport size picture, you can use Microsoft Word’s built-in image editing tools. Just double-click the picture to activate the Picture Format menu and from there, you can edit and enhance your passport size photo.
These are a few image editing tools that are available in Word:
- Remove Background – Automatically remove the unwanted portions of your picture with one click.
- Corrections – Improve the brightness, sharpness and contrast of your photo.
- Color – Change the color of your picture to improve its quality or to match the document’s content.
- Artistic Effects – Apply artistic effects to your photo to make it look like a sketch or painting.
- Picture Styles – Add frames, bevels or drop shadows to your picture.
- Picture Border – Select the color, width and line style for the outline or border.
- Picture Effects – Apply visual effects such as shadow, glow, reflection and 3D rotation to your picture.
- Picture Layout – Transform the picture to a SmartArt graphic to easily arrange, resize and caption it.
How to Save Your Passport Size Picture as JPEG or PNG
What if you want to save your passport size picture as an image file rather than a document? You can do that in Microsoft Word, too.
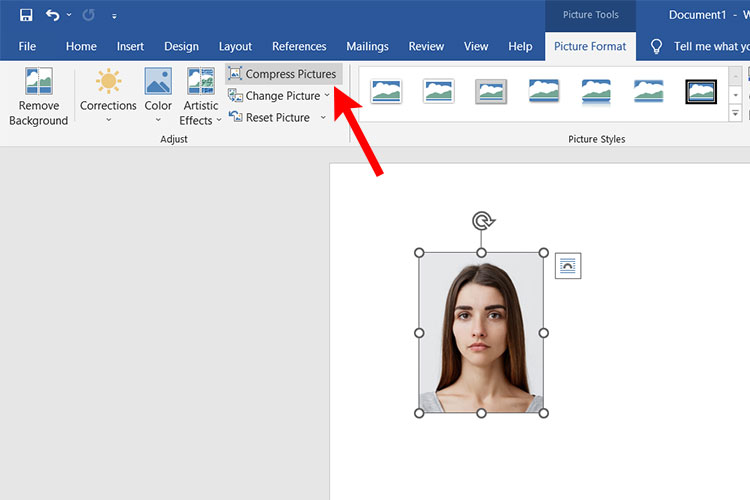
Select the picture by double-clicking it, and then click Compress Pictures.
On the Compress Pictures dialog, make sure that “Delete cropped areas of pictures” is checked. You can also change the resolution (e.g. print, web) but this is completely optional.
Click OK to continue.

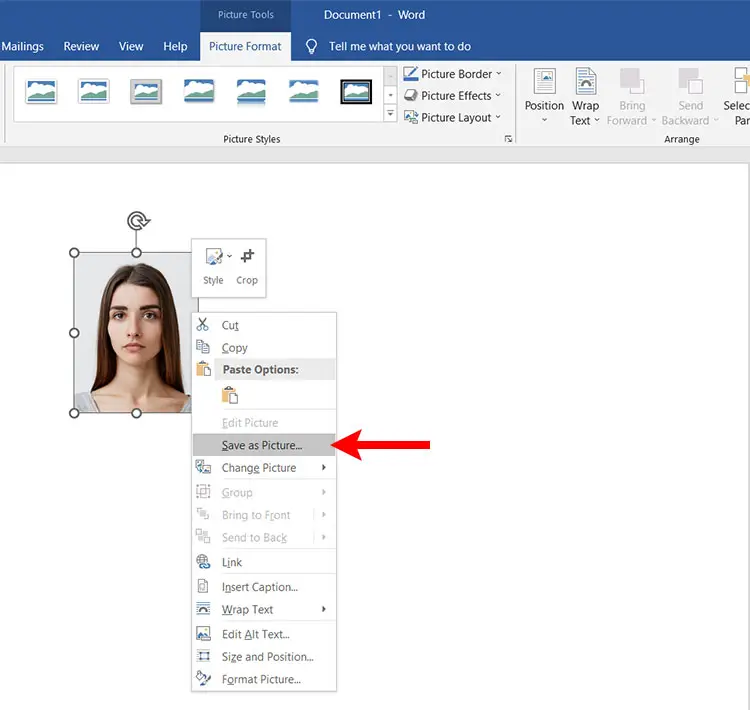
Next, right-click on the picture and on the context menu, select “Save as Picture.”
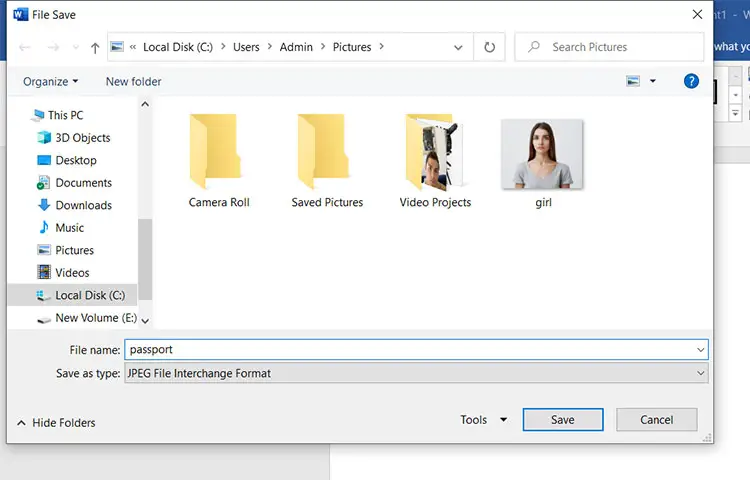
Save your passport size picture to the computer by entering the preferred file name and type. For the file type, select either Portable Network Graphics (PNG) or JPEG File Interchange Format on the “Save as type” field.
Click Save to save your passport photo as a JPEG or PNG file.
What is the Size of a Passport Photo in Pixels?
You might be wondering what are the dimensions of a passport size photo in pixels. If you are a graphic designer, you probably already know that the pixel dimensions of a photo might vary depending on its image resolution. The higher the resolution of an image, the bigger its size in pixels.
Since you already know the size of a passport photo, what you can do is to convert it to pixels. To convert the passport photo size to pixels, simply multiply its dimensions in inches with its image resolution. The formula for converting inches to pixels is:
Inches x Resolution = Pixels
For example, if you have a passport photo with a resolution of 300 ppi, which is the ideal resolution for photography and printing, then the picture size in pixels is 413 x 531 pixels (1.377″ x 300 ppi = 413 pixels and 1.77″ x 300 ppi = 531 pixels).
You may use this inches to pixels converter as well as this centimeters to pixels converter to know the pixel dimensions based on the image resolution.
To create a passport size picture in Adobe Photoshop, click Create New (or press Ctrl + N) and select “Default Photoshop Size” (or any custom size). Enter the dimensions in pixels or centimeters into the Width and Height fields, as well as your preferred image resolution.
How to Remove the Background From Your Photo (Optional)
If you want to make your passport photo look presentable and professional, you may want to remove the unwanted portions of your picture such as its background. How do you remove the background from your photo without hiring a graphic designer or learning Photoshop skills?
You can use a web-based background removal tool such as Remove.bg, which uses AI technology to automatically remove the background from your photos. You can create a free Remove.bg account and then upload your photo (maximum file size is 12MB) to have its background removed instantly.
If you are not completely satisfied with the result, you can click Edit to erase or restore portions of the picture. You can even replace the background with your own photo or from their collection of designs.
Remove.bg is not free and you will have to buy credits in order to download a high-definition (HD) photo. However, you can download the preview image for free. The quality of the preview image is sufficient enough in most cases.
You can also use Canva to remove the background from your photo, but this feature is only available to Canva Pro, Canva for Teams, Canva for Education, and Canva for Nonprofits users. So Remove.bg is probably still the better option for free users.
Final Thoughts
These days, there’s no need to visit the photo studio to have your passport picture taken. Using your smartphone photo, Microsoft Word and a little bit of creativity, you can create your own passport size photo that you can use in your resumes, job applications and other documents. For the best results, however, it’s still recommended to get your photos done by a professional photographer.
You might also be interested to learn create a 1×1 or 2×2 picture using Microsoft Word.