Ever wonder how to set up dual monitors for your computer? Maybe you’ve seen all those cool dual monitor setups and you want to have one, too. Plenty of computer users have set up dual monitors to help with productivity and to get more stuff done. The good news is that creating a dual monitor setup is not that hard, even if you’re not tech-savvy.
There are several reasons why you would want a dual monitor setup. A dual monitor setup allows you to perform several tasks simultaneously without spending your time and energy on additional keystrokes.
With dual monitors, you can watch two screens at the same time. This means that you don’t need to switch tabs or windows. You can work on your Word document on your main screen while watching a YouTube video on the secondary screen, for example.
Simply put, a dual monitor setup drastically increases your work productivity. It helps you to get more things done. That is why dual monitor setups are popular among software developers and programmers who spend a lot of hours in front of the computer.
Of course, you don’t have to be a programmer to use dual monitors. Anyone with a desktop computer or even a laptop can have a dual monitor setup and use two screens simultaneously.
Gamers will also find dual monitors useful for extending their screen’s real estate. Instead of buying a bigger monitor, gamers can expand the game screen across multiple monitors and turn it into one large virtual desktop.
So are you ready to set up dual monitors for your computer? Let’s get started.
What You’ll Need
First things first, you’ll need the following for your dual monitor setup:
- Desktop computer with HDMI or DVI ports
- HDMI or DVI adapter or cable
- Extra monitor
- Dual monitor stand (optional)
Let’s talk about each in detail.
Computer with HDMI or DVI port
Most modern computers have an HDMI or DVI port that can be connected to an external device such as a monitor. You can look at the back of your computer to see what kind of output it has. Refer to the graphic below for the different types of output ports.
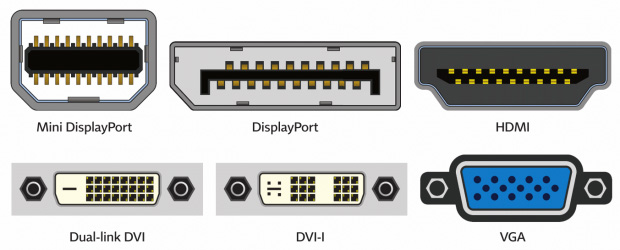
In most cases, your computer will have a VGA output and either an HDMI or a DVI port (or both). A DVI port can either be a DVI-D output which produces a digital signal or a DVI-I output which produces both analog and digital signals.
Since the VGA output is normally used for the main monitor, we will use the HDMI or DVI port to connect to the secondary monitor.
If you don’t know your computer’s output ports, you may ask the manufacturer of your PC.
HDMI or DVI adapter or cable
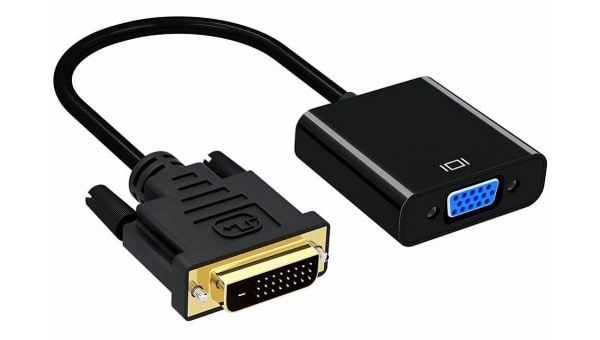
Once you already know your computer’s output ports, it’s time to buy the necessary cable to connect your computer output to the monitor input. For example, if your computer has an HDMI output and your monitor has a VGA input, then you can buy an HDMI to VGA adapter to connect the two. If it’s a DVI output, then you buy a DVI to VGA adapter.
In my case, I used the DVI-D port because the HDMI port didn’t work for some reason. So I bought a DVI-D male to VGA female adapter. Take note that if you have a DVI-D port, you must buy an “active” DVI-D to VGA adapter which converts the digital signal to the analog signal of the VGA input.
Extra monitor
This is pretty self-explanatory. This is the monitor which you will use to extend your screen. We’ll call it the second monitor or second display.
Dual monitor stand
If you want a clean desk, you may want to purchase a monitor stand that supports two or more monitors. It’s completely optional but we recommend it if you want a clutter-free area and the ability to adjust the height and angle of your monitors.
How to Configure Dual Monitor Setup in Windows 10
Setting up dual monitors is not a “plug and play” process. You will have to tweak a few settings to optimize your dual monitor setup and ensure that your second monitor is displaying correctly.
Step 1: Connect your computer to the second monitor
Connect your computer to the second monitor using the adapter or cable for your output port.
If you have an HDMI to VGA adapter, insert the male HDMI socket to the computer’s HDMI port and then connect the monitor’s VGA cable to the adapter’s VGA socket. If it’s an HDMI to VGA cable, attach the male HDMI socket to the HDMI port and then connect the male VGA socket to the monitor’s VGA input port.
Step 2: Go to Windows settings
Turn on your computer and monitors if you haven’t done so already.
Navigate to Settings by clicking the Start button (or tap the Windows key) and then Settings. Under Settings, select System > Display. (You can also right-click in Desktop and select Display settings.)
Windows will automatically detect the secondary monitor. If Windows cannot detect the monitor, the adapter or cable might be defective, it was not connected properly, or the output port is defective or non-functional. In that case, you may replace the connector cable or switch to a different output port.
Step 3: Extend the display
Scroll down to “Multiple displays.”
The default setting is “Show only 1.” We will change it to extend the screen and enable the second monitor.
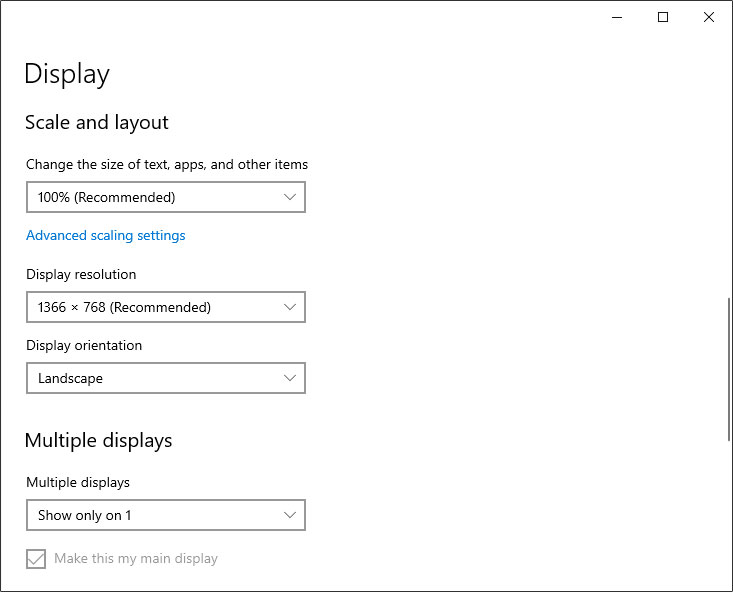
On the dropdown box, select “Extend these displays.”
You can also choose “Duplicate these displays” but this will only show the same screen on multiple monitors.

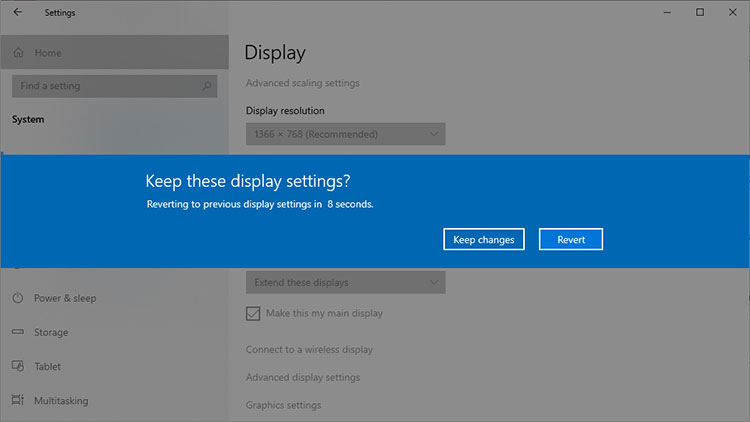
The second monitor is now active. Click “Keep changes” to apply the change or “Revert” to cancel it.
If you don’t do anything, it will revert to the previous display settings.
You might notice that you can move your mouse cursor to the second display or screen. However, any actions performed on the second screen will only be shown on the first or main display. But don’t worry because I’ll teach you how to make full use of your second monitor later on.
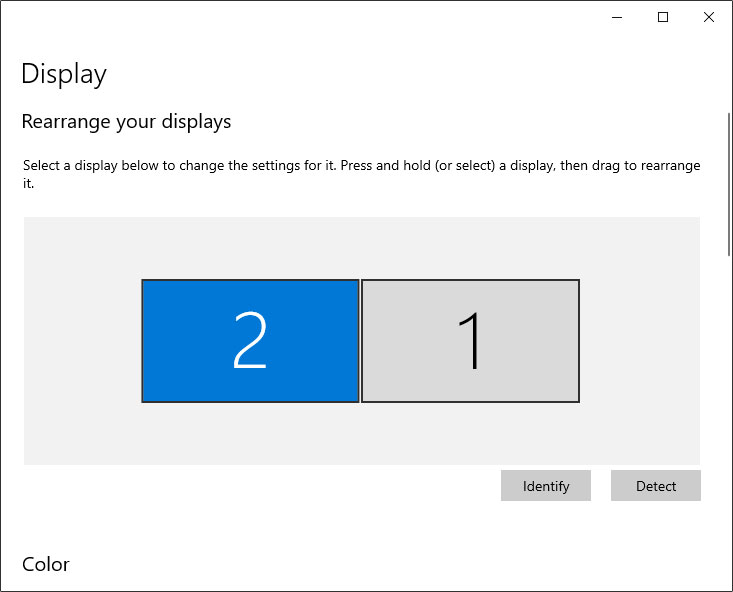
Step 4: Rearrange your displays (optional)
Choose a display (or monitor) to change the settings for it. Click “Identify” to label your displays and “Detect” to detect it.
Rearrange your displays and move them around to correspond with their respective positions on your desk or workspace. Just hold and drag your selected display to its desired position. If your second monitor is positioned on the left of your main monitor, drag “2” to the left.
Step 5: Change display resolution and orientation
If your second screen is not displaying correctly, you can change the resolution by selecting it on the dropdown box under “Display resolution.” Click “Keep changes” to apply your selection.
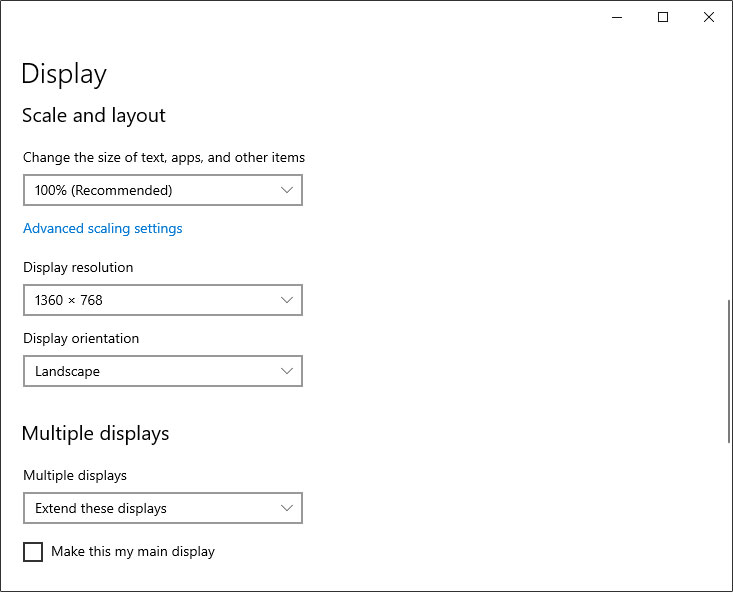
If you want a vertical display, select “Portrait” under “Display orientation.” Click “Keep changes” to apply.
How to Use Your Dual Monitor Setup
Now that you have your own dual monitor setup, it’s time to familiarize yourself with its operation and keyboard shortcuts. Here are some Windows keyboard shortcuts you must remember for a smooth dual monitor experience:
Windows + P
Instead of going to the Settings page to switch between display modes, just hit the Windows + P keys and then select “Extend.”
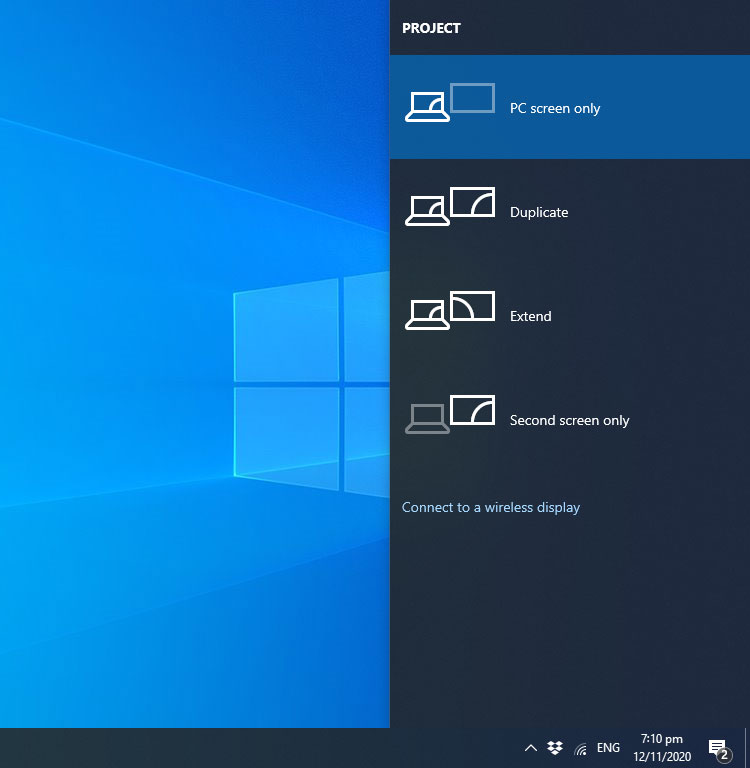
To go back to using only the main screen, just click “PC screen only.”
Windows + Left/Right
Pressing Windows + Left or Windows + Right will snap the current window to the edge of the monitor. Pressing it consecutively will move the window to the next monitor’s edge.
Shift + Windows + Left/Right
To move the current window to the secondary display, hit Shift + Windows + Left (or Shift + Windows + Right if the second monitor is on your right). So if you have a Word document or a Chrome window that you want to move across two or more screens, just use these keyboard shortcuts to do so.
Any Questions?
Having a dual monitor setup will definitely help you become more productive at work or play. As long as you have the right equipment, it doesn’t take much to set up dual monitors for your computer.
If you have any questions about dual monitor setups, just leave a comment or send a message, and we’ll do our best to answer.
Featured image credit: Imgur