
Thanks to the Internet, it’s now possible to get your birth certificate from the Philippine Statistics Authority (PSA) even without leaving your house. All you have to do is to order your certificate online and it will be promptly delivered to you. However, it’s still possible to personally obtain your certificate from the PSA office as a walk-in applicant, but you need to set an online appointment first.
There are a few reasons why it’s better to get your PSA certificates in person instead of ordering them online. First of all, it’s far cheaper to personally request your certificates from the PSA. It costs only ₱155 to claim your birth certificate directly from the PSA, whereas it costs ₱330 when you order from PSA Serbilis and ₱365 when you order from PSAHelpline.ph.
Secondly, it’s usually quicker to personally obtain your certificates from the PSA. As long as appointment slots are still available, you can book your appointment for tomorrow or even on the same day. Compare this to online delivery services that often take up to 8 working days to deliver your documents, especially if you’re in the provinces.
Online delivery services such as PSA Serbilis are still the more convenient option as they require virtually no effort aside from tapping the keyboard. But let’s say that your passport appointment is only a few days away. In that case, it’s probably better to get your birth certificate directly from the PSA instead of ordering it online. You’ll get your certificate almost immediately and you don’t have to endure the agonizing wait for your document to be delivered.
So if you need your birth certificate, marriage certificate, or certificate of no marriage (CENOMAR) in the soonest possible time, just book your appointment via the PSA website and claim your certificate during your scheduled appointment and personal appearance.
In this comprehensive guide, you will learn how to schedule a PSA online appointment and request for an authenticated copy of your certificate from the PSA.
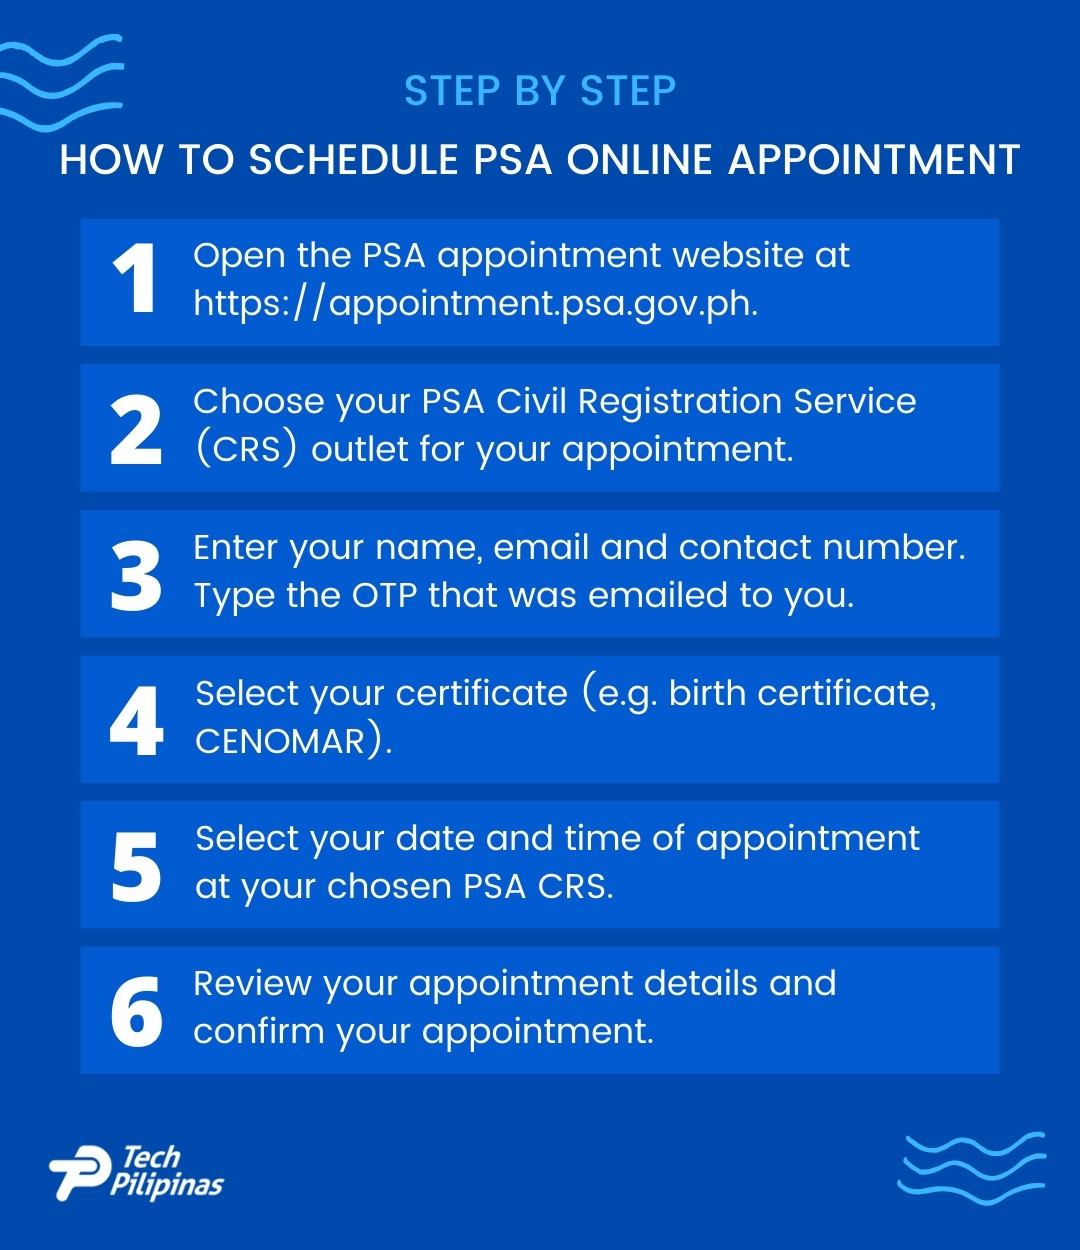
How to Schedule Your PSA Online Appointment
The PSA makes it extremely easy to set an online appointment, only requiring your name, email address and mobile number. All you need to book your appointment is a computer or smartphone with an Internet connection.
Step 1: Open the PSA online appointment website
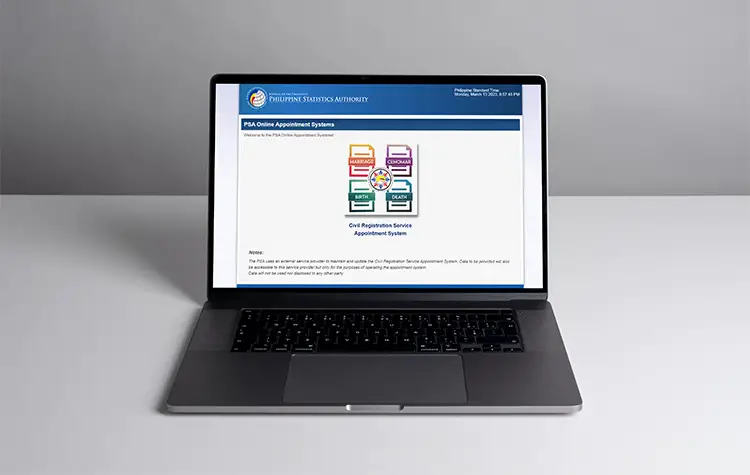
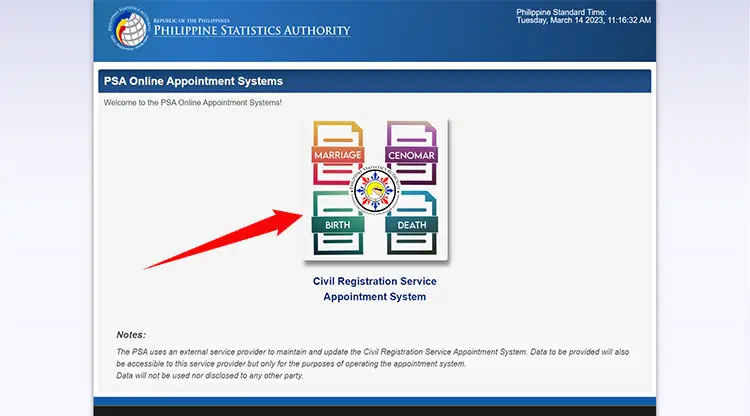
On your web browser, go to the PSA Online Appointment Systems website at https://appointment.psa.gov.ph.
Once there, click the icon for the Civil Registration Service Appointment System as indicated on the screenshot image below.
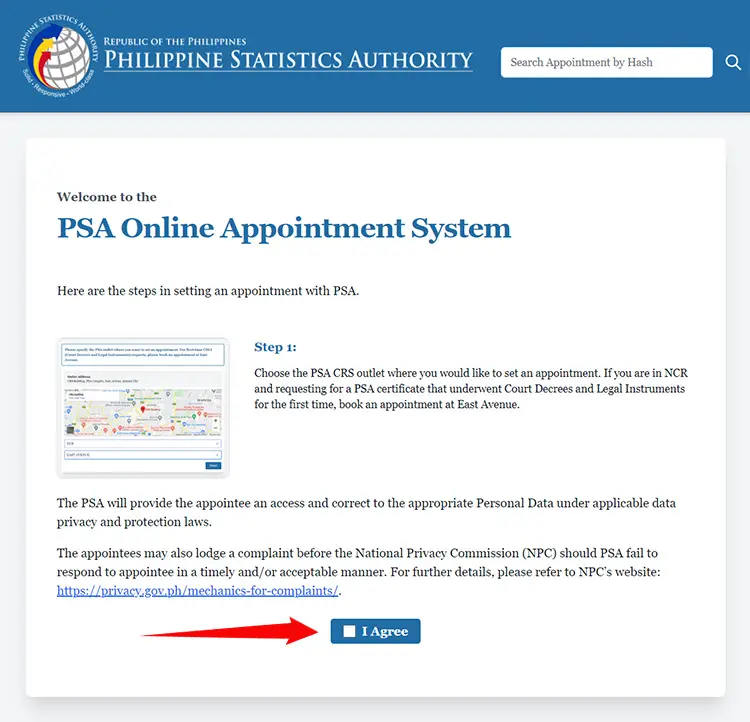
Step 2: Read the instructions, privacy notice and reminders
You have now accessed the PSA Online Appointment System. Take the time to read the instructions and privacy notice. Scroll down to the bottom of the page and then click the “I Agree” box to check it.
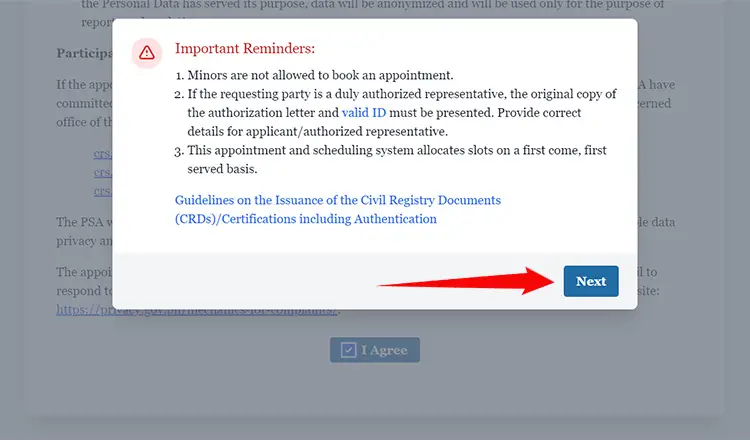
A popup dialog will appear. Read the important reminders and then click “Next.”
Step 3: Choose your PSA CRS outlet
The next step is to select the PSA Civil Registration Service (CRS) outlet where you will have your appointment.
Click the “Choose a Region” dropdown field and select your region. Example: NCR for National Capital Region.
Once you’ve selected the region, another dropdown field named “Choose an Outlet” will appear. Click it and choose the PSA CRS outlet where you want to set an appointment.
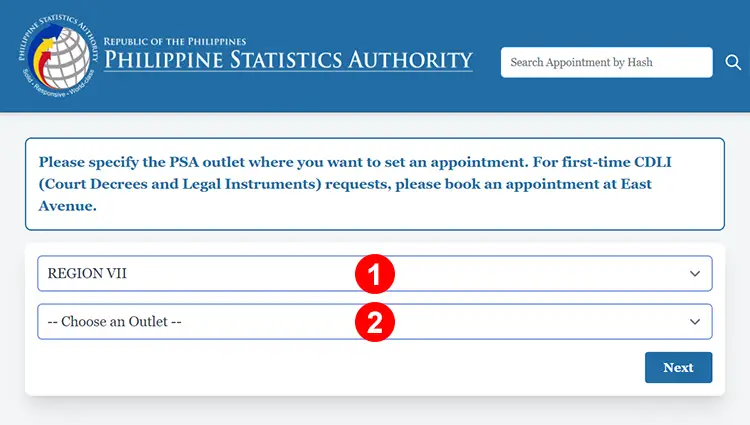
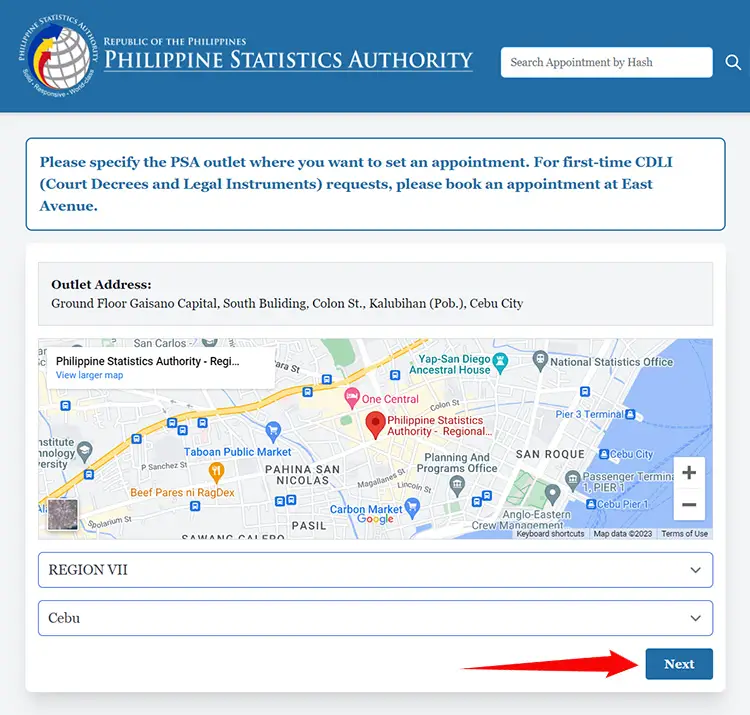
The address and map of the PSA office or PSA CRS outlet will be displayed after selecting it. Keep note of this information as it might help you locate the outlet easier.
Click “Next” to proceed.
Step 4: Enter your name and contact details
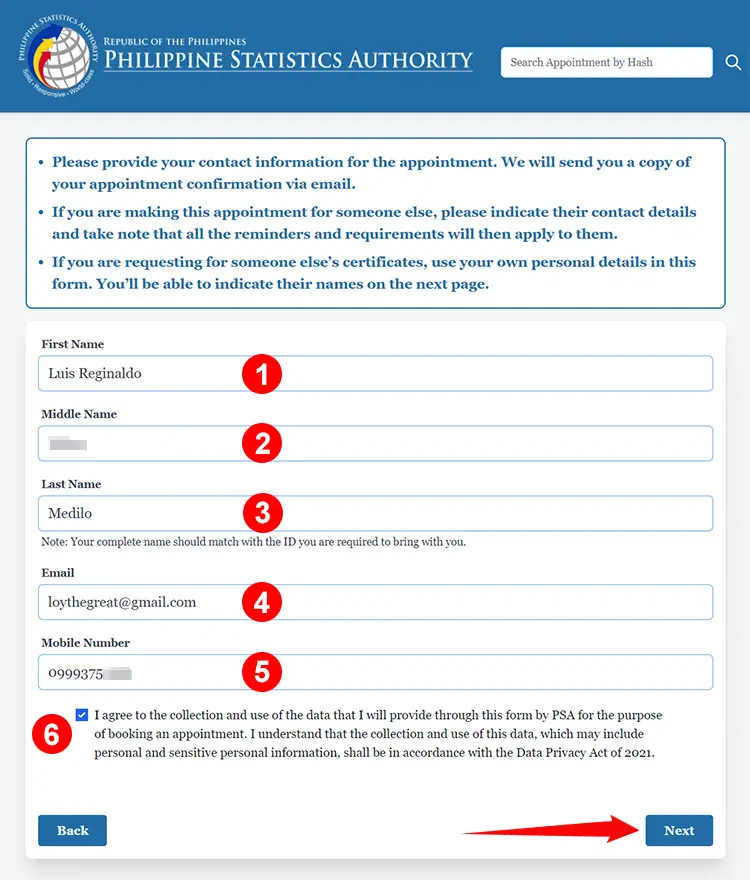
You’ll now be asked to provide your personal and contact information. Carefully enter your details into the following fields:
- First Name – Your complete name must match with your valid ID.
- Middle Name – Enter your full middle name (no initials)
- Last Name – Indicate your surname or family name.
- Email – Double-check that you typed the correct email as the verification code and appointment confirmation will be sent there.
- Mobile Number – Provide your 11-digit mobile number.
If you’re requesting someone else’s certificate, you must provide your own personal details. You’ll have the chance to enter their names on the next step.
Tick the checkbox for “I agree to the collection and use of the data…” and then click “Next.”
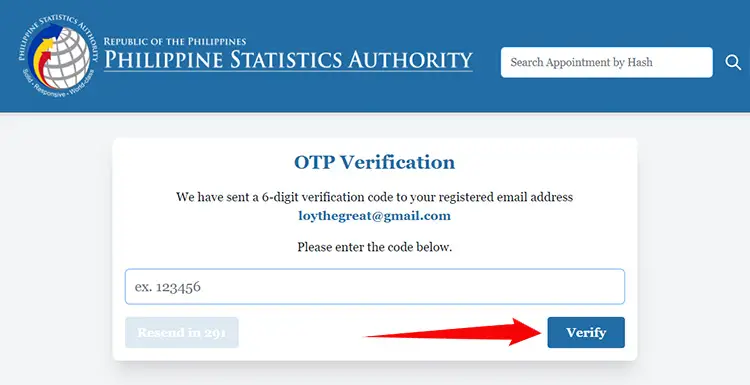
Step 5: Enter the verification code
A 6-digit verification code will be sent to your provided email address. Open the email with the subject “CRS Online Appointment System – One-Time PIN (OTP)” to get the verification code.
Type the OTP into the provided field and click “Verify.”
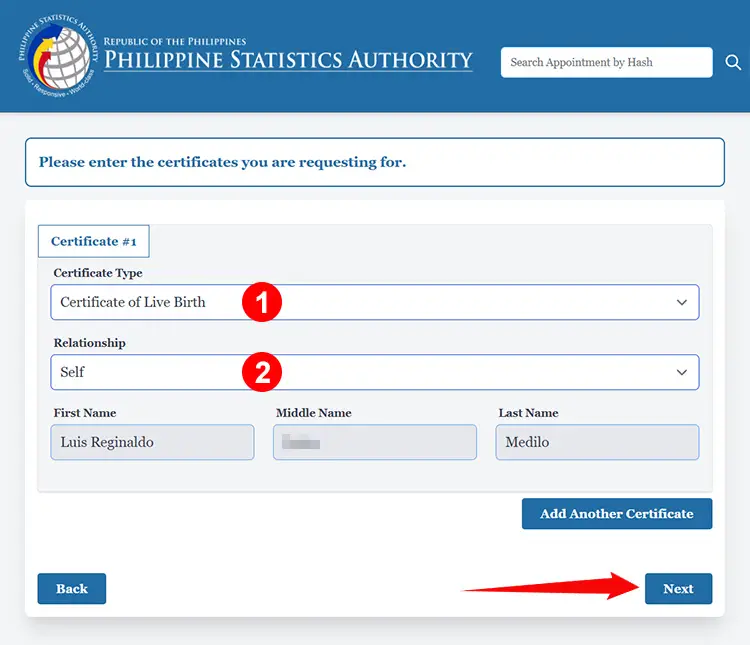
Step 6: Select your certificate
Choose the type of certificate that you want to request from the PSA:
- Certificate of Live Birth
- Certificate of Marriage
- CENOMAR (Certificate of No Marriage)
- Certificate of Death
Afterwards, indicate your relationship with the owner of the certificate. If you’re the owner, select “Self.” If you’re requesting on behalf of someone else (e.g. authorized representative), you’ll also have to provide their complete names.
To request another certificate, click “Add Another Certificate” and repeat the process.
When you’re done, click “Next” to proceed.
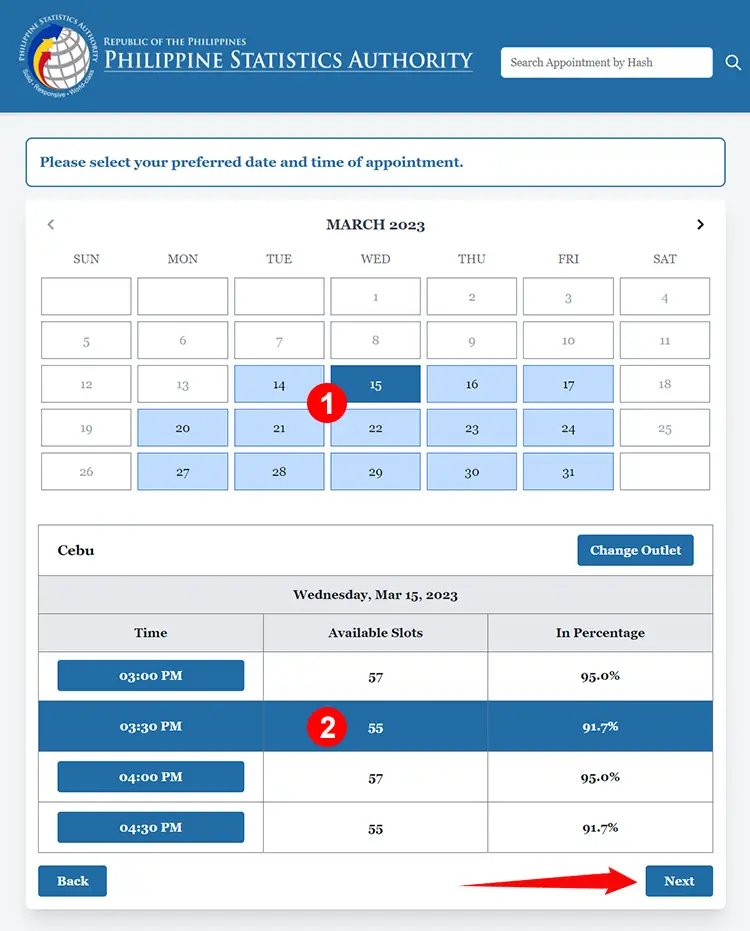
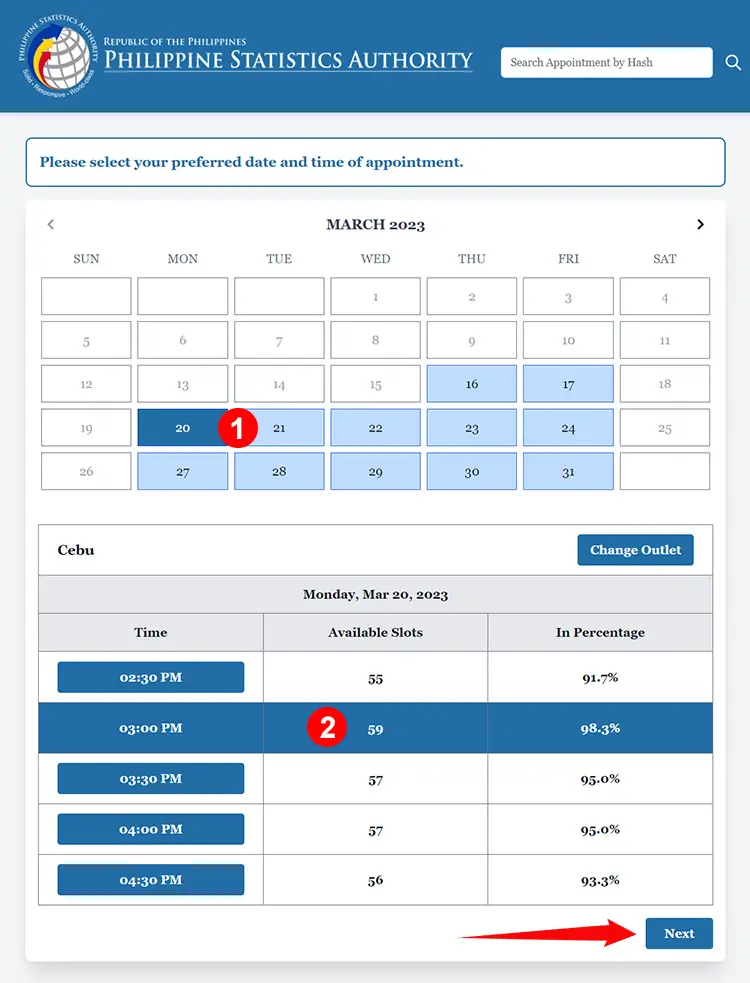
Step 7: Choose your appointment date and time
It’s time to select your preferred date and time of appointment. Each PSA outlet can accommodate up to 1,200 applicants per day, divided into 60 slots per 30-minute interval.
Start by clicking your preferred date of appointment on the calendar. Your selected appointment date will be highlighted in dark blue.
A list of available timeslots will then be displayed below the calendar. Select your preferred timeslot and then click “Next.”
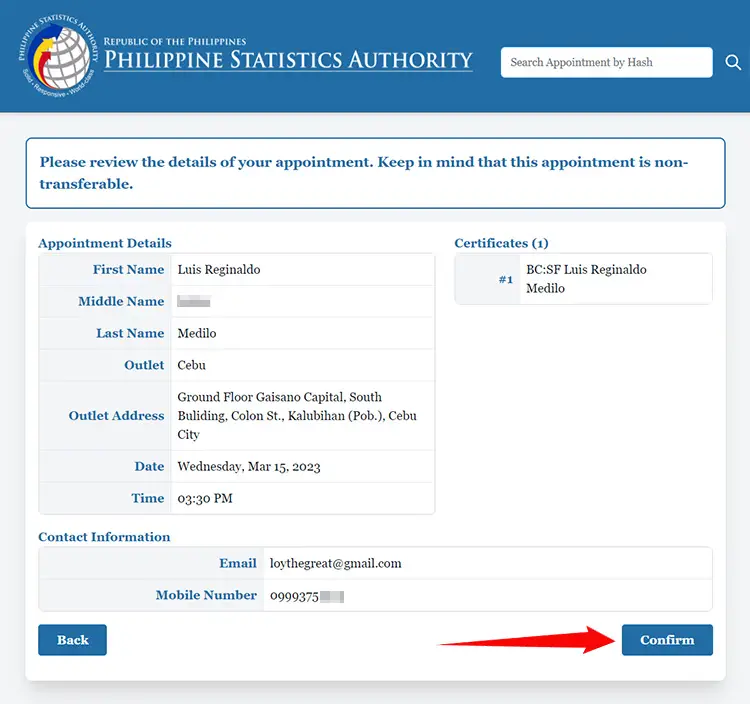
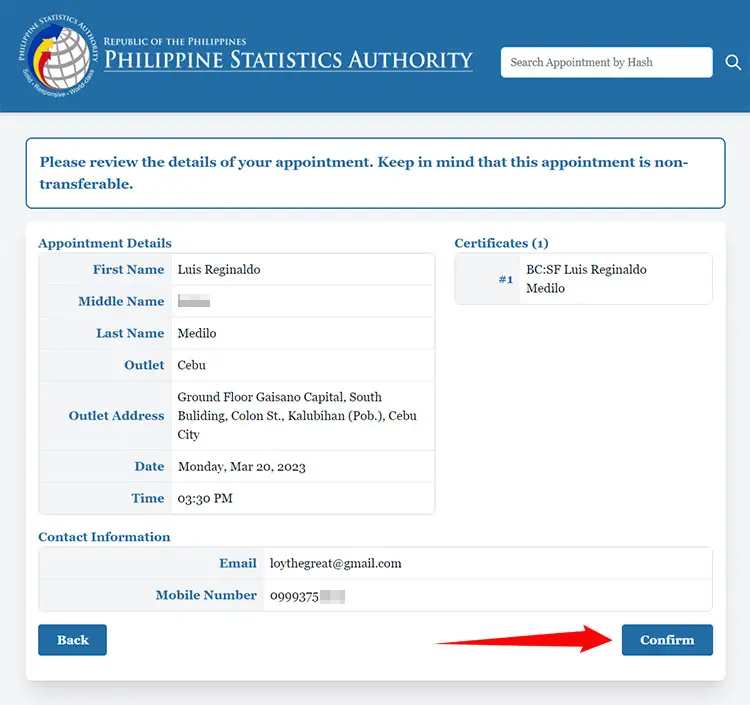
Step 8: Review your appointment details
Take the time to review the details of your PSA online appointment, making sure that all your provided information are correct and accurate. If there are any errors or if you wish to change your appointment date or time, just click the “Back” button to return to the previous steps.
When you’re done double-checking your appointment details, click “Confirm.”
Wait for the confirmation message to be displayed. When it is, click “Next” to complete your appointment request.
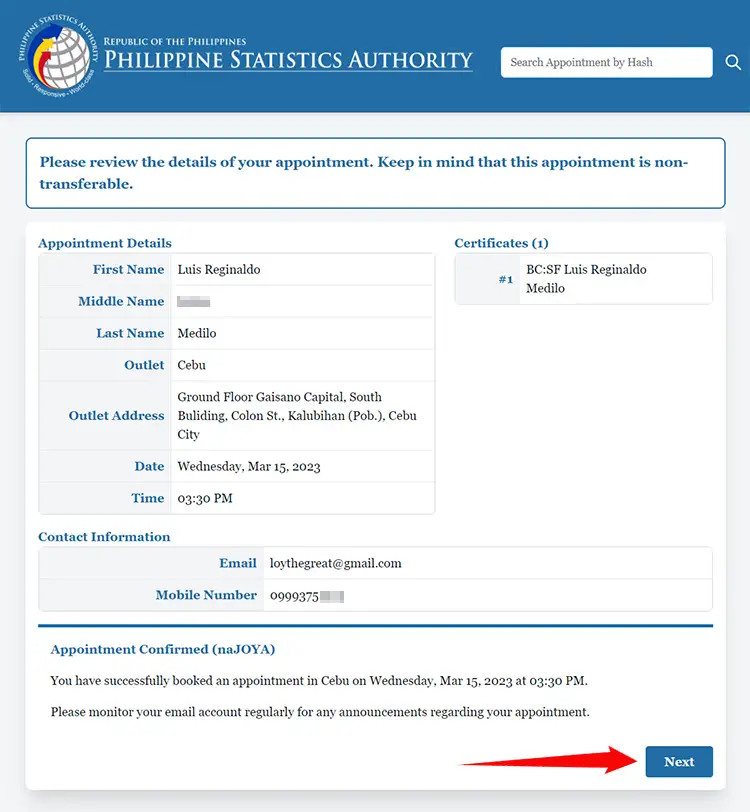
Step 9: You’ve successfully set your PSA online appointment
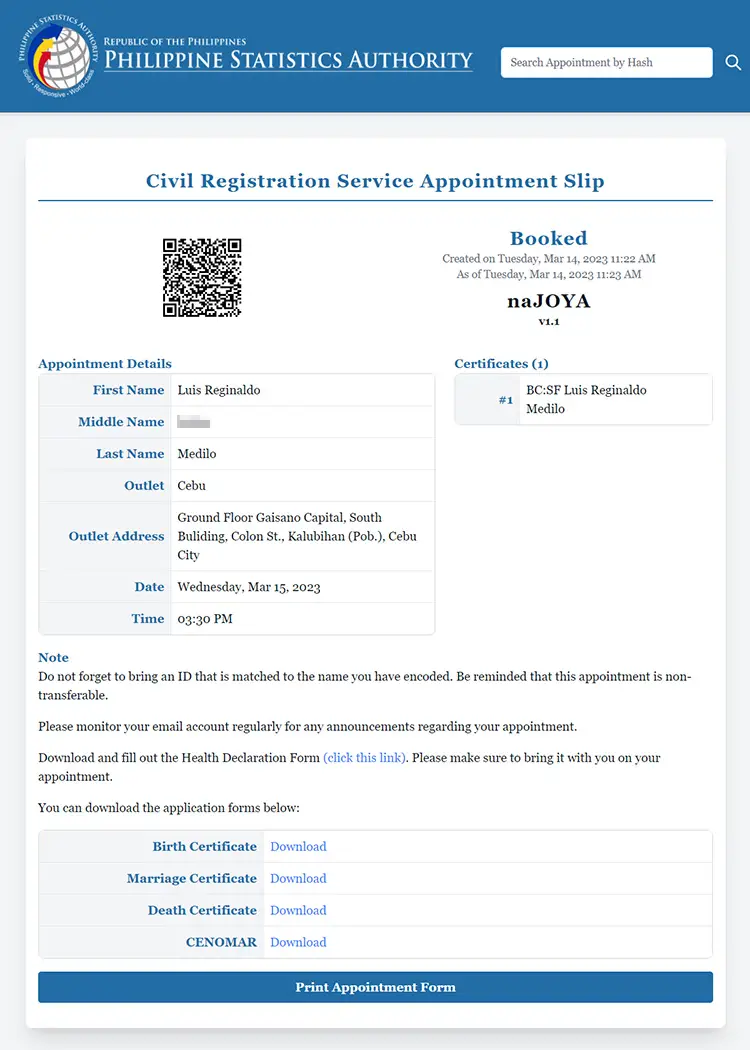
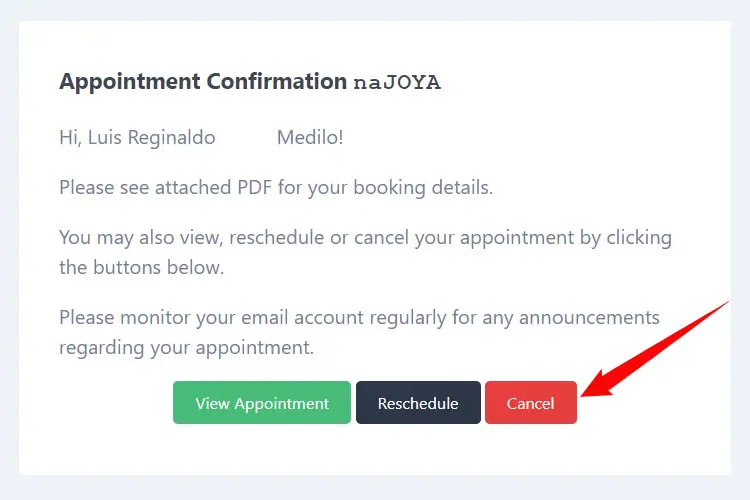
Congratulations! You have successfully scheduled your PSA online appointment. The details of your appointment will be sent to your email. This email contains your CRS appointment slip in PDF format as well as links to view, reschedule or cancel your appointment.
You can either print your appointment slip by clicking the “Print Appointment Form” button, or take a photo or screenshot of the appointment confirmation page. Show the appointment slip to the PSA personnel during your personal appearance.
Step 10: Print and fill out your application form (optional)
To save you time and effort, you can print and accomplish the appropriate application form before your personal appearance at the PSA office. That way, you don’t have to spend time filling out the application form during your scheduled appointment.
Download and print the appropriate application form below:
- Birth Certificate Application Form
- Marriage Certificate Application Form
- Death Certificate Application Form
- CENOMAR Application Form
You can also print and fill out the Health Declaration Form which must be submitted before you’re allowed to enter the PSA office.
Carefully fill out your application form in CAPITAL LETTERS using a black ballpoint pen. Bring your duly accomplished application form, along with your appointment slip and valid ID, to the PSA CRS outlet during your scheduled appointment and personal appearance.
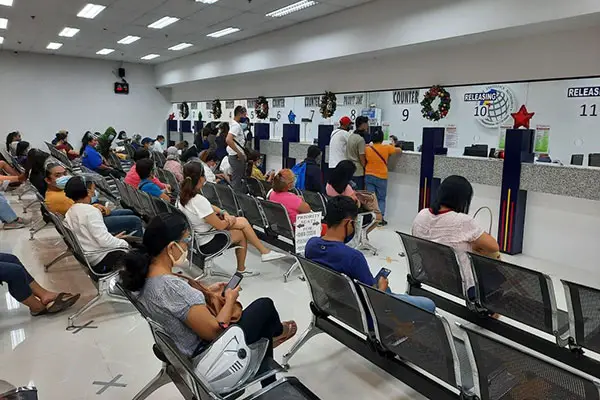
Next Stop: Personal Appearance at the PSA
Go to your chosen PSA outlet on the date and time of your scheduled appointment. Be sure to arrive at the office at least 30 minutes before your appointment time. For example, if your appointment time is 3:00 PM, make sure you’ve arrived by 2:30 PM.
Don’t forget to bring the following requirements during your appointment:
- CRS appointment slip (printed or digital copy);
- Valid ID;
- Application fee (₱155 for birth, marriage and death certificates, and ₱210 for CENOMAR);
- Duly accomplished application form (optional);
- Duly accomplished Health Declaration Form (optional); and
- Any other supporting documents (if applicable).
If you’re requesting a certificate on behalf of someone else, you’ll need to bring an authorization letter or Special Power of Attorney (SPA) and the valid ID of the document owner (original and photocopy). The authorized representative must also present his/her valid ID and a photocopy of it.
Also bring a black ballpoint pen to fill out and sign your application form (if you haven’t accomplished the form in advance).
Here’s the step-by-step procedure for claiming your certificate during your scheduled appointment at the PSA office or PSA CRS outlet:
- Show the CRS appointment slip (printed or digital copy) to the information officer for validation.
- Fill out and submit the Health Declaration Form.
- Get the application form and queue ticket number.
- Fill out the application form while waiting for your queue number to be called.
- When your number is called or shown on the monitor, proceed to the counter and submit the accomplished application form, valid ID, authorization letter or Special Power of Attorney (SPA) (if applicable), and other supporting documents. Also pay the corresponding fees.
- Get the official receipt (OR) and count the change, if any.
- Wait for the releasing of your certificate, which usually happens within the same day. When your name is called, proceed to the releasing counter and submit the OR, valid ID, authorization letter or SPA (if applicable), and other supporting documents.
- Get your certificate and check that its details are correct and complete before leaving the premises.
How to Reschedule Your PSA Online Appointment
Have a change of plans? You can easily reschedule your PSA online appointment for another time or day.
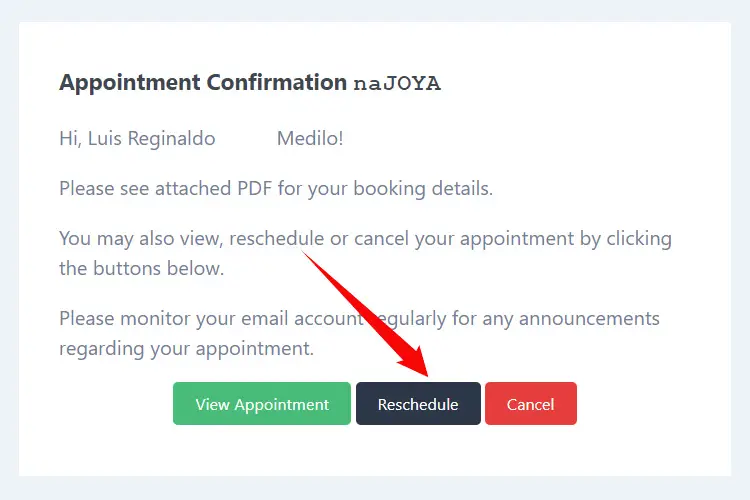
To change or reschedule your online appointment, open the confirmation email and click the black “Reschedule” button.
You will be asked: “Are you sure you want to reschedule your appointment…?”
Click “Yes” to proceed.

Choose your new appointment date and time by clicking the date on the calendar, and then selecting an available timeslot below it.
Click “Next” to continue.
Review your appointment details and if everything is correct, click “Confirm.”
Once you’ve successfully rescheduled your PSA online appointment, you will receive a new confirmation email with your updated appointment slip. Present this appointment slip during your scheduled appointment at the PSA office.
How to Cancel Your PSA Online Appointment
If you no longer want to proceed with your PSA online appointment, you can simply cancel it. This action will invalidate your existing appointment, so proceed with caution.
To cancel your appointment, open the confirmation email and click the red “Cancel” button.
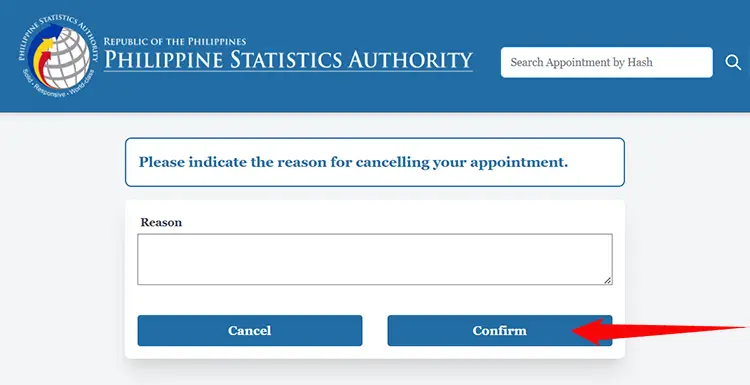
Indicate the reason for cancelling your appointment on the provided field. For example: “Personal emergency.”
Click “Confirm” to finalize the cancellation.
Frequently Asked Questions
Is PSA online appointment mandatory?
The PSA has announced that they will not accept walk-in clients without an online appointment, except in emergency cases. Senior citizens, persons with disability (PWD), and pregnant persons can avail of the courtesy lane and therefore will not require an online appointment.
Do I need to print my appointment slip?
It’s not necessary to print your appointment slip. You can download the CRS appointment slip from the appointment confirmation page or save it from the confirmation email that was sent to you. You can also screenshot the confirmation page (make sure that the QR code and your personal details are displayed).
Do I need to download and print the application form?
You don’t need to download and print the application form for your requested certificate, since the form is freely available at PSA offices. However, if you want to save time and minimize hassles, you may print and fill out the application form in advance.
What are the fees for requesting a certificate?
The fee for birth, marriage and death certificates is ₱155, while the CENOMAR costs ₱210.
When will I be able to claim my certificate?
Certificates are released on the same day as your appointment, usually 1-3 hours after the submission of documents. If your appointment is in the afternoon, there’s a possibility that you will be asked to return on the next working day.
Where can I view my appointment?
You can view the details of your online appointment by clicking the “View Appointment” button in the confirmation email. You can also go to the PSA CRS appointment website and enter your appointment code into the “Search Appointment by Hash” field.
Final Takeaways
It’s a good thing that the PSA has established an online appointment system to control the number of people who visit their offices daily. Thanks to the PSA Civil Registration Service (CRS) appointment system, clients will no longer have to endure the long queues and the agency will become more efficient and effective in delivering vital services to Filipinos.
If you have any questions and concerns about your online appointment, you may call the PSA CRS hotline (02) 8461-0500 or email [email protected] or [email protected].


