If you plan to apply for a government job in the Philippines, the civil service exam is usually the first real hurdle you have to clear. Almost every plantilla position asks for civil service eligibility, and the most straightforward way to obtain that eligibility is by passing the Career Service Examination (a.k.a. the civil service exam). Before you can sit for the exam, though, you need to file your civil service exam application with the Civil Service Commission (CSC).
The good news is that the whole application process can now be done through the Online Civil Service Examination Application System (OCSEAS). No more lining up at the CSC office just to grab a form – just reserve your slot online, fill out your personal details, upload the required documents, and only show up in person to submit your docs and pay the application fee. Easy as pie, right?
Before I took the civil service exam in 2006, I personally visited the CSC office and spent the whole day filling out paperwork and submitting documents. It was exhausting yet rewarding – not only did I pass the exam, but I also topped it! These days, you can save yourself the hassles and drudgery by completing the application process online. It’s not 100% online, though, since you still need to visit the CSC office to submit your documents – but at least all the hard work has been done beforehand.
I don’t want you to miss the next scheduled civil service exam, so I prepared this guide to help you with the online application process.
Table of Contents
Civil Service Exam Application Requirements
Before you open the OCSEAS website and submit your application, make sure that you have already prepared the following documentary requirements:
- Passport-size ID picture
- Valid government-issued ID
- PSA birth certificate (only if your date of birth isn’t printed on your ID)
- Signed Certificate of Consent (can be downloaded from OCSEAS)
- Application fee of ₱500 (to be paid at the CSC office)
- Active email address
Have digital copies ready for uploading and physical originals ready for your personal appearance.
Note: Each applicant is allowed only one OCSEAS account. Don’t create a second one if you forget your password. Recover the existing account instead, because duplicate accounts could cause problems later.
Who Can Use OCSEAS for the Civil Service Application?
OCSEAS is not available to everyone nationwide. The Civil Service Commission uses two separate online application systems depending on your region. Before you open an account, check first whether your region is covered by OCSEAS or by the other system, CSC eServe.
Based on Examination Announcement No. 03, s. 2026 by the Civil Service Commission, OCSEAS is the designated filing system for the following regions:
- CAR (Cordillera Autonomous Region)
- Region I (Ilocos Region)
- Region IV (Calabarzon and Mimaropa)
- Region VII (Central Visayas)
- Region X (Northern Mindanao)
- Region XII (SOCCSKSARGEN)
If you reside or if you plan to take the exam in any of these regions, this guide applies to you. Go ahead and proceed to the step-by-step walkthrough below.
If your region isn’t on the list, you can use a different system. Examinees in Regions II, III, V, VI, VIII, IX, XI, NCR, and BARMM can file their applications through CSC eServe. Caraga is a special case handled through the Lingkod Bayani Kiosk, which requires contacting the CSC Caraga office directly.
One thing to keep in mind: the NCR assignment has shifted between systems in different exam cycles, so if you’re in Metro Manila, always double-check the specific announcement for your batch before you begin. The safest move is to go directly to the CSC website, find the current examination announcement, and check the application filing modes.
How to File Your Civil Service Application Online via OCSEAS
I’ve grouped the full online application process into six phases so it’s easier to follow. Let’s get started!
Phase 1: Create Your OCSEAS Account
- Open your browser and go to the OCSEAS website at https://ocseas.csc.gov.ph.

- Select your region from the options shown, then click PROCEED. Pick the region where you actually plan to take the exam, since this determines which testing centers and CSC offices you’ll see later.
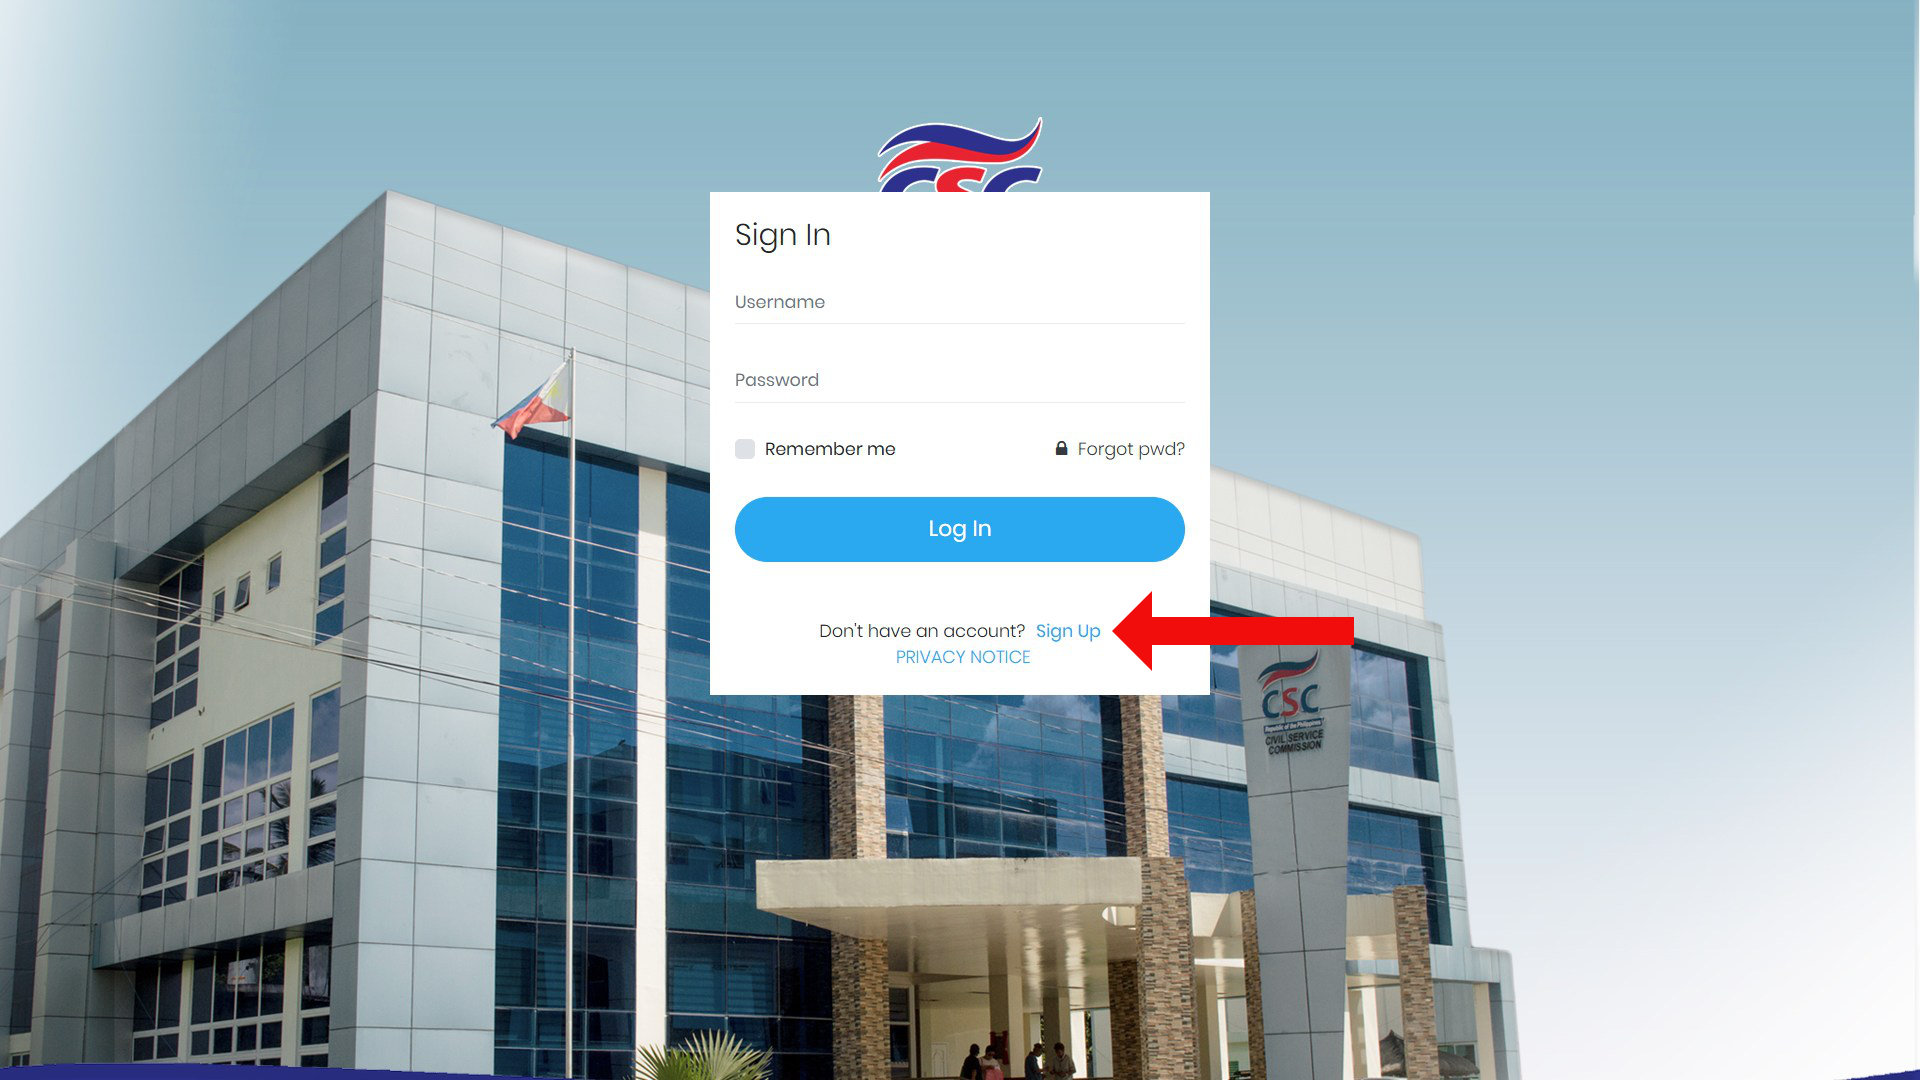
- On the next screen, enter your username and password if you already have an OCSEAS account. If this is your first time, click Sign Up (below the Log in button) to register.
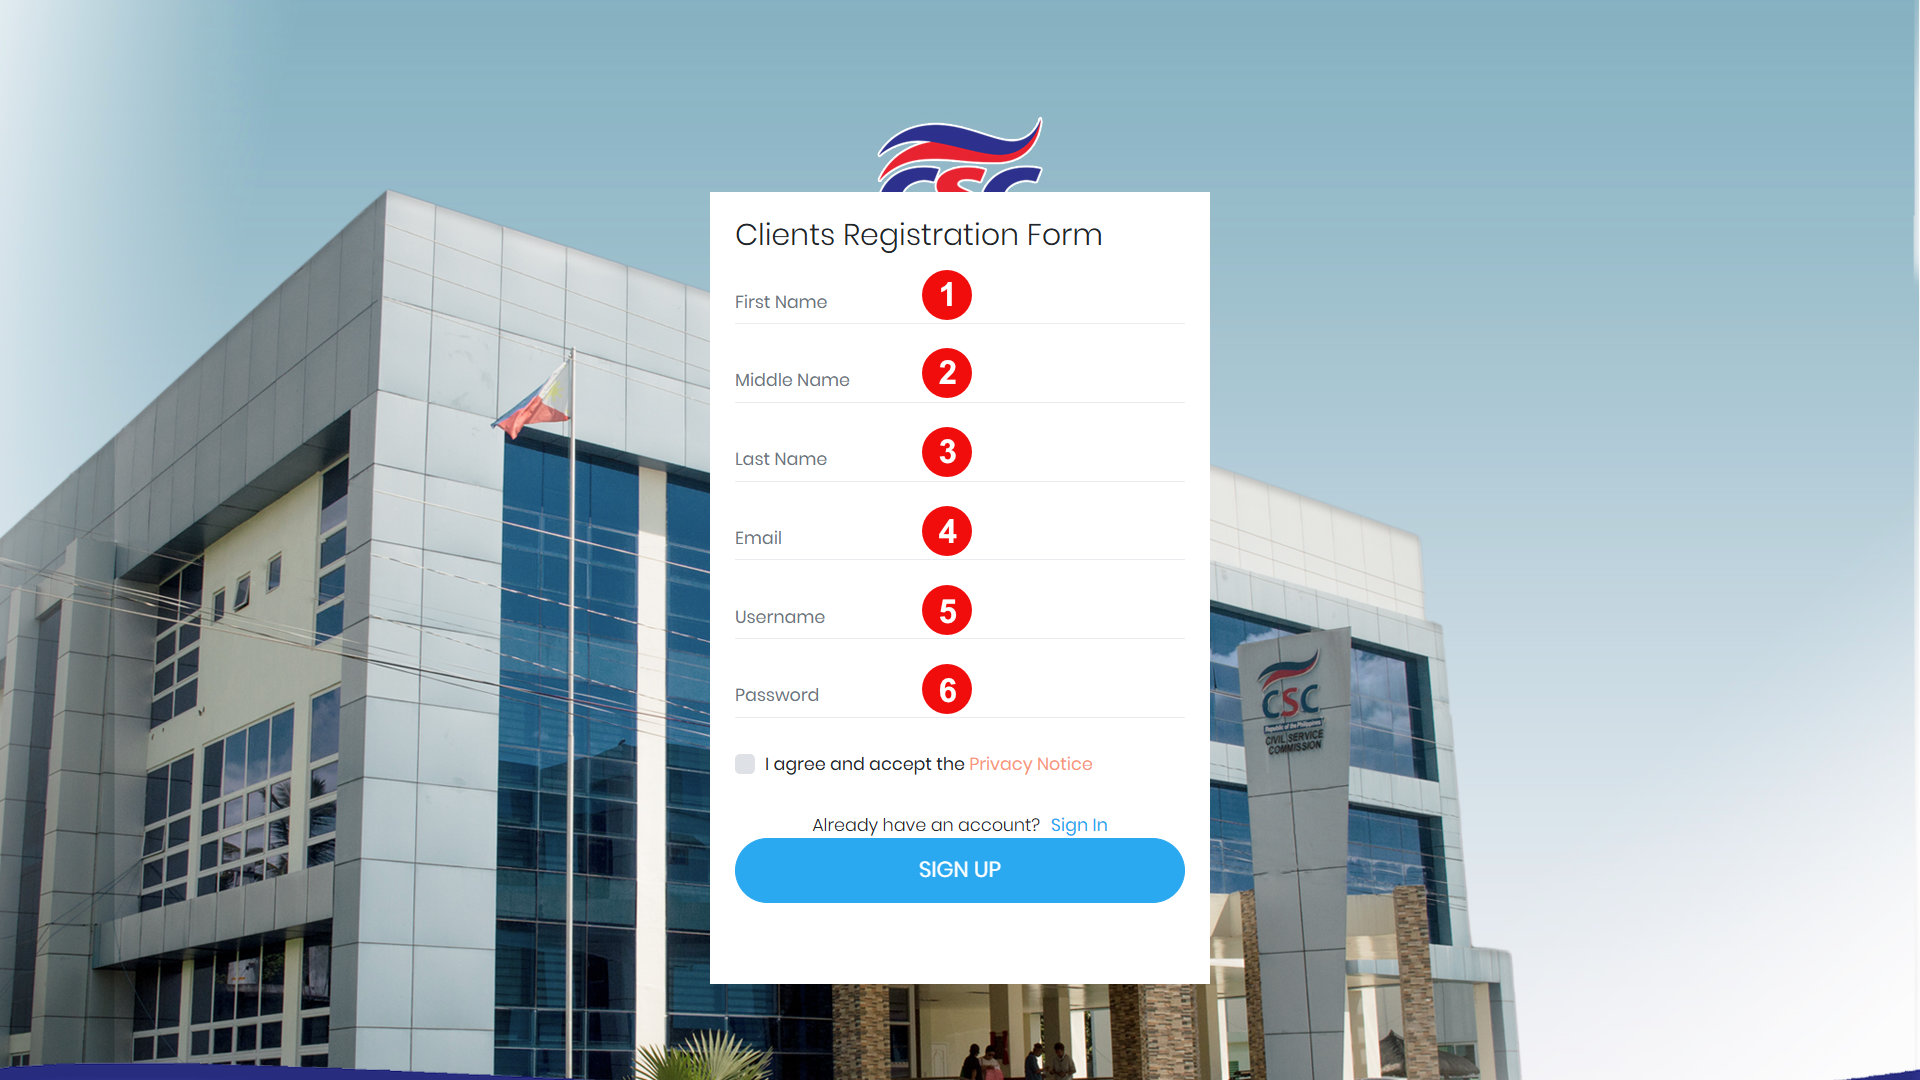
- Fill out the Clients Registration Form with your personal information and a working email address, as well as your preferred username and password. Make sure that your personal details match the ones in your valid government-issued ID. Check the box for “I agree and accept the Privacy Notice” and click SIGN UP.
- Open the registration email that OCSEAS sends you and click the activation link inside. If it isn’t in your inbox within a few minutes, check your Spam folder.
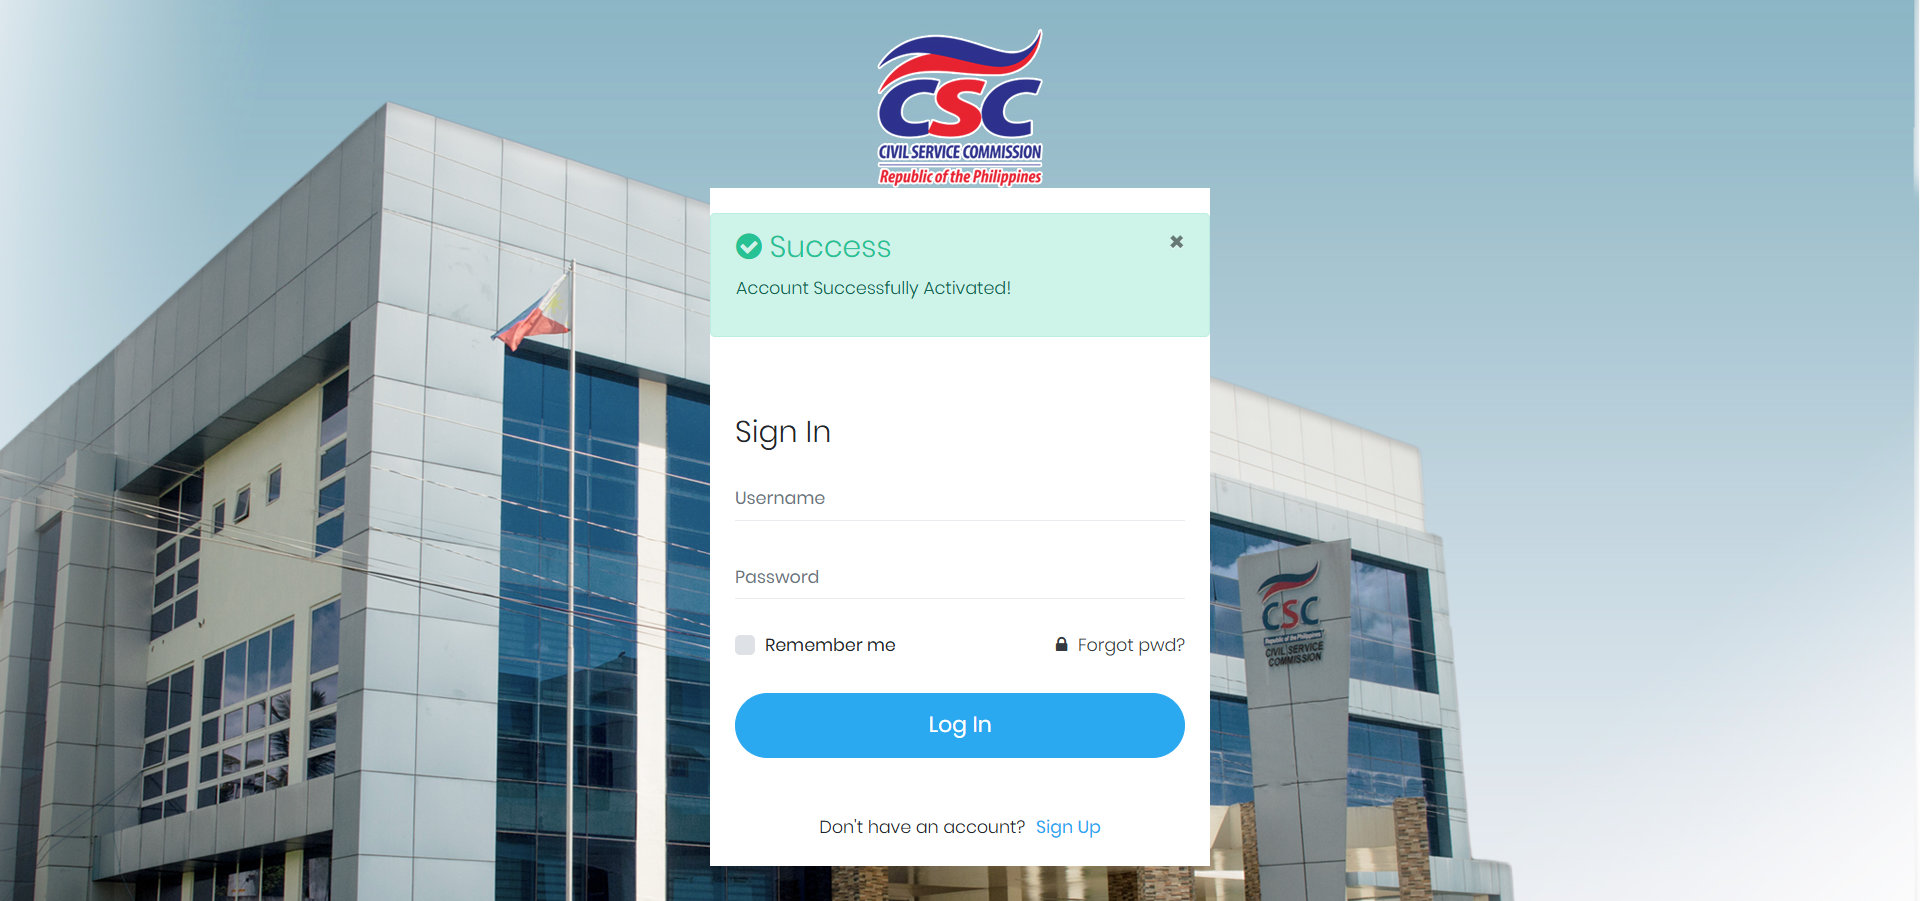
- Once your OCSEAS account is successfully activated, enter your username and password, and then click Log In.
Phase 2: Update Your Profile and Choose a Schedule
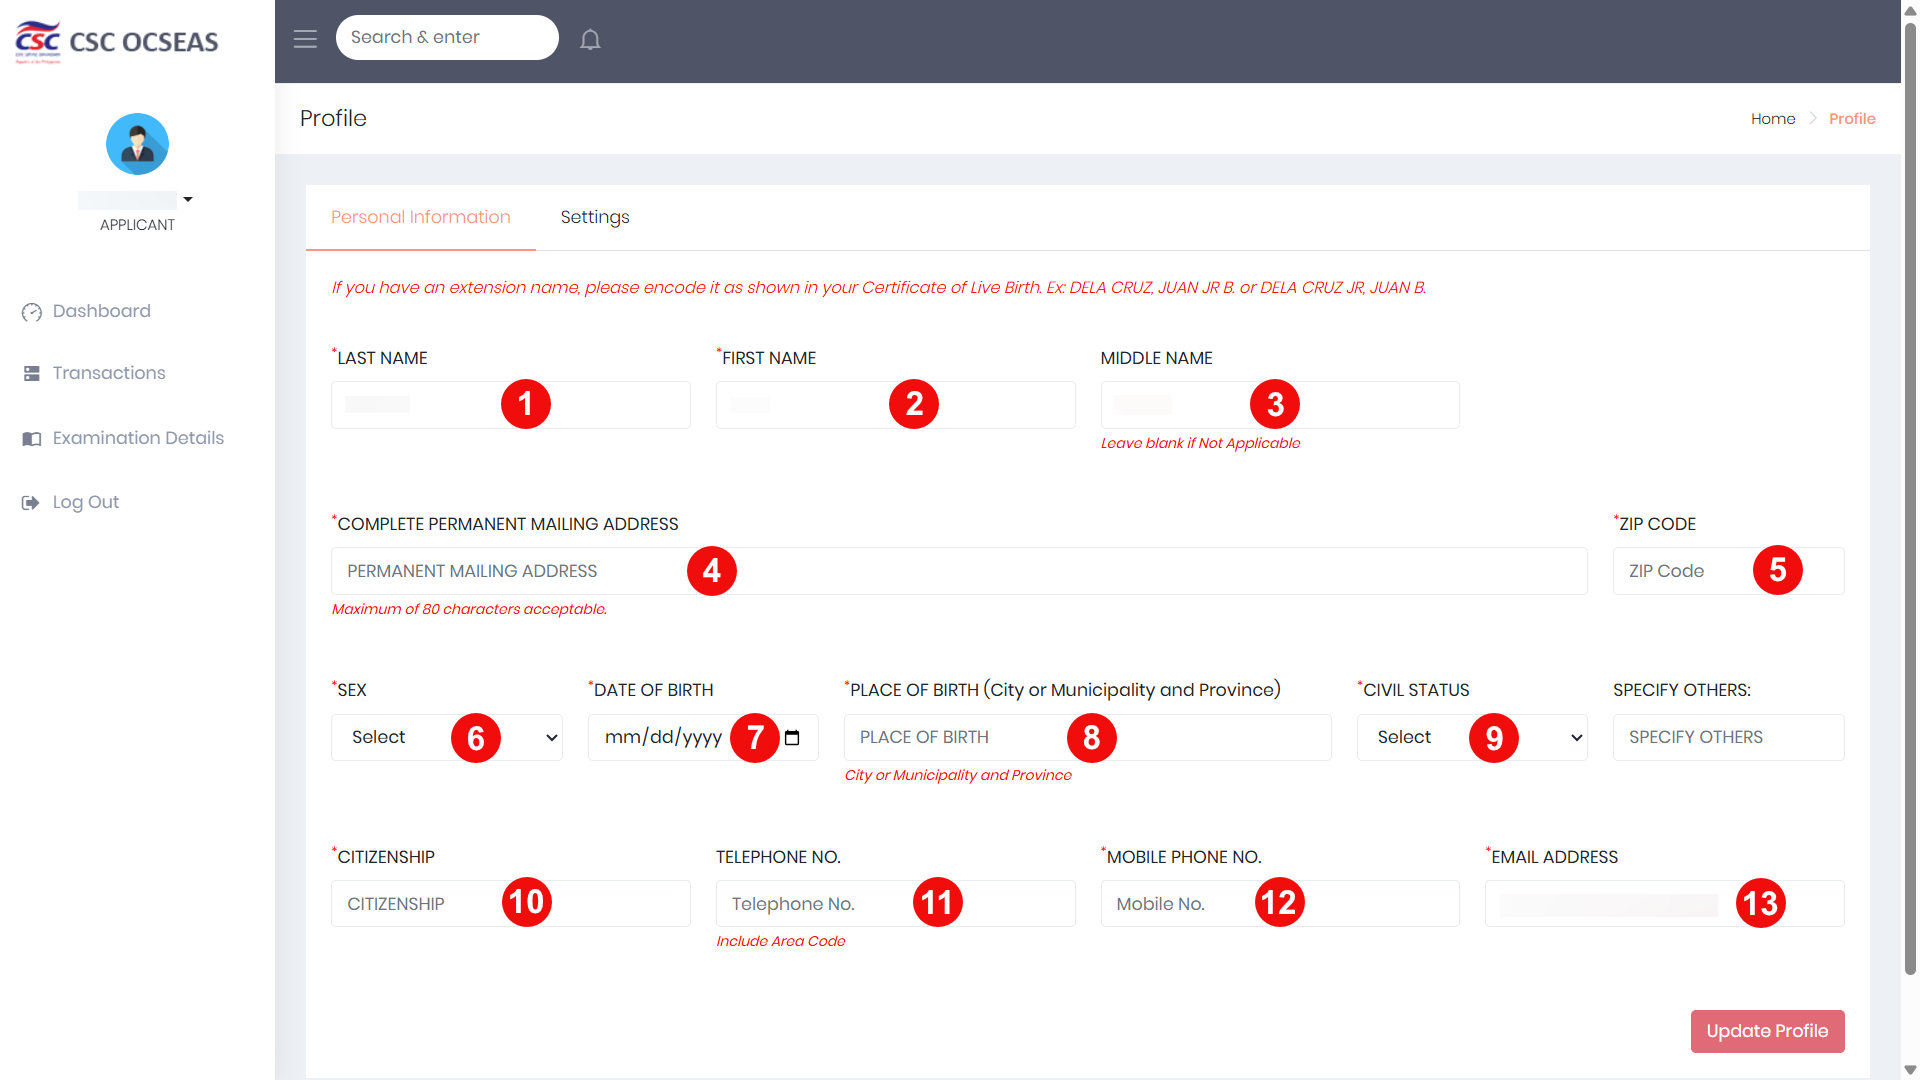
- On your first login, the system will ask you to enter your profile information. Fill out every field carefully and correctly, then click Update Profile when you’re done. This profile will reflect on your application form, so accuracy is important and prevents problems later.
- After your profile is saved, you’ll see the list of available examination schedules. Look for one marked as open, then click the Proceed button next to it.
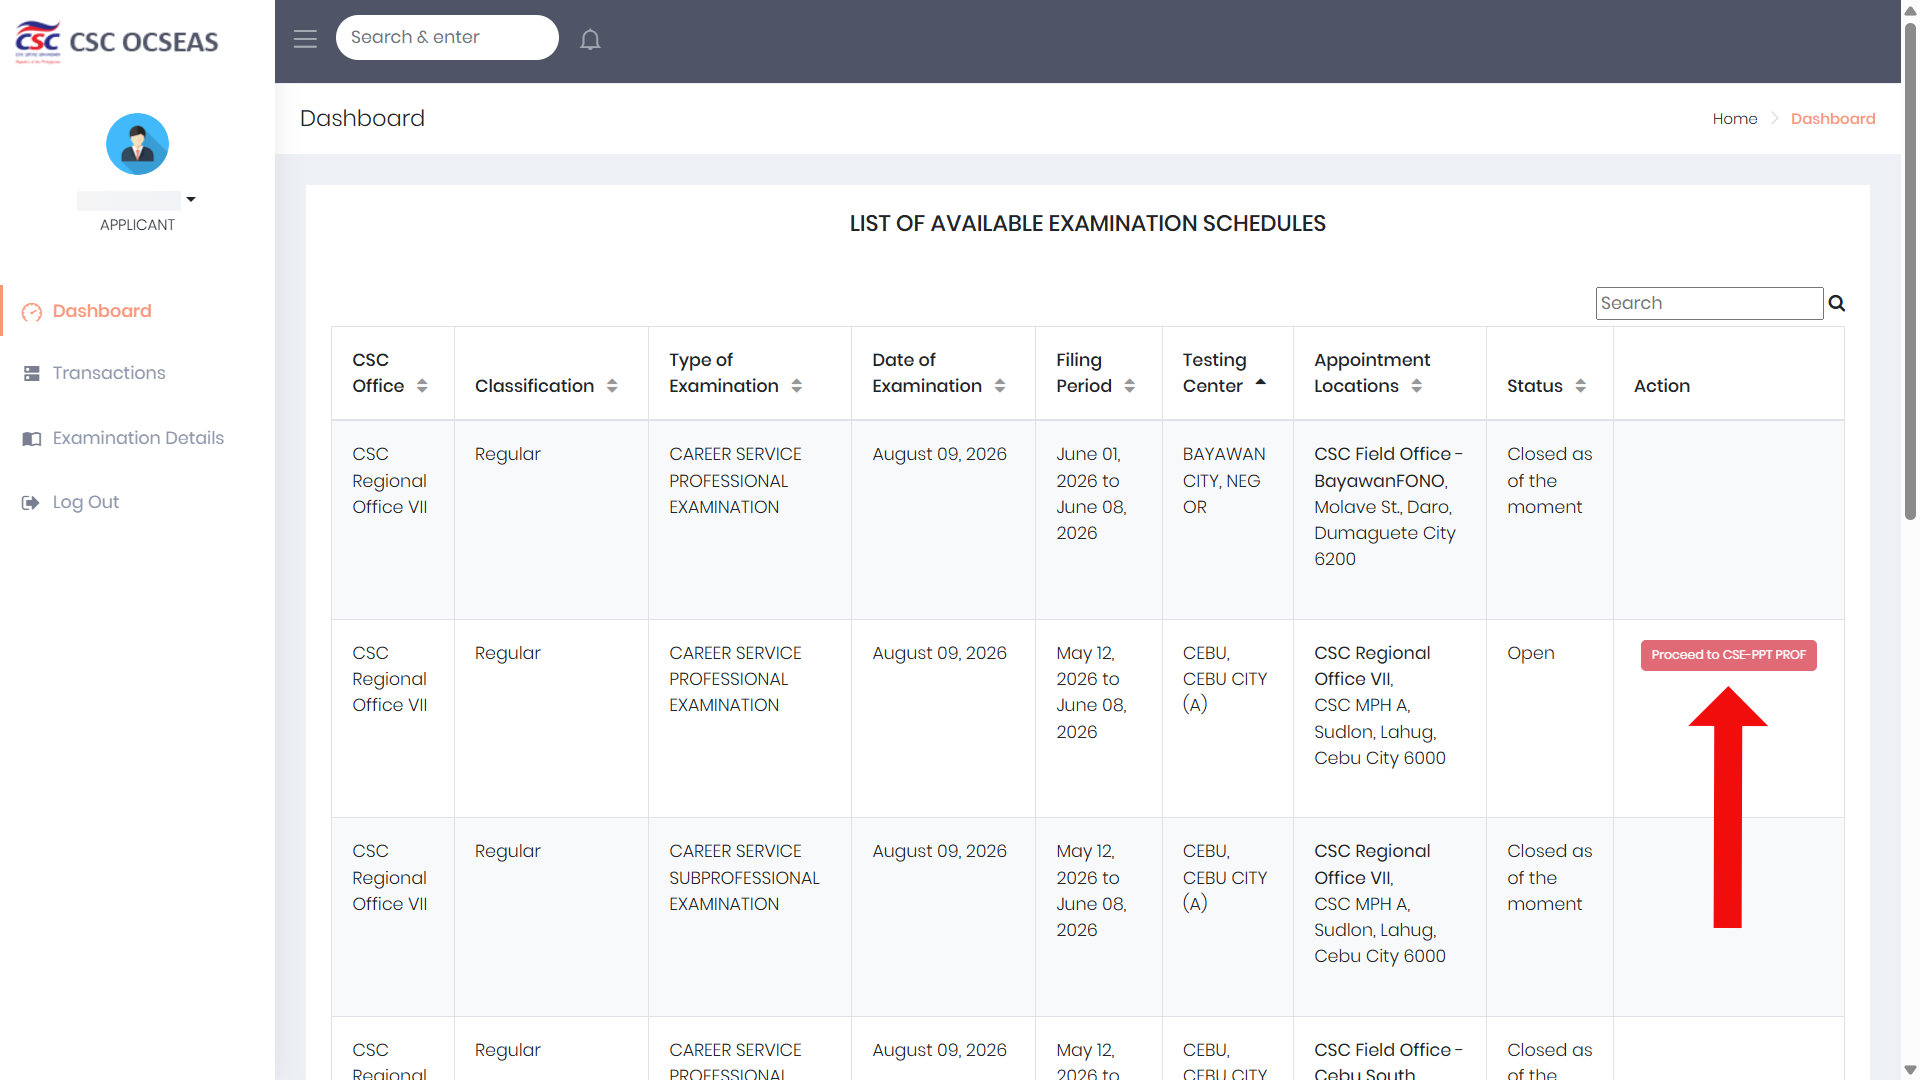
Slots are available on a first-come, first-served basis, and a schedule may close the moment its target number of applicants is reached – even before the official deadline. If you see an open slot for your preferred date and testing center, reserve it immediately.
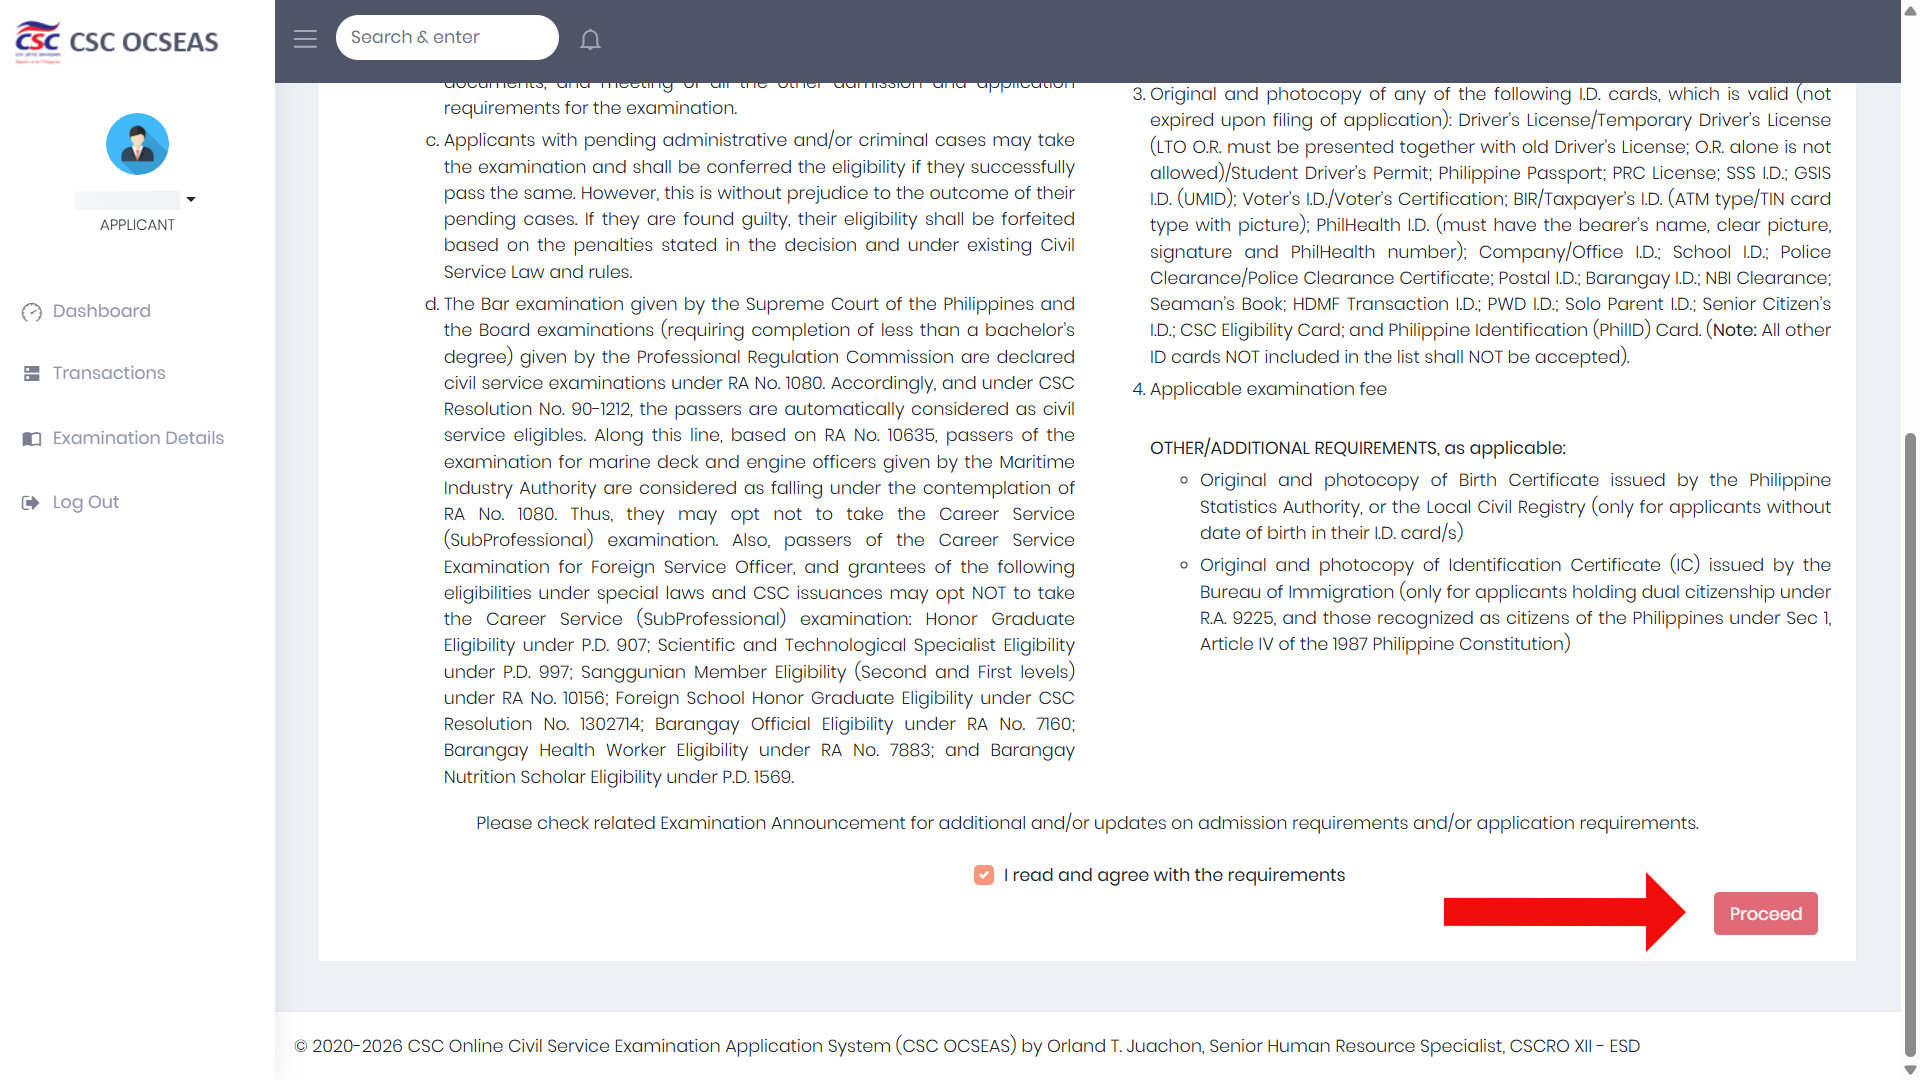
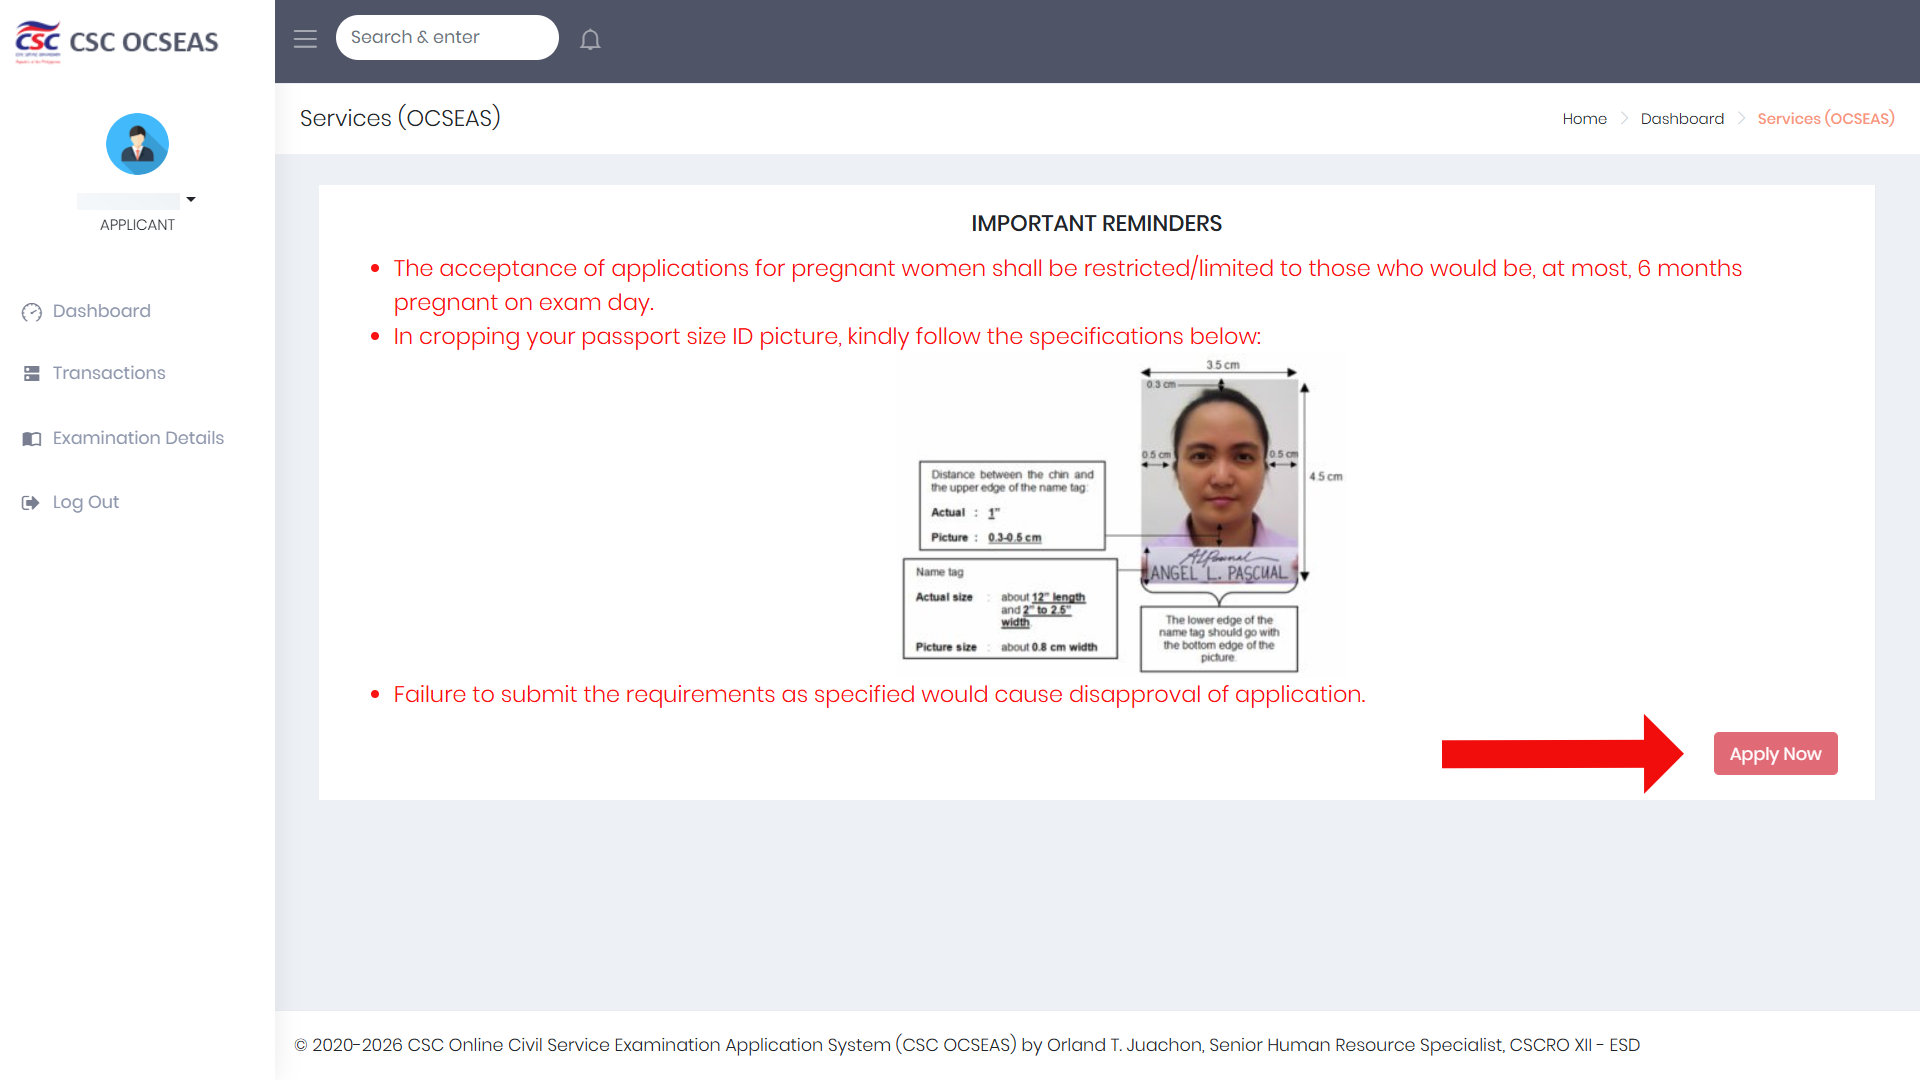
- Read the Admission Requirements and Application Requirements page. Scroll down and check the box that says “I read and agree with the requirements,” and then click Proceed.
- Read the important reminders carefully. These often contain specifications of your passport-size ID picture, among others. Click Apply Now to proceed to the application form.
Phase 3: Fill Out and Submit the Application Form
- Complete the Application Form in full, as completely and accurately as possible. Required fields are marked with a red asterisk (*). When you’re done, click Submit Application at the bottom of the page.
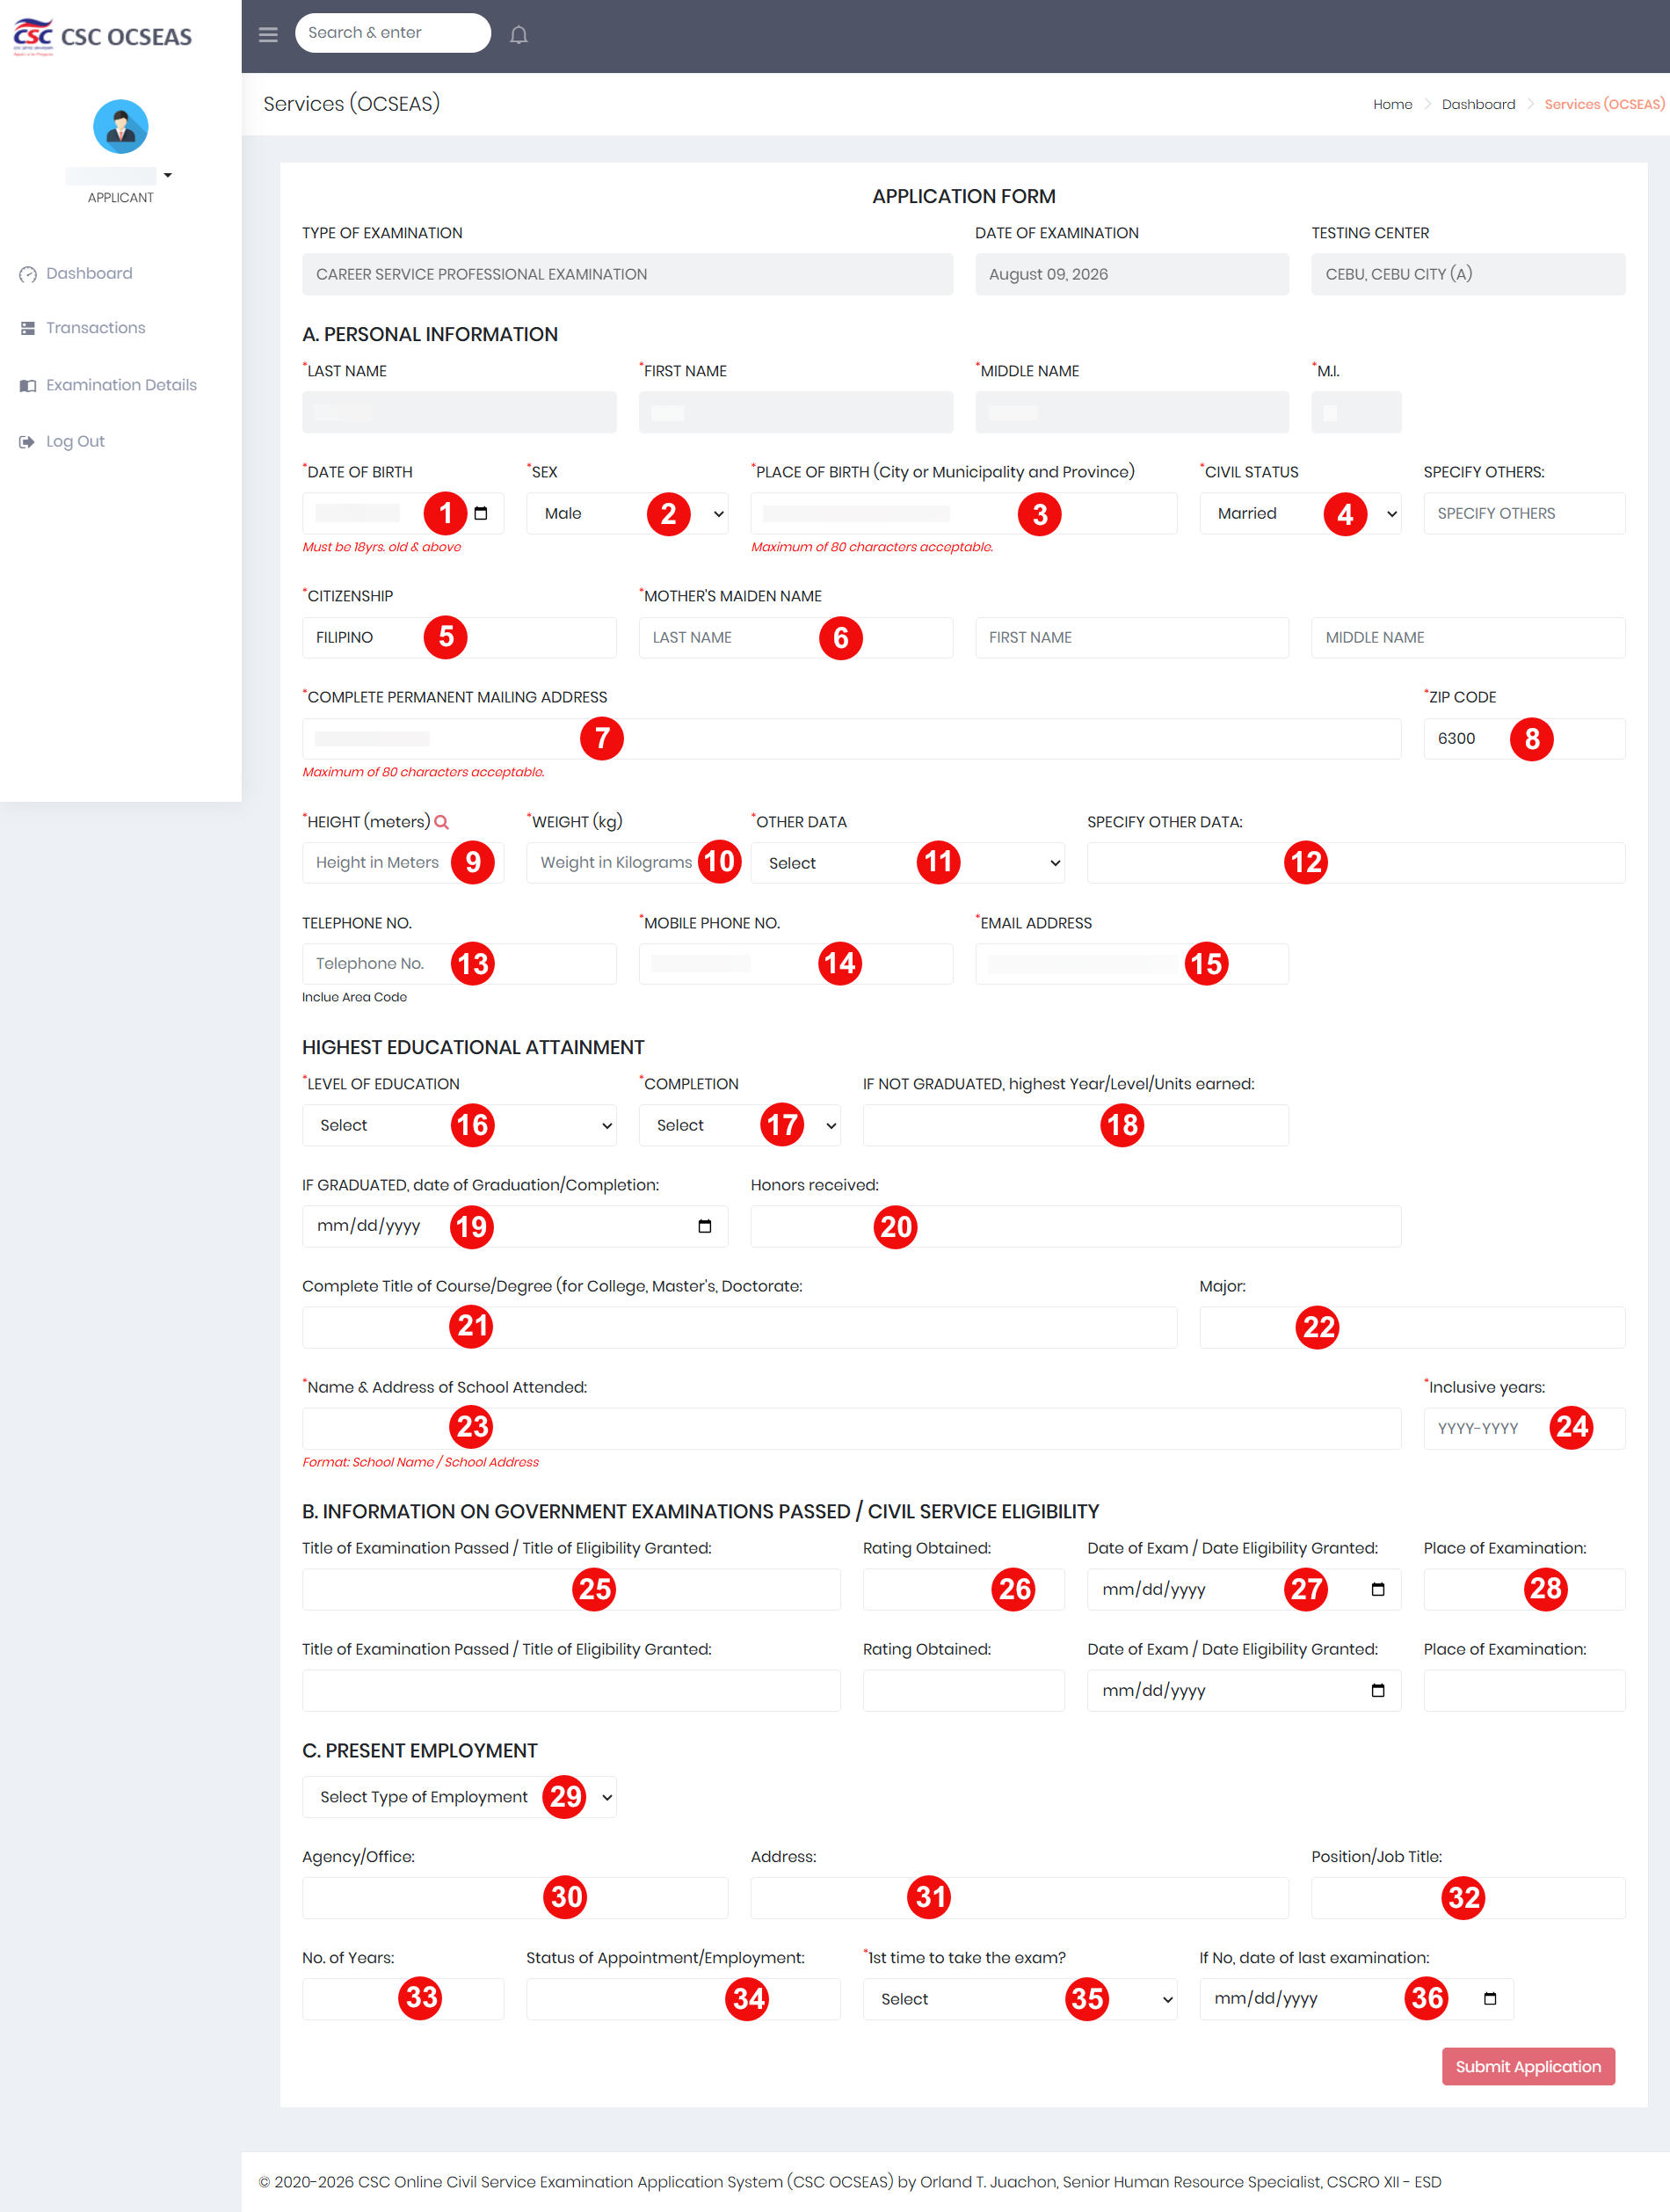
- Review your application on the summary page. If everything looks right, click Save & Proceed. If you noticed a mistake, click Edit Application and fix it before moving on.
Phase 4: Upload Documents and Pick Your CSC Office
- Before uploading your documents, select your preferred CSC office for your personal appearance. Choose one where you can realistically travel to, because you’ll need to show up there in person. Then prepare your required documents: the passport-size ID picture, your valid government-issued ID, and the signed Certificate of Consent (you can download it from the page).
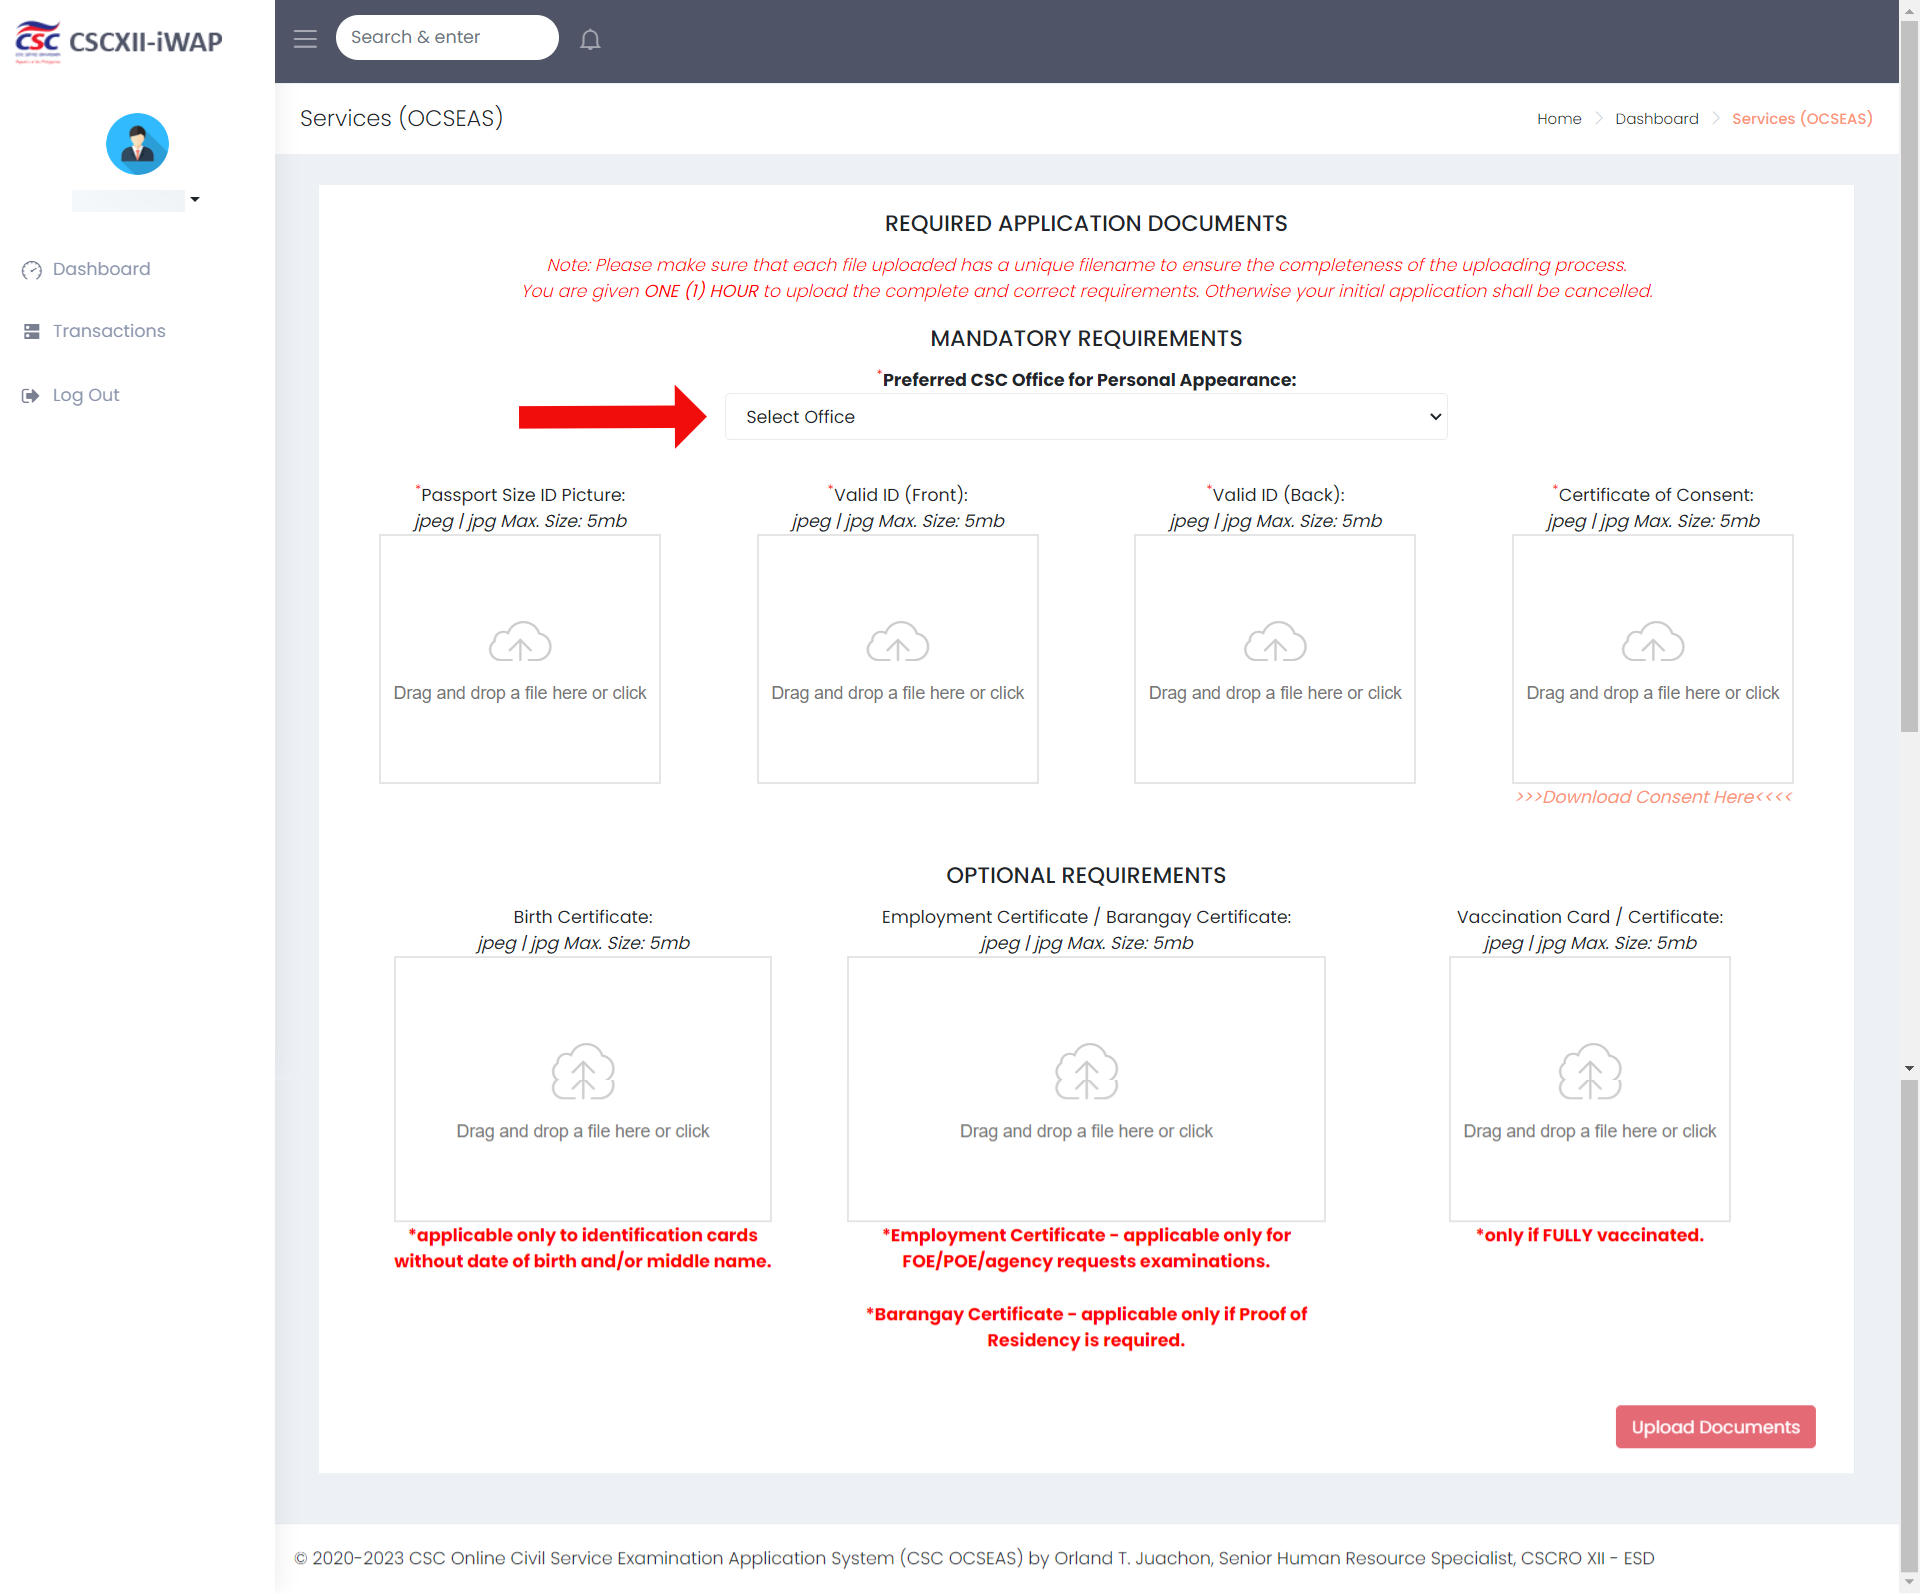
- Upload your documents one by one, making sure that each scan or photo is clear and readable, and then click the Upload Documents button to submit your files.
- If everything goes well, you’ll see a message confirming that you’ve successfully submitted your application. OCSEAS will notify you of your application status by email, so keep checking it. Take note that a submitted application is not the same as a confirmed slot; it still has to be reviewed and approved by the CSC.

Phase 5: Schedule Your Appointment
- Once you receive an email that your application has been approved, log back in to OCSEAS at https://ocseas.csc.gov.ph. Do this as soon as possible because only have a short period of time – usually 48 hours – to set an appointment.
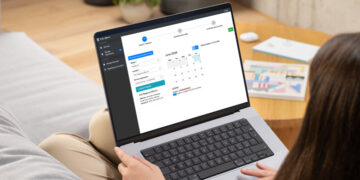
- Go to the Transactions page and click the calendar icon to set your personal appointment schedule.
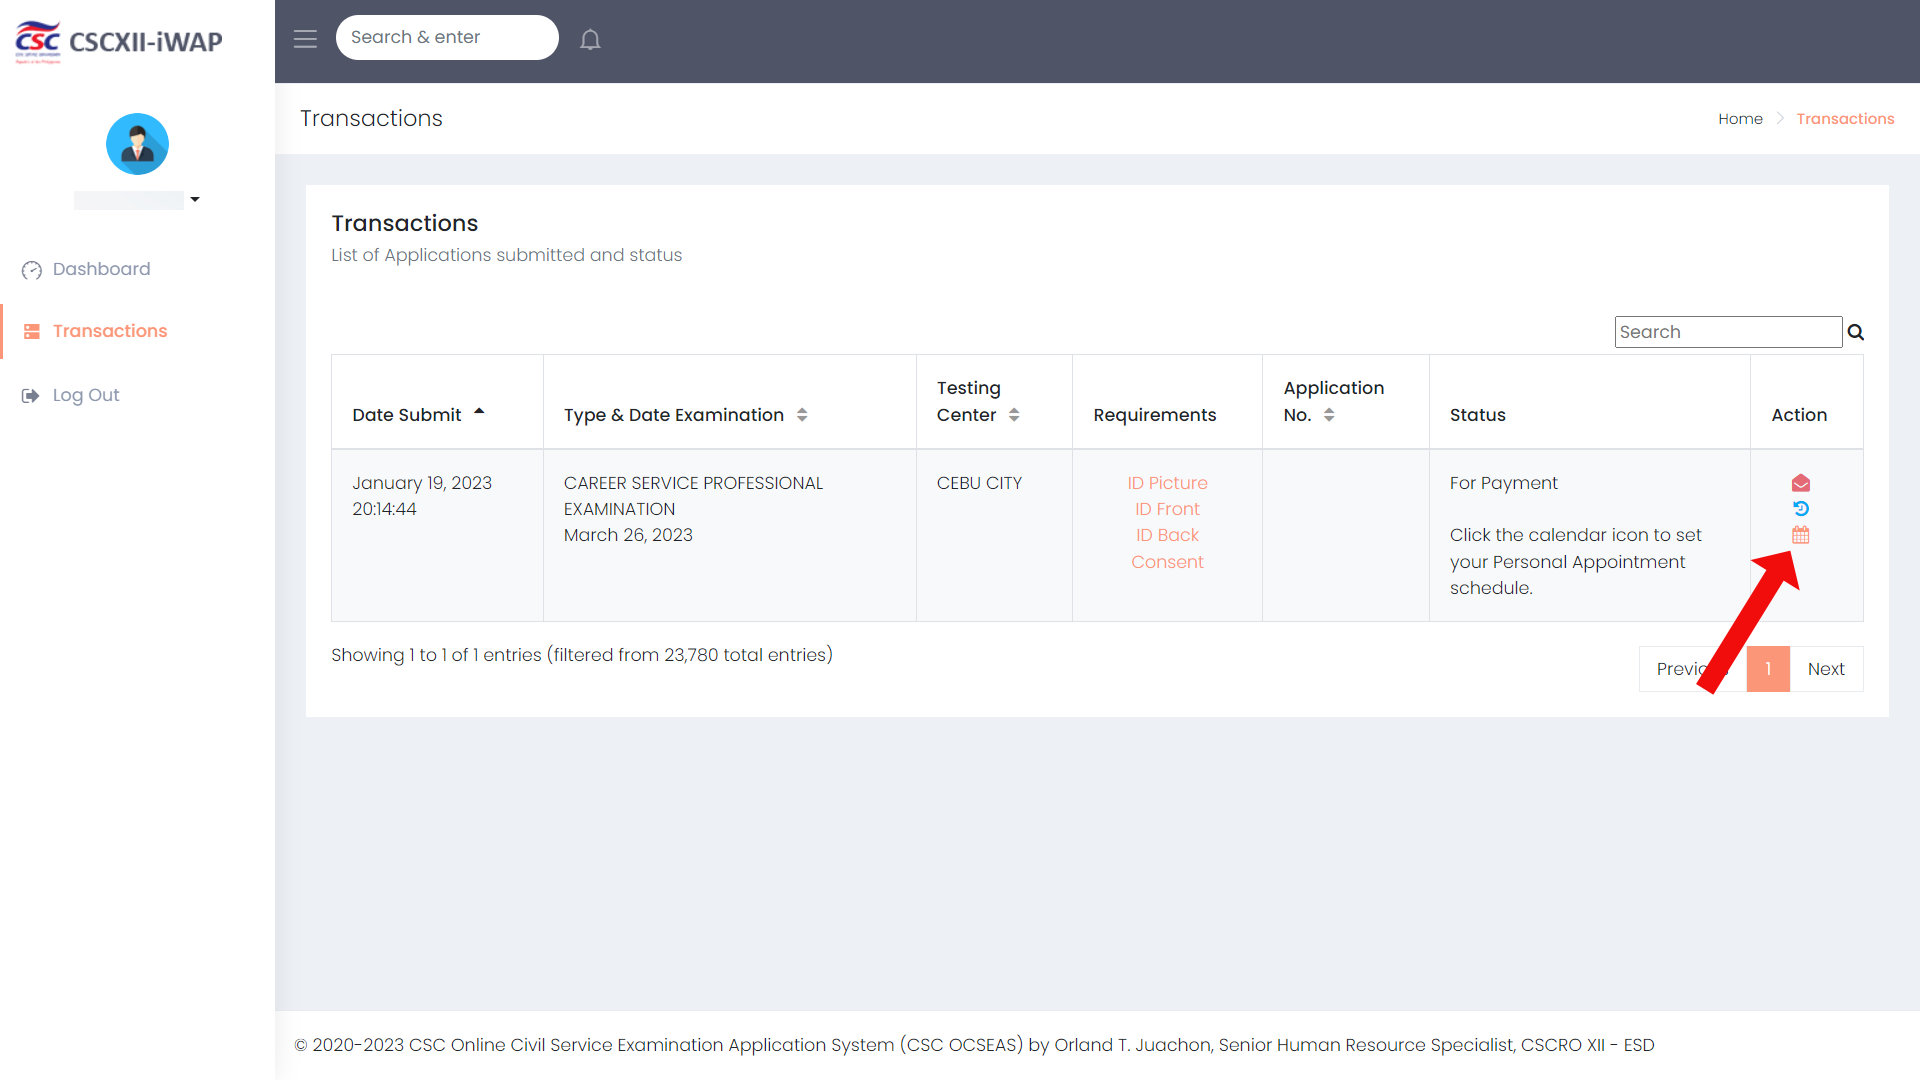
- Pick your appointment date on the calendar. After choosing your appointment date, click Submit.

Phase 6: Personal Appearance and Payment
- Show up at your selected CSC office on your scheduled appointment date. Bring all of the following:
- Printed application form
- Original and photocopy of ID card
- Four (4) pieces of your original ID picture
- Signed Certificate of Consent
- Any other documents that apply to your case (e.g., birth certificate)
- ₱500 in cash for the examination fee
After your appointment, you will receive a final email from the CSC with a list of reminders for exam day. Take the time to read these reminders to avoid problems and inconveniences on the day of the exam.
Important reminder: CSC offices have a dress code. Sleeveless shirts and blouses, shorts and short pants, and slippers are not allowed at the CSC office.
Frequently Asked Questions
How much does the civil service exam application cost?
The CSE-PPT costs ₱500, which will be paid in cash at the CSC office during your personal appearance. The computerized version (COMEX), where available, costs ₱680 and delivers results faster. The fee is the same whether you take the Professional or Sub-Professional level.
Can I complete the entire civil service application form online?
Almost. You create your account, update your profile, reserve a slot, fill out the application form, and upload documents entirely online through OCSEAS. The only in-person step is your personal appearance at the CSC office, where you submit your original documents and pay the ₱500 fee.
What documents do I need for the civil service online application?
You’ll need to submit these documents: a passport-size ID picture, a valid government-issued ID, and a signed Certificate of Consent. You may also need a PSA birth certificate if your date of birth and/or middle name isn’t printed on your ID. For your personal appearance, bring the printed application form, your original ID, four original ID pictures, the signed Certificate of Consent, and the ₱500 fee.
Is OCSEAS the only way to apply for the civil service exam?
No. While OCSEAS is the main online system, some CSC regional offices use CSC eServe instead, and walk-in applications are accepted at certain offices. Check your region’s official examination announcement to confirm which process applies where you intend to take the exam.
Final Thoughts
Filing your civil service application online is genuinely easier than it used to be, and once you understand the OCSEAS process, it takes far less time than the old walk-in system ever did. The two things that decide whether it goes smoothly are your preparation and timing. Get your documents ready first and apply early in the filing window before slots disappear.
I last verified this guide in June 2026, based on the OCSEAS process and the ₱500 CSE-PPT fee in effect for the current exam cycle. Filing periods and schedules change with each batch, so always cross-check the latest CSC examination announcement for your exact dates.
I hope this walkthrough makes your application stress-free. Bookmark this page (press Ctrl + D) so you can come back to it on filing day. If you have any questions about the civil service online application process, just leave a comment below and we’ll sort it out.