Interested to know how to get a police clearance for business, legal or employment purposes? Here’s some good news! You can now get your police clearance online through the National Police Clearance System (NPCS) of the Philippine National Police (PNP).
The police clearance is a document that serves as a background check by the police, and lists the criminal or derogatory records that the holder may have, if any. Just like the NBI clearance, the police clearance is one of the requirements for employment in the Philippines and abroad. It proves that the applicant is a law-abiding citizen and has not committed a crime nor is wanted by the law.
The police clearance can also serve as a valid ID for your transactions and dealings with government agencies and private companies. However, not all government bodies consider it as a valid ID. For example, the police clearance is not a valid ID for DFA passport applications.
Information that are included in the police clearance are: name, address, birth place, birth date, citizenship, and gender. It also contains the holder’s photograph, signature and thumbmark or fingerprint. Each clearance has a unique QR code and number, and is valid for only 6 months.
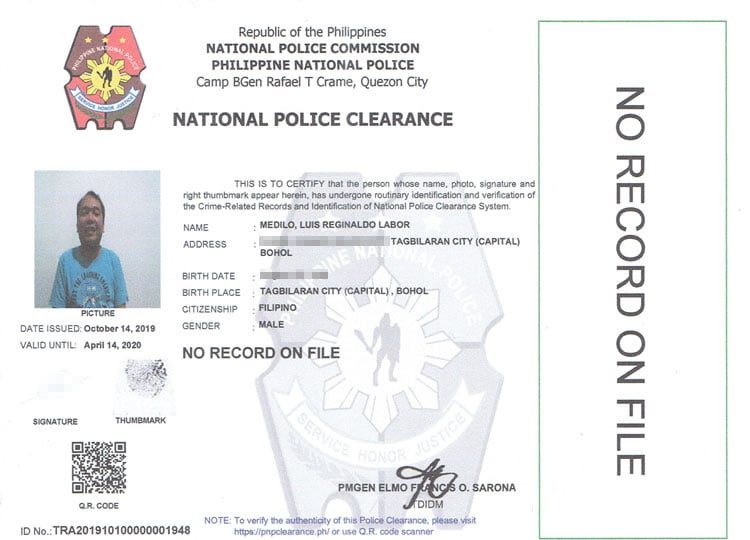
Table of Contents
What is the National Police Clearance System?
The National Police Clearance System (NPCS) is a centralized web-based facility for the checking of criminal records and the issuance of police clearances. The online system is a significant departure from the old setup in which each city or town has its own database of criminal records. The NPCS taps into an up-to-date, nationwide database for the verification of records.
Under the NPCS, criminals and lawless elements will have a harder time hiding from the law due to its nationwide coverage. Under the old system, criminals and wanted persons can escape detection in a different town or city because each locale has its own database.
The NPCS makes it easier and faster for applicants to acquire their police clearances through the Internet. Through the web-based platform, applicants can simply provide their personal information and pay the police clearance fee online. Applicants will still need to personally appear at a police station for verification and processing.
Local Police Clearance vs. National Police Clearance
What are the differences between the local police clearance and the national police clearance?
The two types of police clearance differ by scope. The local clearance only covers the city or municipality while the national clearance covers the whole country.
This means that you can use the national clearance anywhere in the Philippines. For example, if you want to apply for a job in Manila but you’re from Cebu, you don’t need to apply for a local police clearance in Manila – you can use the national police clearance instead.
Furthermore, the national police clearance is a multipurpose clearance, so you can use it for any purpose, while the local police clearance has to have a specific purpose (such as local employment) which will be printed in the certificate.
The local police clearance also has more requirements, such as community tax certificate (cedula), barangay clearance and valid IDs, while the national clearance only requires one valid ID.
To summarize, these are the advantages of the national police clearance over the local clearance:
- Wider scope or coverage – The national clearance can be used anywhere in the Philippines.
- Multipurpose – It can be used for any purpose.
- Fewer requirements – You only need to present one valid ID.
- Faster processing – If you applied online, your data no longer need to be inputted by the processor, so you will get your clearance faster.
As of now, online applications are not yet required, so you can get a national police clearance as a walk-in applicant. Just ask for it at the police station and their officers will process it personally.
National Police Clearance Requirements
These are the police clearance requirements that you must present at the police station on the date of appointment:
- One (1) valid ID,
- Reference number, and
- Official receipt.
You will be provided with the reference number after submitting your application to the NPCS. The official receipt will be generated after payment.
The PNP requires a valid ID for your clearance application. Here is a list of valid IDs accepted by the PNP:
- AFP ID
- Alien Certificate of Registration
- BFP ID
- BJMP ID
- Barangay Residence Certification
- Birth Certificate
- GSIS UMID
- IBP ID
- LTO Driver’s License
- LTOPF ID
- Marina ID
- OFW ID
- Pag-IBIG ID
- Passport
- PCG ID
- PNP ID
- PRC License
- PWD ID
- PhilHealth ID
- Philippine Identification (PhilID) or National ID
- Postal ID
- SSS ID or SSS UMID
- School ID with Registration Form
- Senior Citizen’s ID
- TIN ID
- Voter’s ID
Your IDs must be unexpired, original (not photocopied), and must have your full name, clear photo, and signature.
How to Register to the National Police Clearance System
To apply for a national police clearance, you must first register to the National Police Clearance System (NPCS). Registration is free and there are no documents to submit.
Step 1: Open the National Police Clearance System website
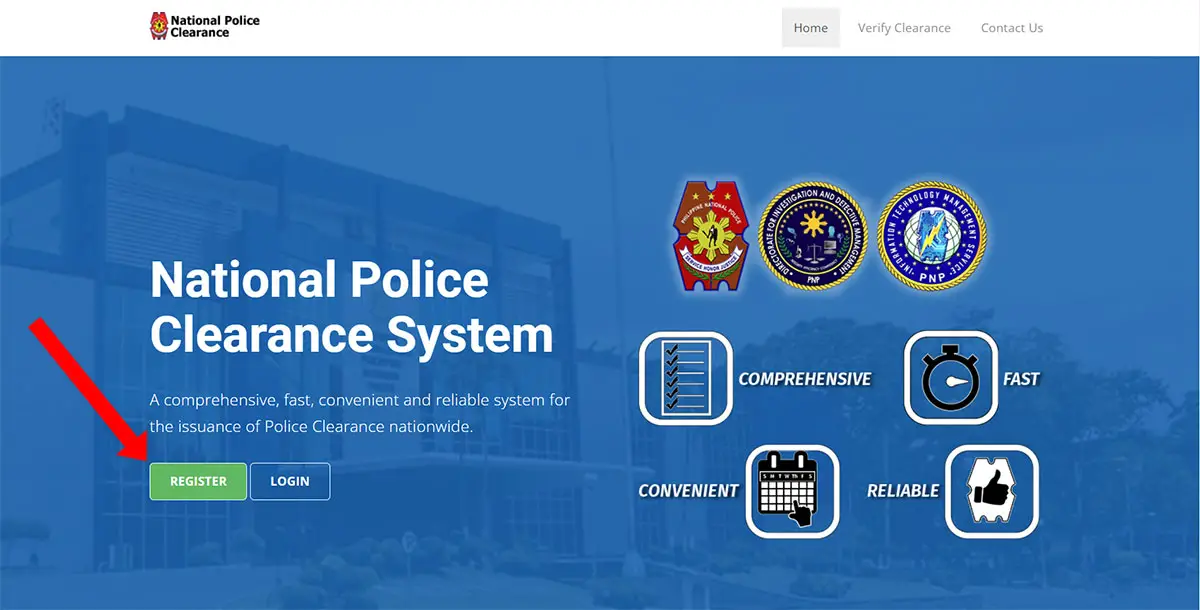
Using your computer or smartphone, open the National Police Clearance System (NPCS) website at https://pnpclearance.ph.
If you’re a first-time applicant, click the “REGISTER” button.
Read the terms and conditions. Check all the checkboxes and click “Next.” You will have to check all the boxes until you see the “I Agree” button.

Step 2: Enter your registration details
Fill out the applicant registration form. Required fields are indicated by an asterisk (*).
- Email address – Enter an active and working email address.
- Password – Set your account password. Make sure to use a password that cannot be easily guessed.
- Confirm password – Retype your password.
- First name – Enter your first name or given name.
- Middle name – Enter your middle name (optional).
- Surname – Enter your surname or last name.
- Qualifier – If your name has a suffix such as Sr, Jr or III, select it here.
- Gender – Indicate whether you’re “Male” or “Female.”
- Birth date – Enter your date of birth in MM/DD/YYYY format.
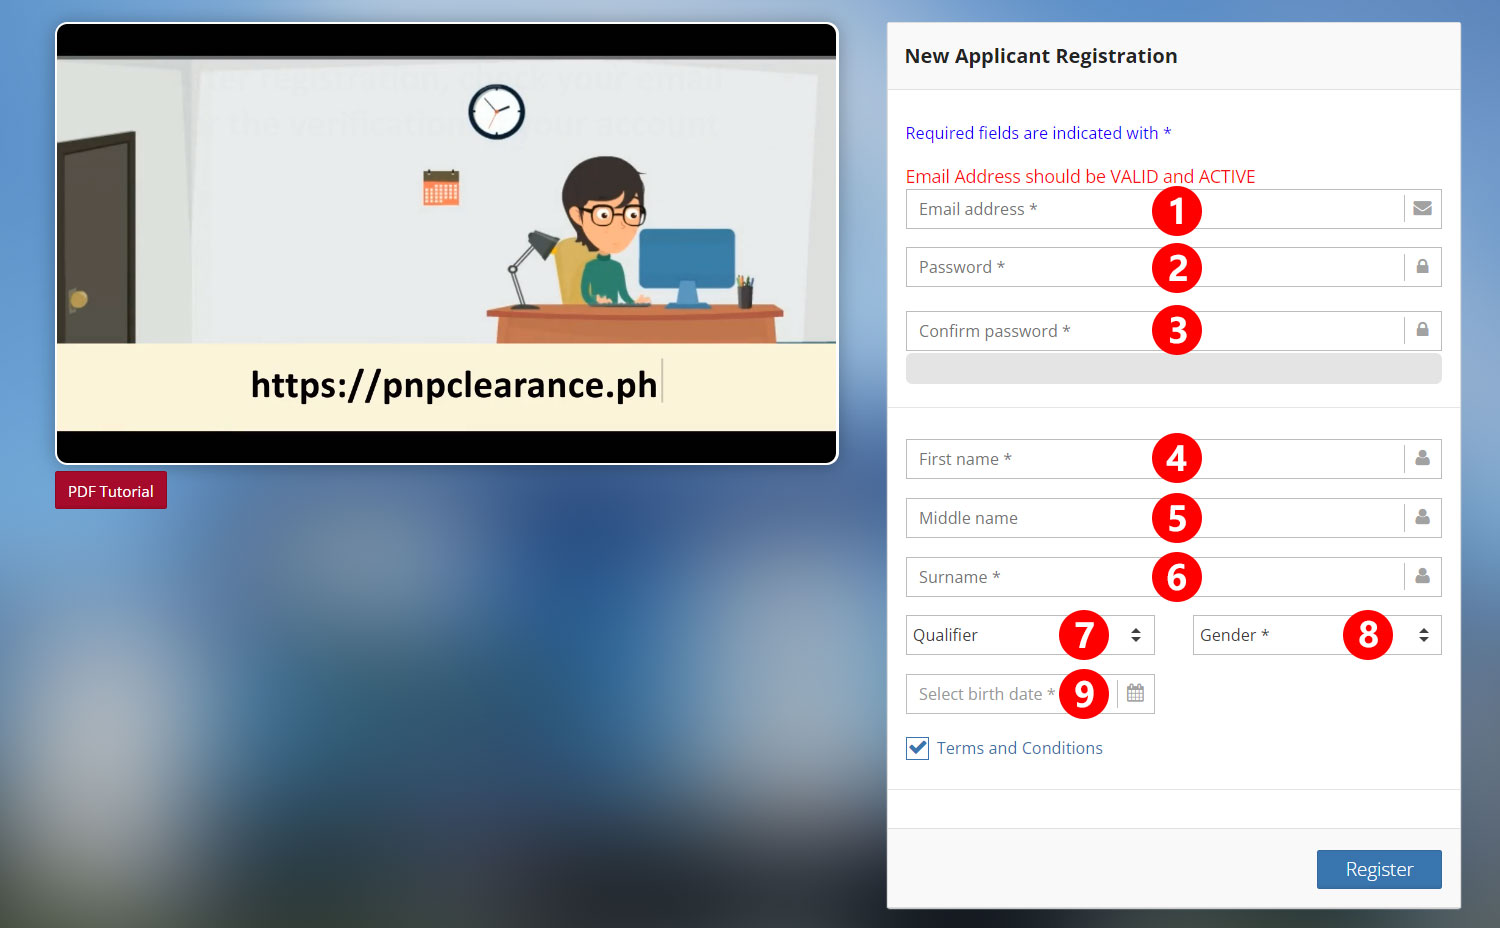
Review your provided information and then click “Register.”
A popup will appear with the message, “Do you want to save it? Please check all the information before you proceed. Editing is not allowed after saving.”
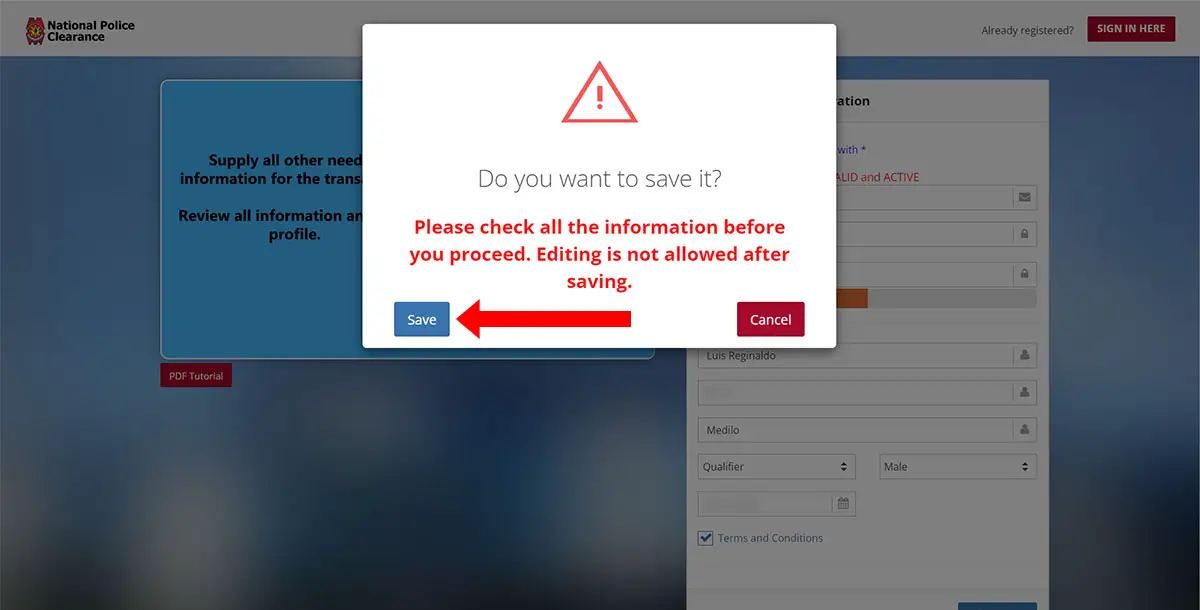
If you’re sure that all provided information are correct and accurate, click “Save.” Otherwise, click “Cancel” to modify your details.
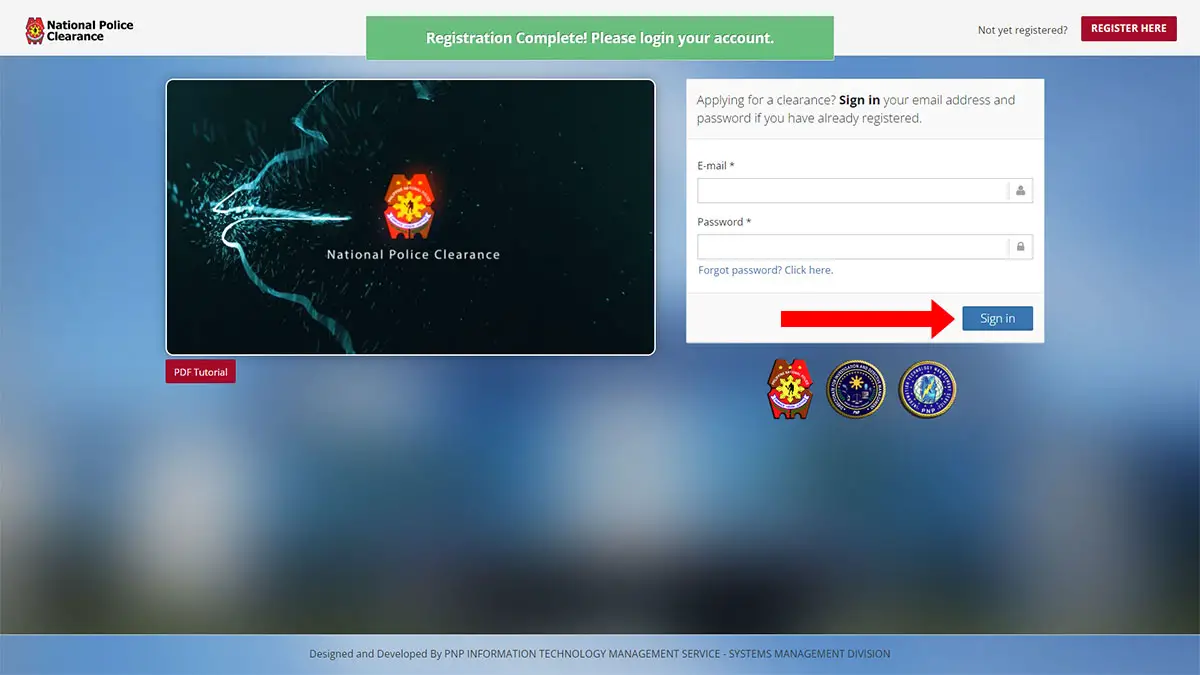
Step 3: Login to your account
You have successfully registered with National Police Clearance System. Enter your email address and password, and click “Sign in” to login to your NPCS account.
Step 4: Fill out your applicant profile
You’re now logged in to the NPCS portal. But first, you must fill out your applicant profile before you can proceed with the police clearance application and appointment.
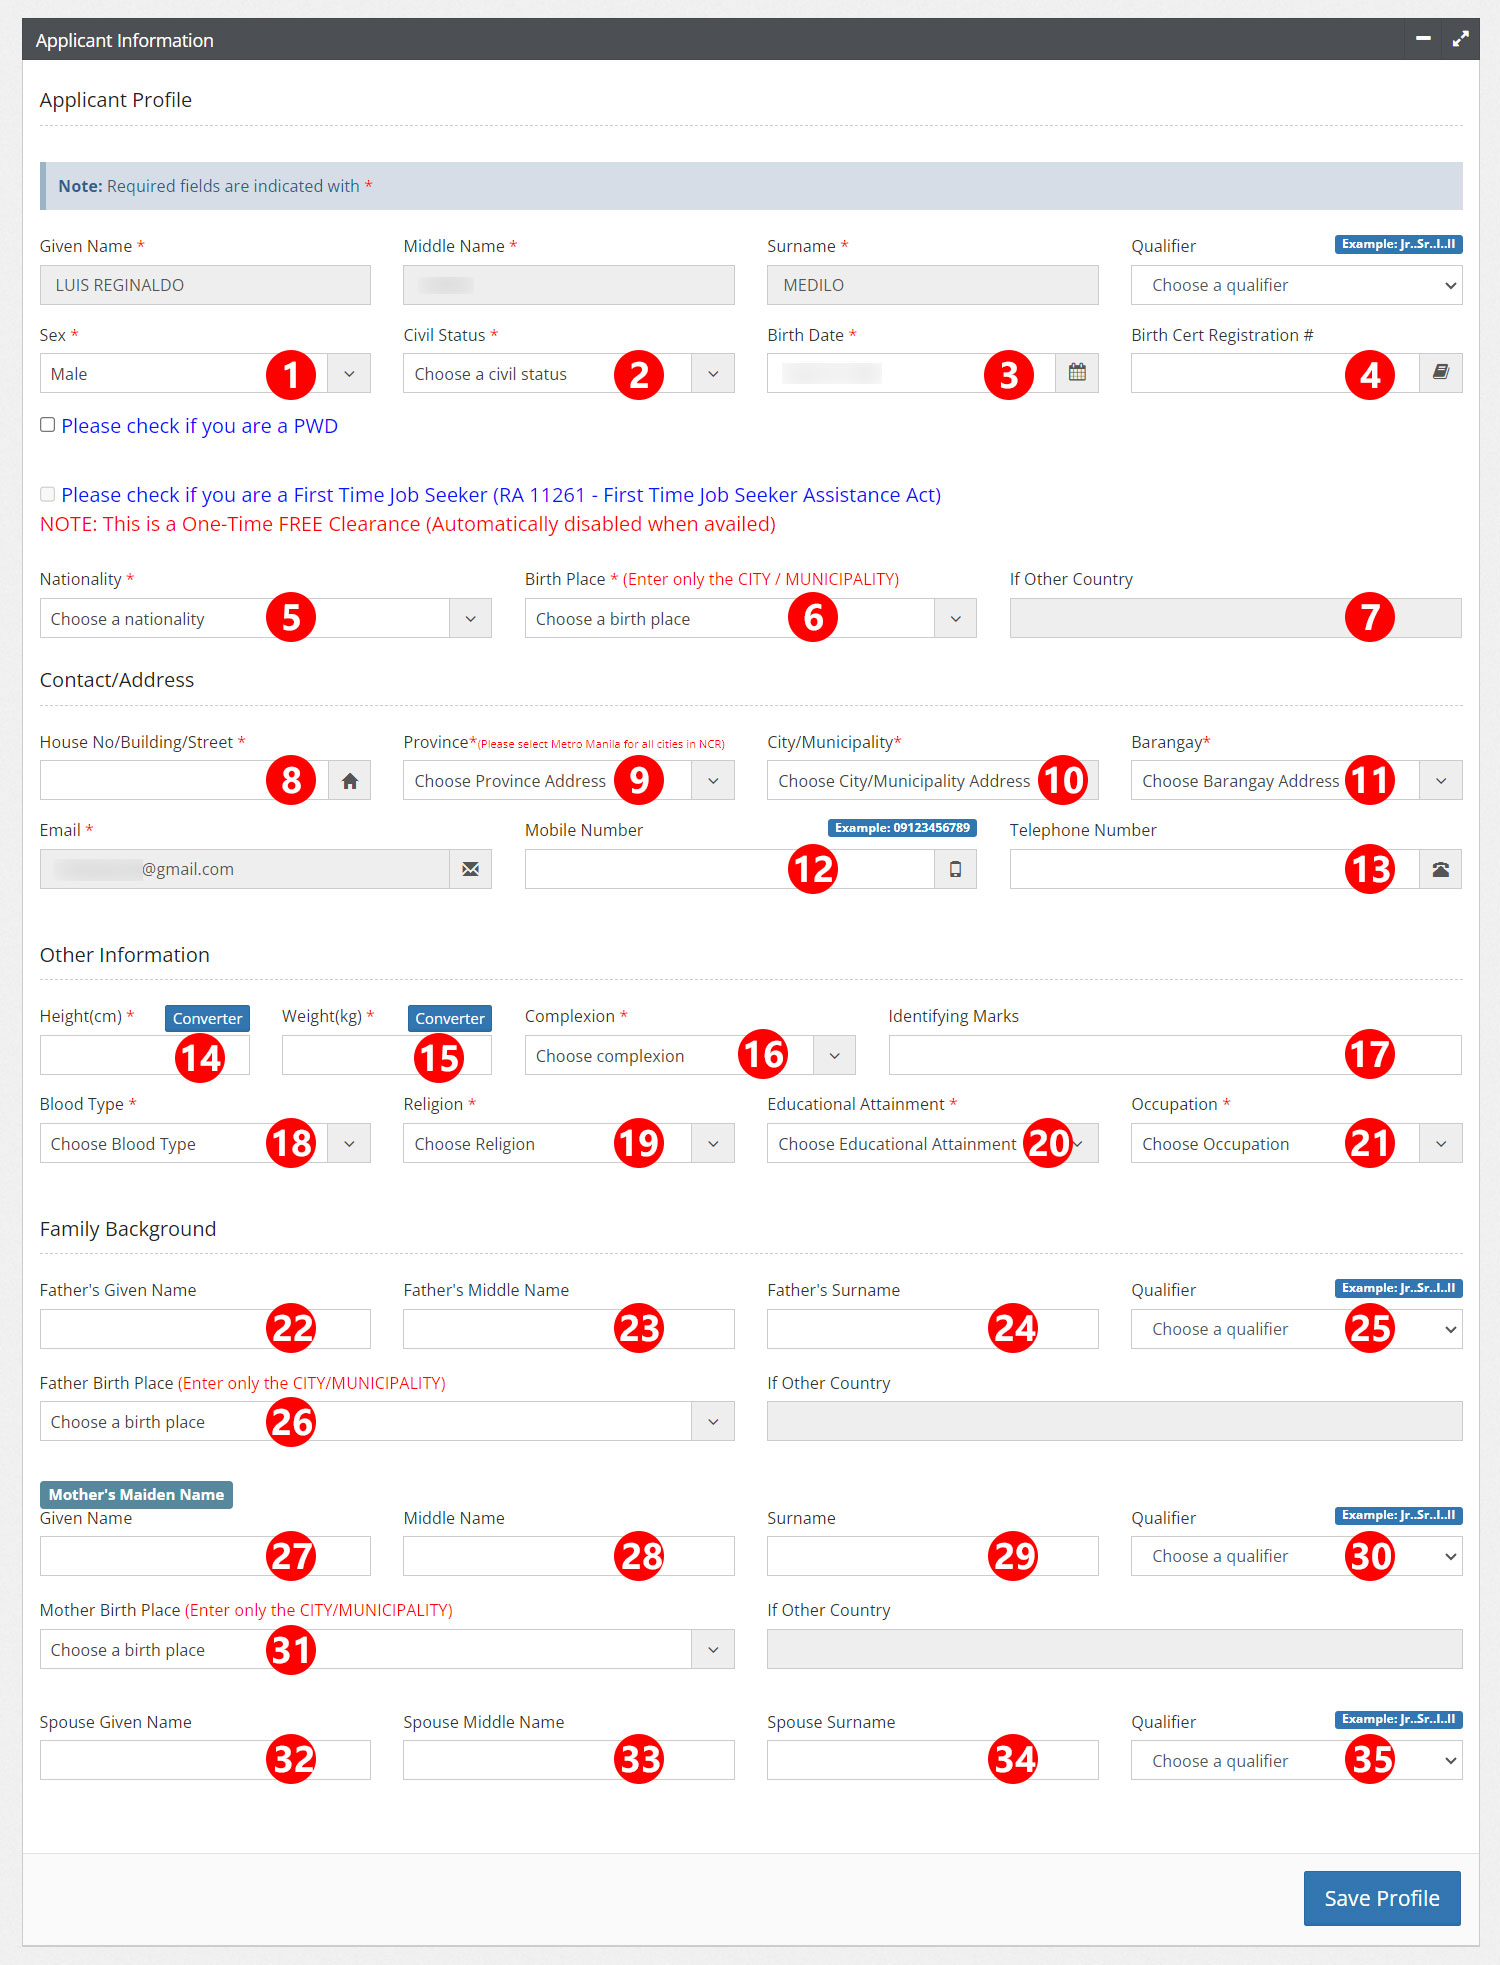
Enter all the required information for your profile. Required fields are indicated by a red asterisk (*).
- Sex – Your sex or gender was already selected during registration, but you can still change it.
- Civil Status – Select your civil status. For example: Married.
- Birth Date – Your birth date was selected during registration, but you can still change it.
- Birth Certificate Registration Number (optional) – If you have a birth certificate, enter its registration number here.
- Nationality – Choose “Filipino” if you’re a Filipino citizen.
- Birth Place – Type your place of birth. If you were born outside the Philippines, select “Other Country.”
- Birth Place (If Other Country) – Only enter this information if you’re born outside the Philippines.
- House No./Building/Street – Provide your home address including street name.
- Province – Choose the province of your address.
- City/Municipality – Select your city or municipality.
- Barangay – Select your barangay based on your city/municipality.
- Mobile Number (optional) – Enter your 11-digit cellphone number starting with “0”.
- Telephone Number (optional) – Enter your telephone or landline number, if any.
- Height (cm) – Enter your height in centimeters. Click “Converter” to convert feet and inches to centimeters.
- Weight (kg) – Enter your weight in kilograms. Click “Converter” to convert pounds to kilograms.
- Complexion – Select your skin complexion. For example: Brown.
- Identifying Marks (optional) – If you have any identifying marks such as a mole, describe it here.
- Blood Type – Choose your blood type. If you don’t know your blood type, select “Unknown.”
- Religion – Select your religion. For example: Roman Catholic.
- Educational Attainment – Indicate the highest level of education that you have achieved. For example: College Graduate.
- Occupation – Select your job or occupation. Choose “Unemployed” if you’re currently not working.
- Father’s Given Name (optional) – Enter your father’s first name.
- Father’s Middle Name (optional) – Enter his middle name.
- Father’s Surname (optional) – Enter his surname or last name.
- Qualifier (optional) – If your father’s name has a suffix such as Jr, III, IV, indicate it here.
- Father’s Birth Place (optional) – Select the city or municipality where your father was born. If he was born outside the Philippines, select “Other Country” and enter the country in the next field.
- Mother’s Maiden Given Name (optional) – Enter your mother’s first name before marriage.
- Mother’s Maiden Middle Name (optional) – Enter her middle name before marriage.
- Mother’s Maiden Surname (optional) – Enter her last name before marriage.
- Qualifier (optional) – If your mother’s maiden name has a suffix such as II, III, IV, indicate it here.
- Mother’s Birth Place (optional) – Select the city or municipality where your mother was born. If she was born outside the Philippines, select “Other Country” and enter the country in the next field.
- Spouse’s Given Name (optional) – Enter your wife’s or husband’s first name.
- Spouse’s Middle Name (optional) – Enter your wife’s or husband’s middle name.
- Spouse’s Surname (optional) – Enter your wife’s or husband’s last name.
- Qualifier (optional) – If your spouse’s name has a suffix such as Jr, III, IV, indicate it here.
Make sure that all your provided information are correct and accurate, then click “Save Profile.”
How to Schedule Your National Police Clearance Online Appointment
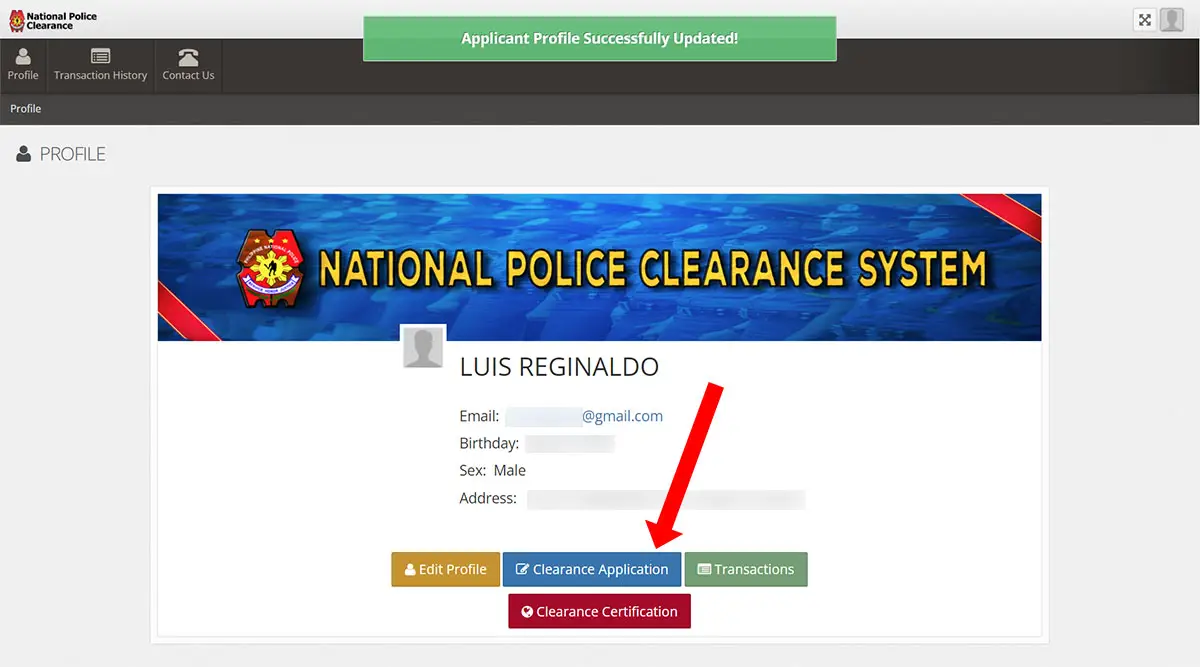
After successfully updating your applicant profile, you can now apply for the national police clearance and set your online appointment.
Click “Clearance Application” to begin.
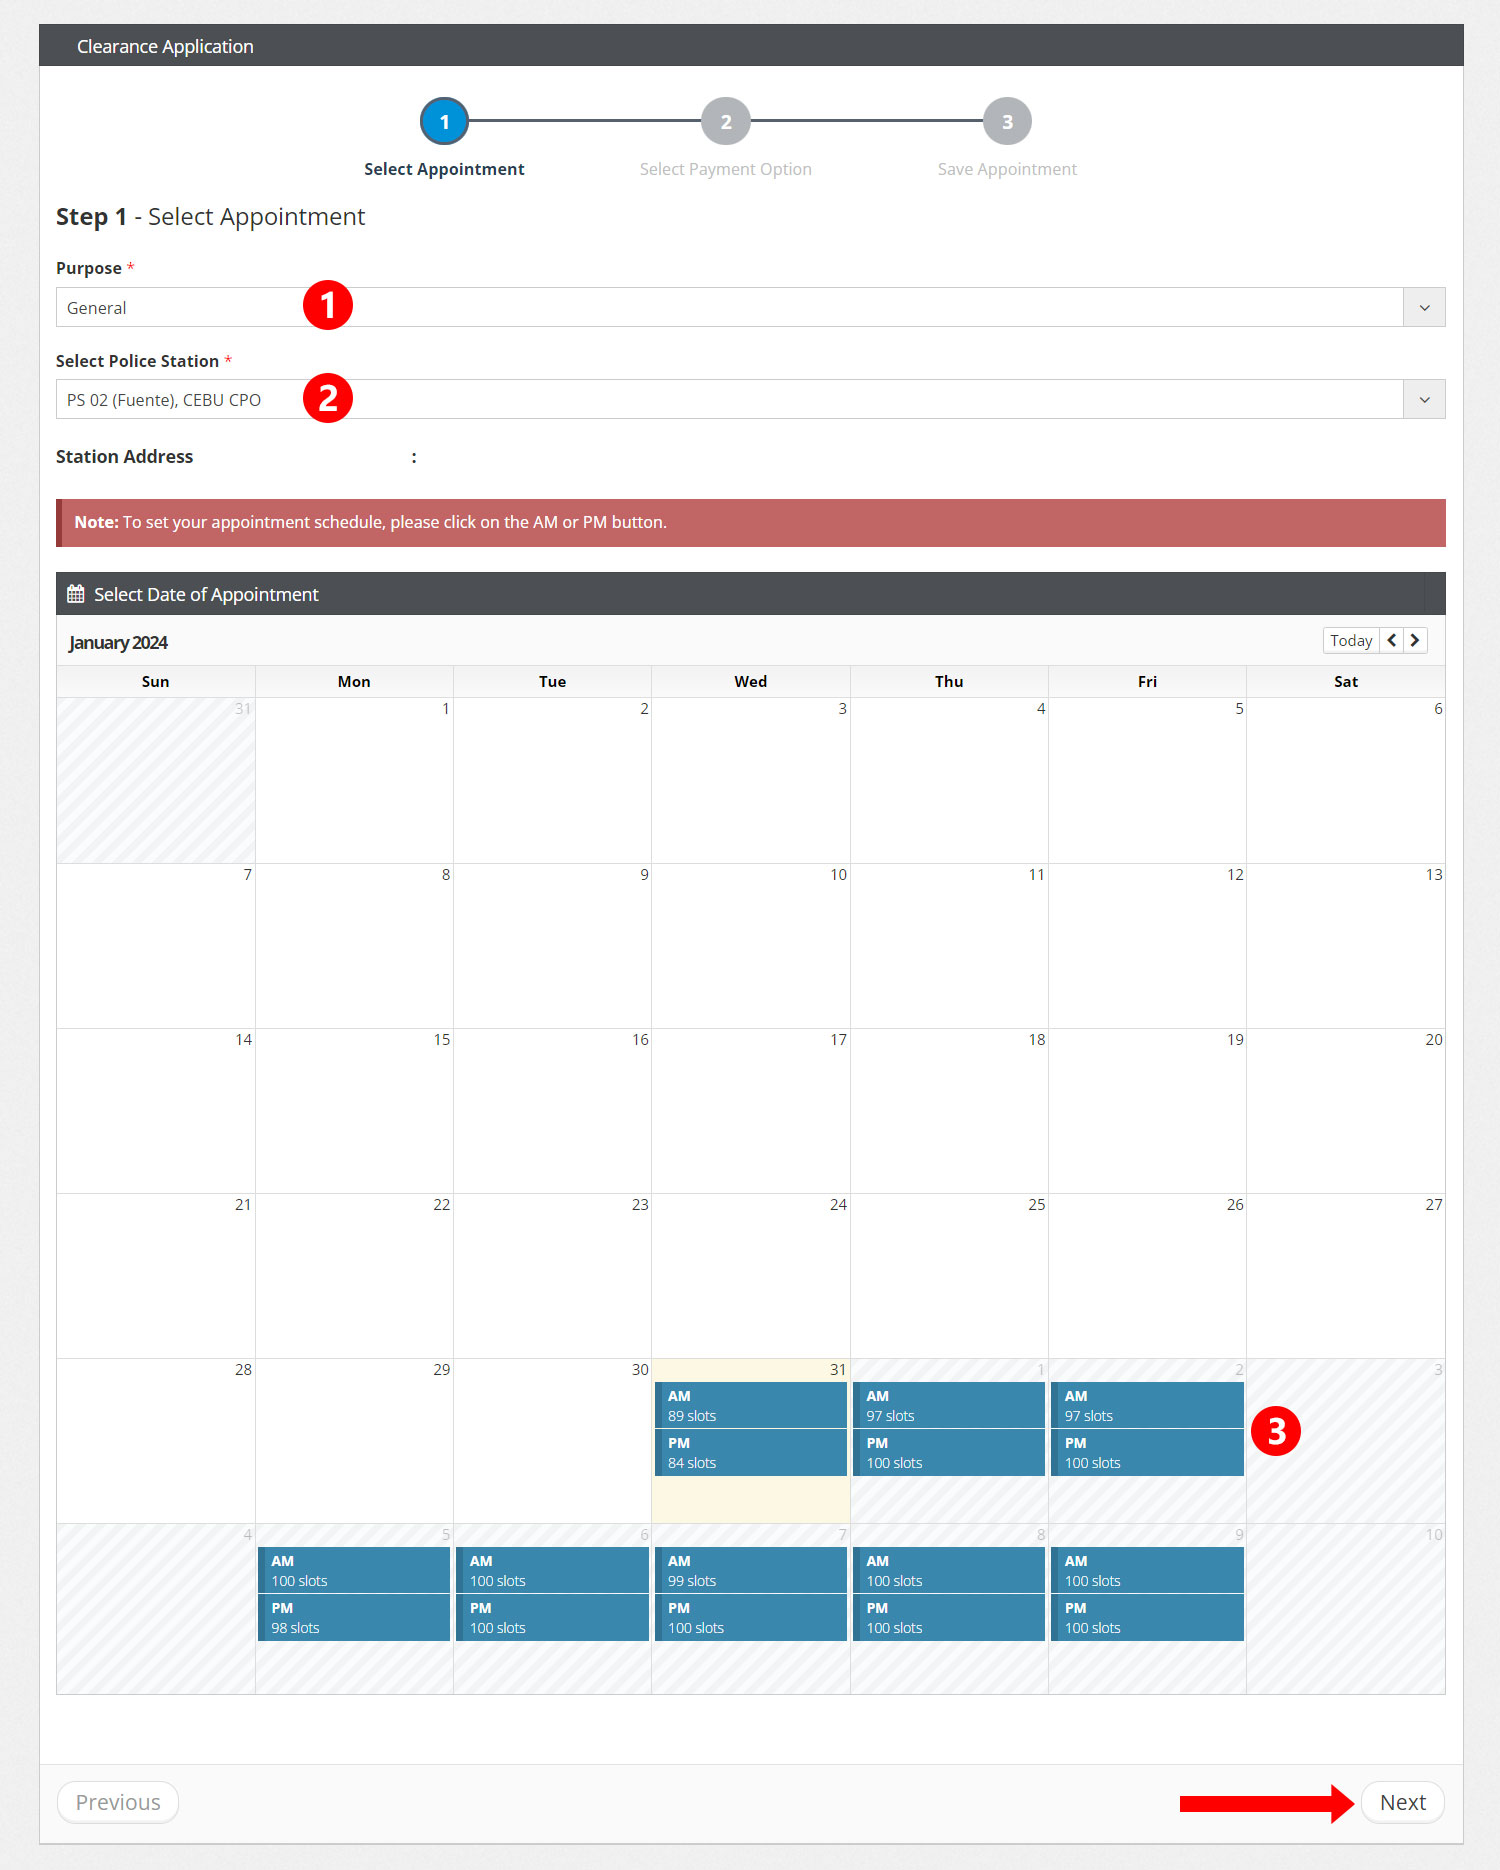
Step 1: Set your appointment schedule
Select the purpose of your application. In most cases, this should be “General.”
Set your appointment schedule by choosing the police station where you want to have your clearance processed. Start typing the location of the police station and the system will provide some suggestions.
After selecting the police station, choose the date and time of appointment (whether AM or PM). The timeslot will turn to green upon selection.
Click “Next” to proceed.
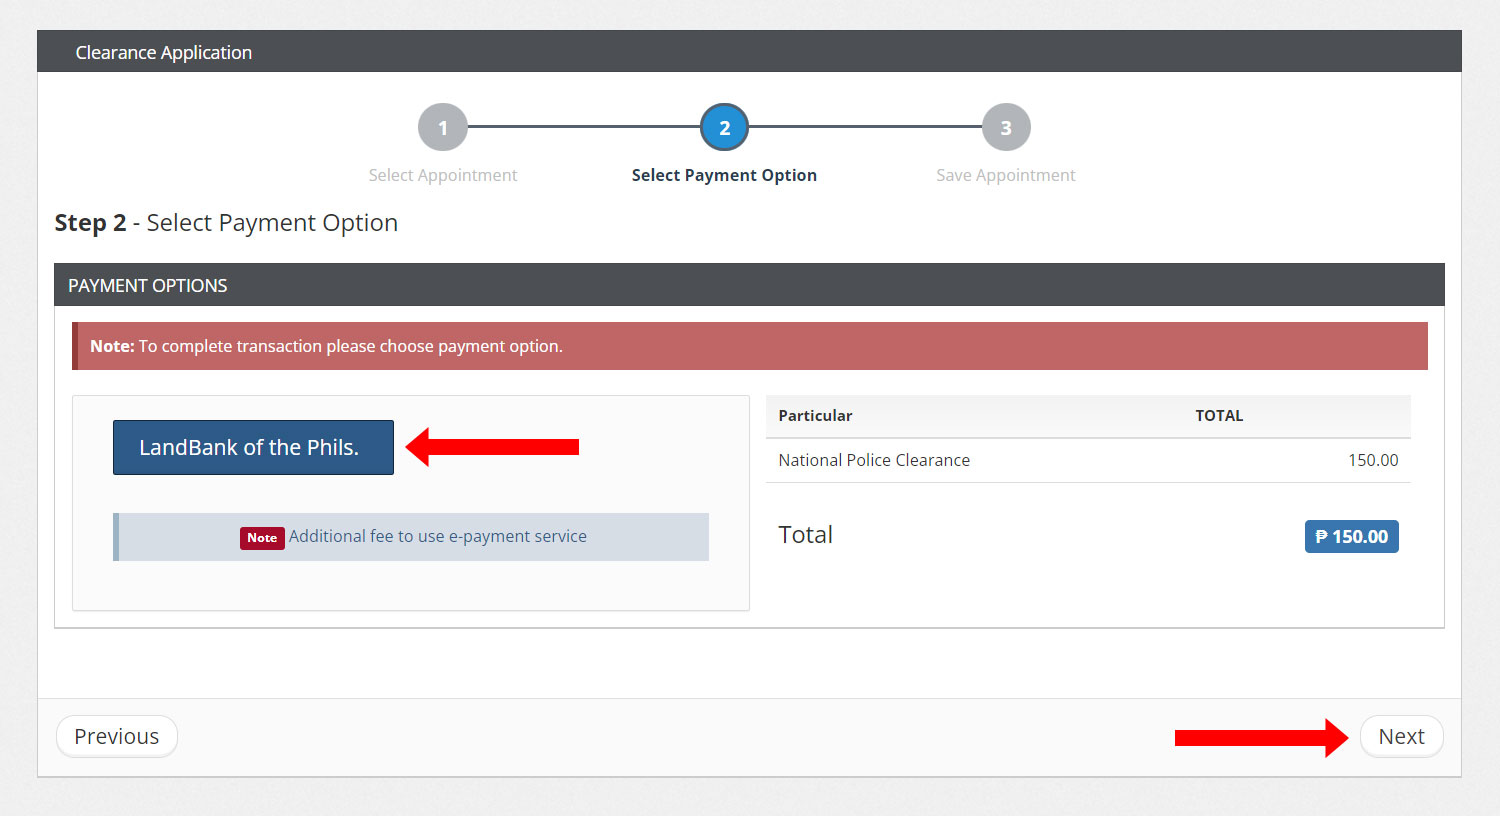
Step 2: Select your payment option
Choose your payment option. At the moment, only LandBank is available so click its button. But don’t worry, you can still pay using your GCash, Maya or another bank (we’ll show you in the next few steps).
It will show the police clearance fee which is currently ₱150. Click “Next” to continue.
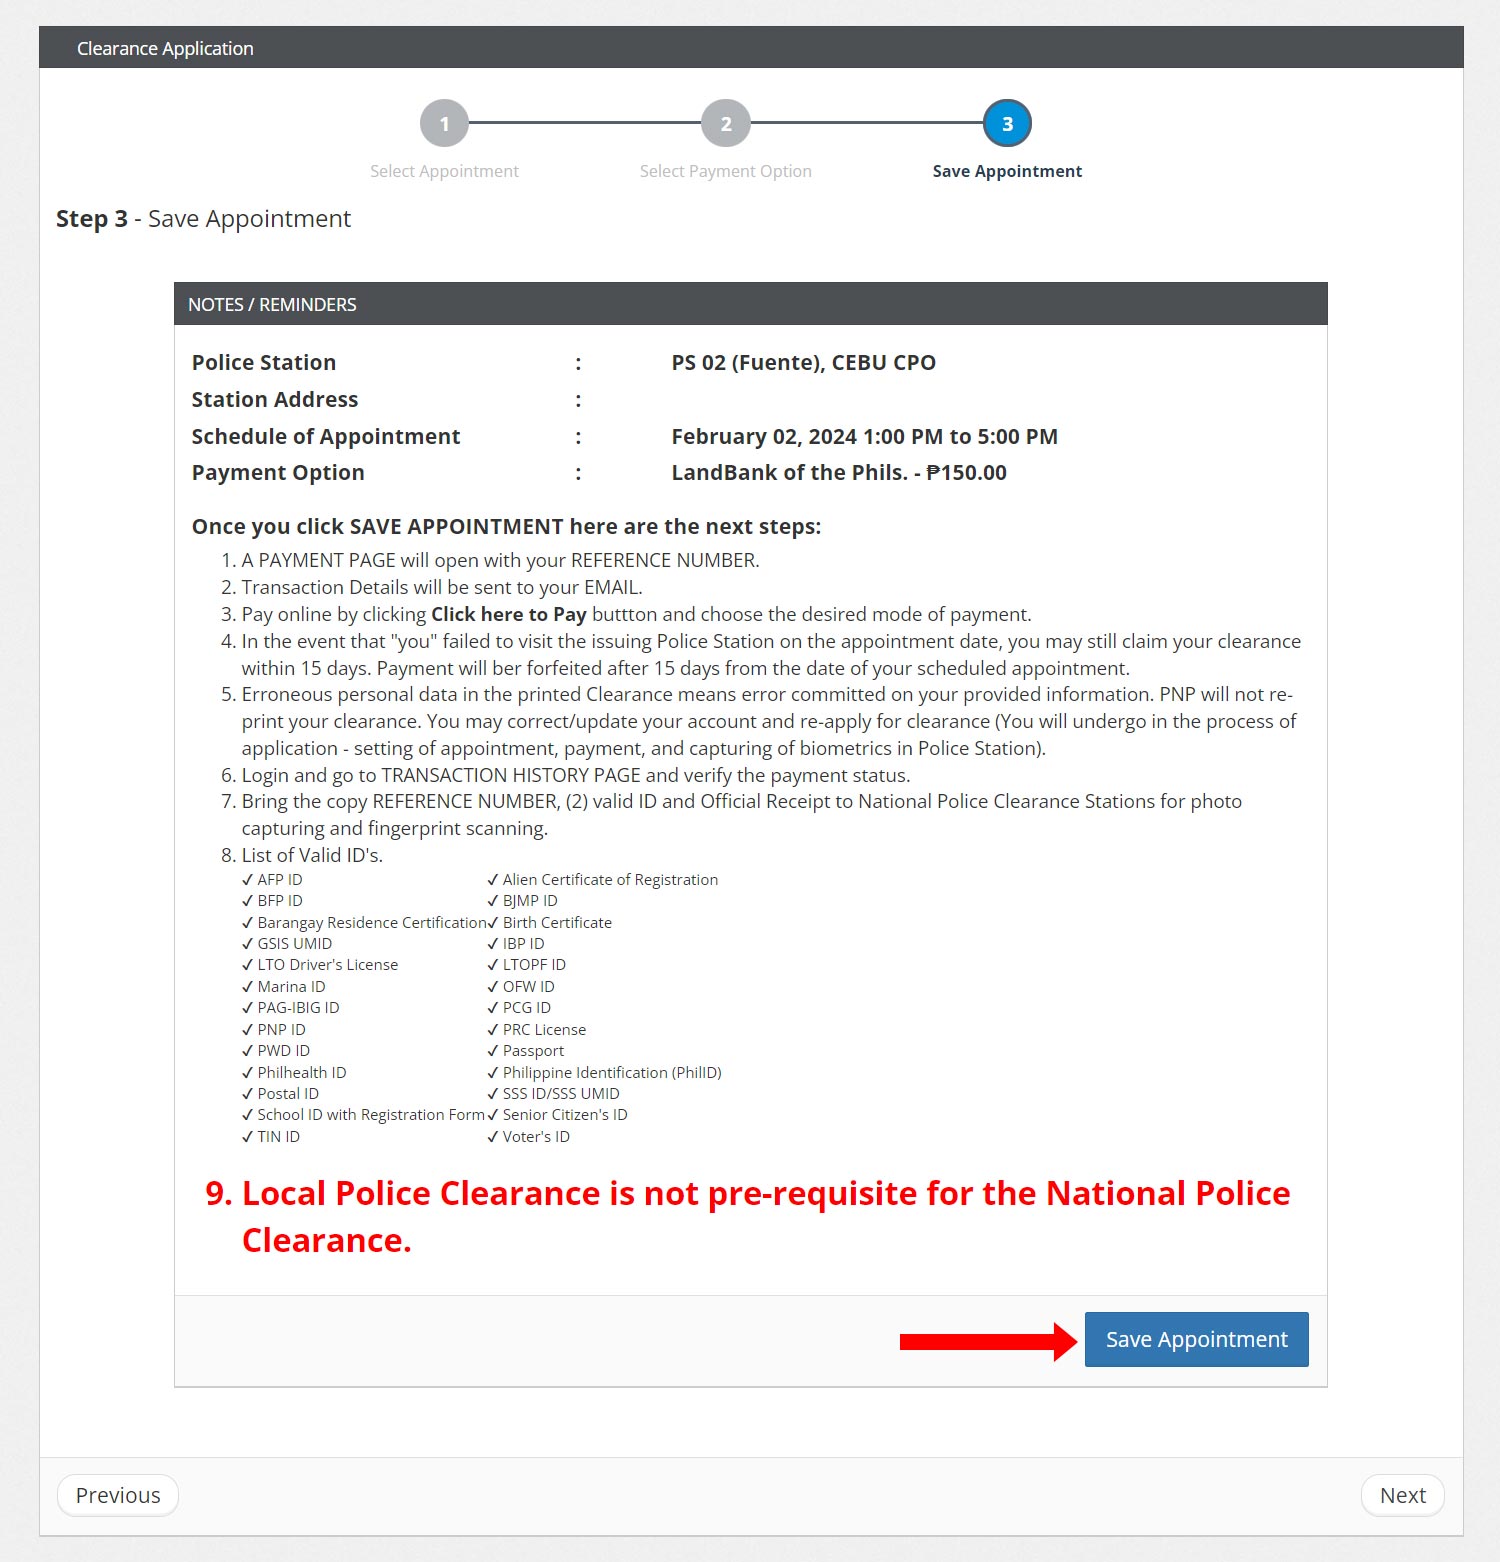
Step 3: Save your appointment
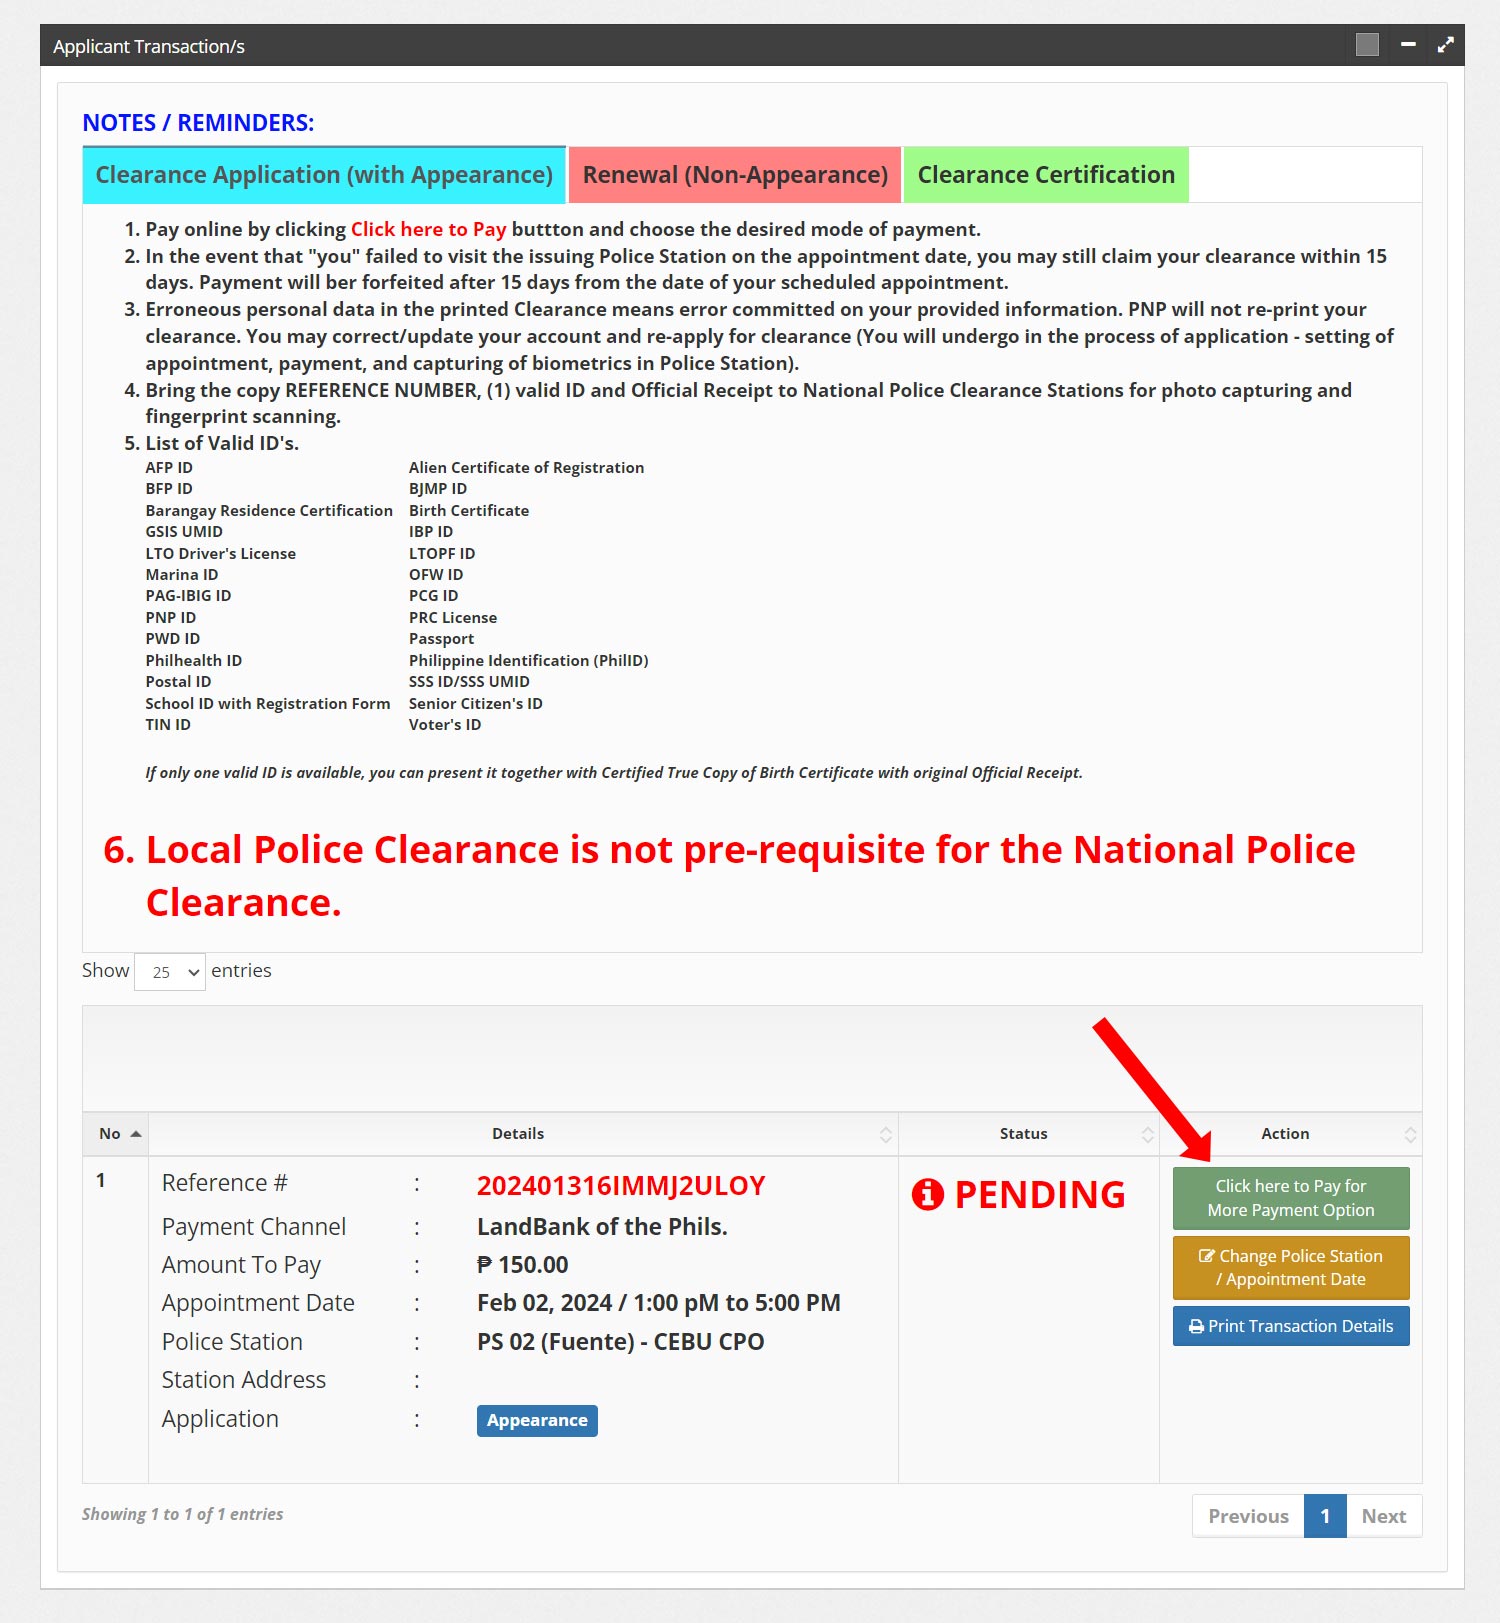
Read the notes and reminders for your appointment. Click “Save Appointment” to proceed to payment.
Step 4: Proceed to payment
Proceed to the payment page by clicking the “Click Here to Pay for More Payment Option” button. You will be redirected to the LandBank payment portal.
Step 5: Review your transaction details
In the Landbank payment portal, click the “Payment Mode” dropdown box and select your mode of payment. You can choose to pay using your LandBank/OFBank ATM card or your e-wallet (GCash, Maya, GrabPay, or ShopeePay).
To pay using your e-wallet, select “Cash Payment and GCash, Maya, ShopeePay, and GrabPay via MYEG.”
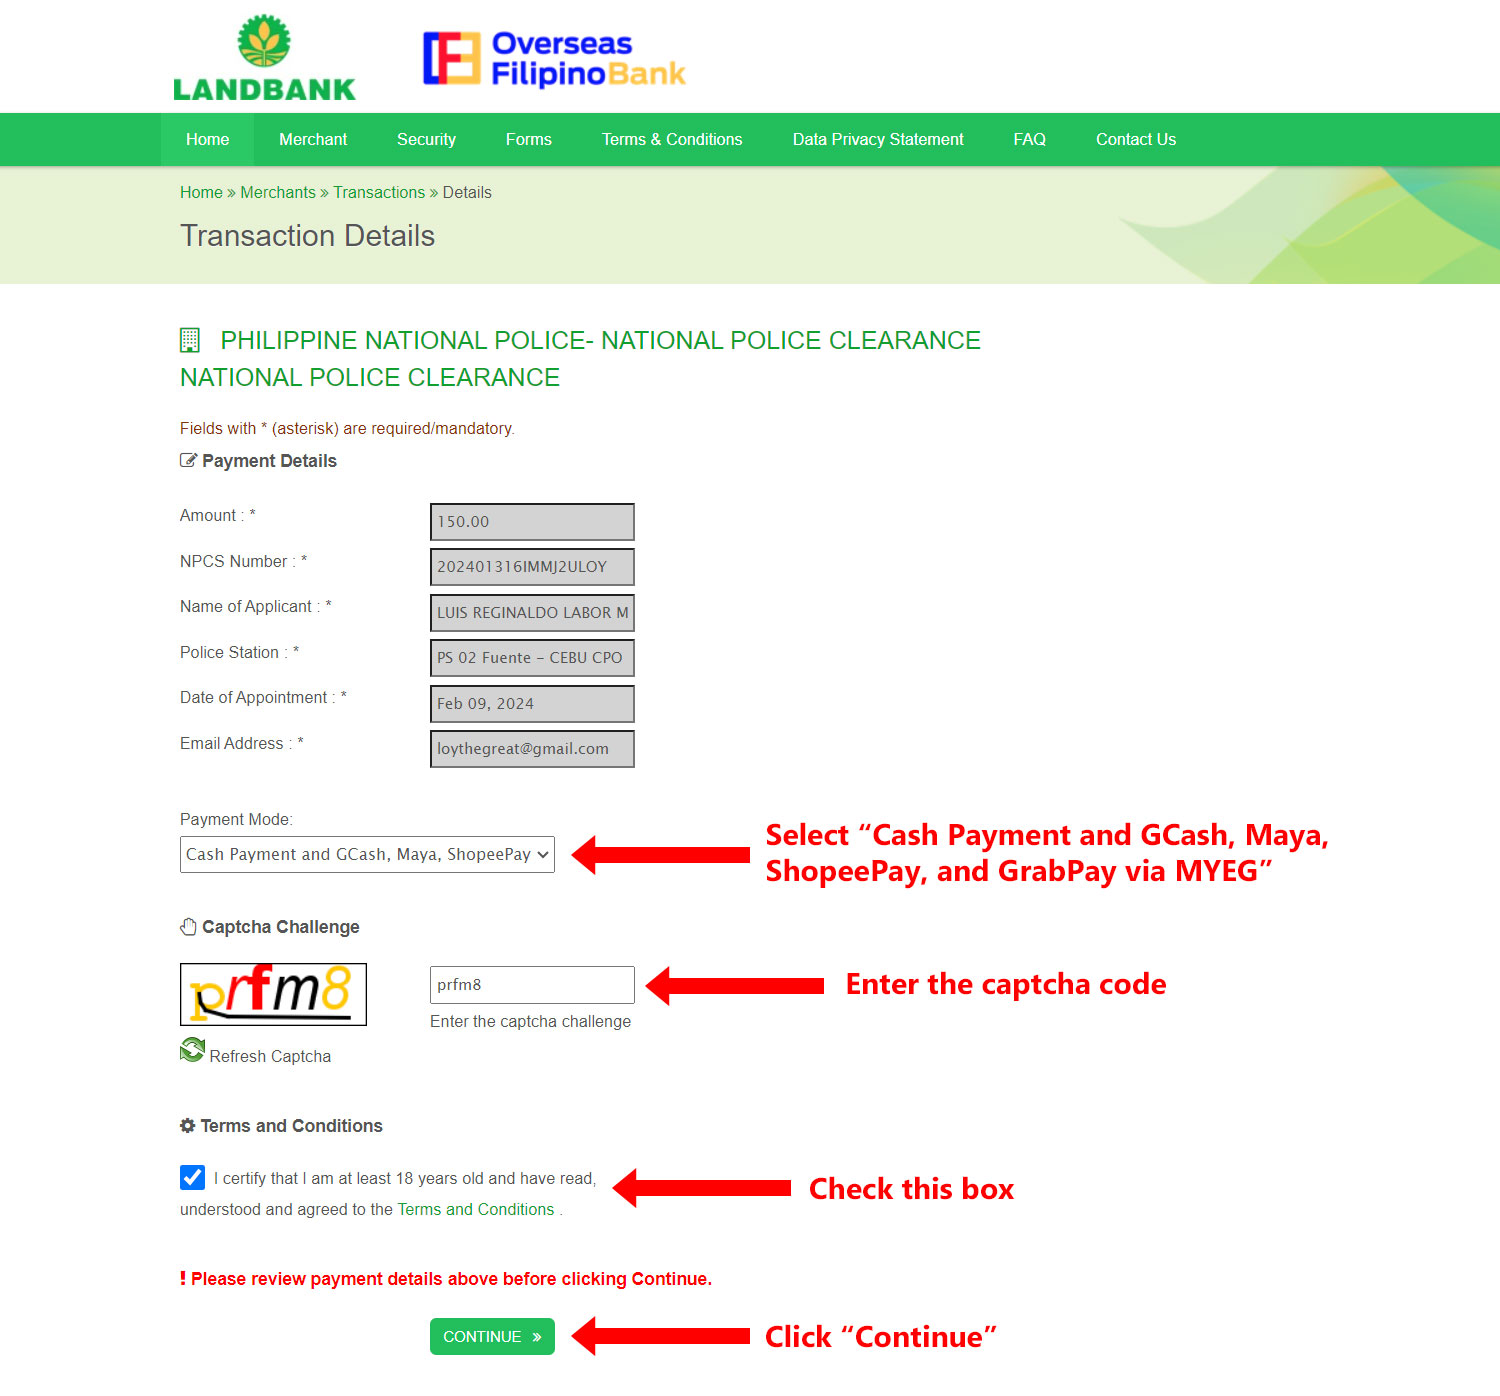
Enter the captcha code in the provided field. If you have a hard time reading the code, click “Refresh Captcha” to generate a new code.
Check the terms and conditions box (“I certify that I am at least 18 years old…”) and then click “CONTINUE.” Dismiss the popup by clicking “OK.”
Step 6: Choose your payment method
You’ll be taken to the MYEG PH Payment Gateway page to choose your payment method. You can select your mobile wallet or e-wallet such as GCash, Maya, ShopeePay, or GrabPay.
For over-the-counter payment options, click the “Over The Counter” tab and select the payment outlet (e.g. 7-Eleven, Palawan Pawnshop, Cebuana Lhuillier, Bayad Center).
For this article, we’ll choose “GCash” because it’s the most common mode of payment aside from cash.
Select the “GCash” logo to highlight it, and then click “Proceed.”
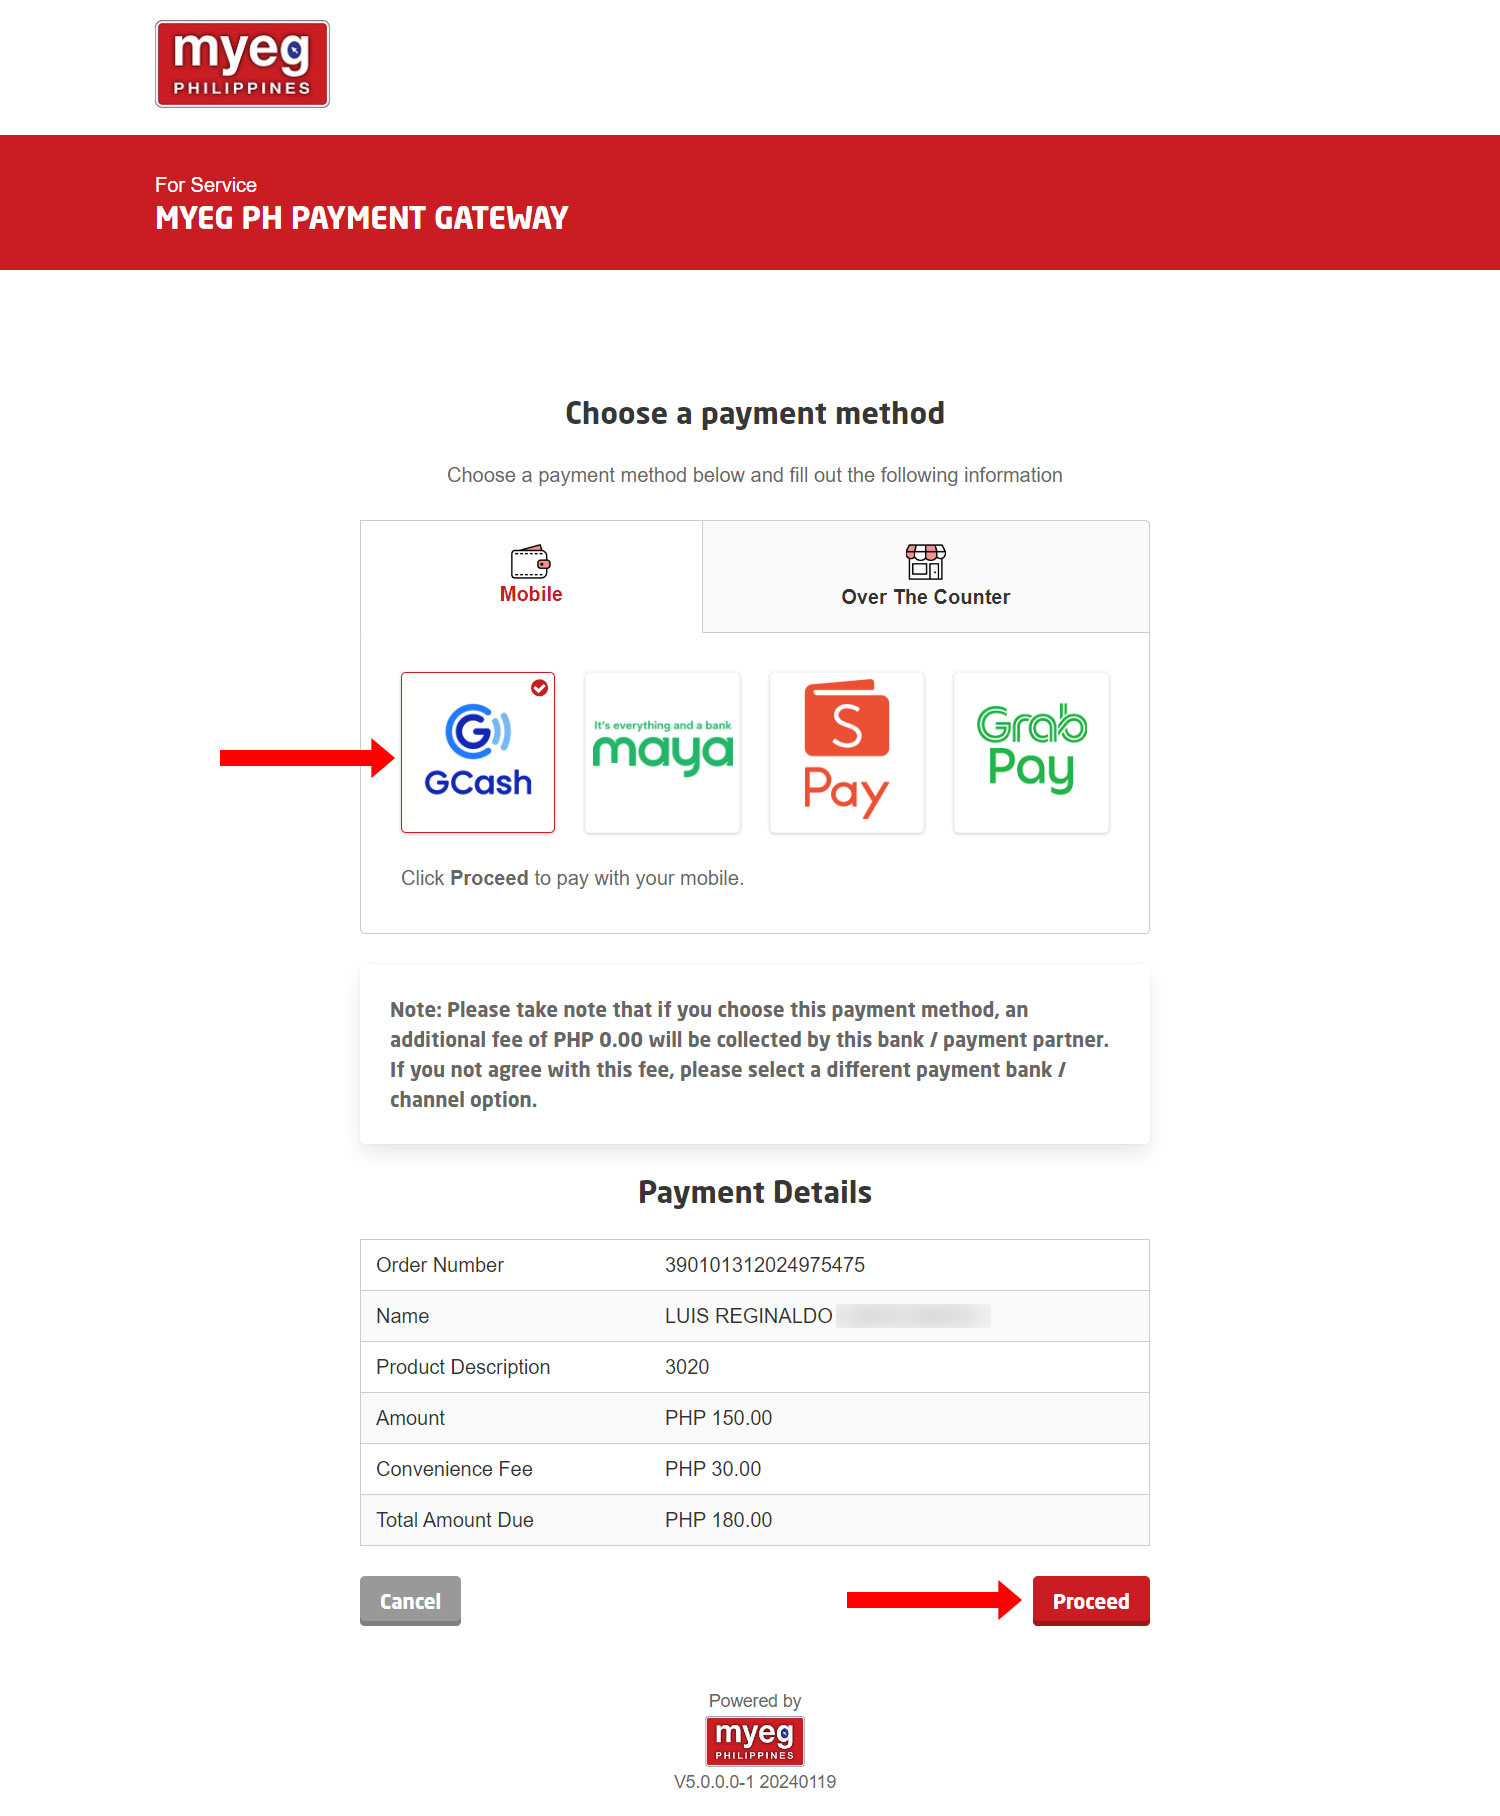
A popup will appear with the message, “Are you sure you want to proceed?” Click “OK” to continue.
Step 7: Complete your payment
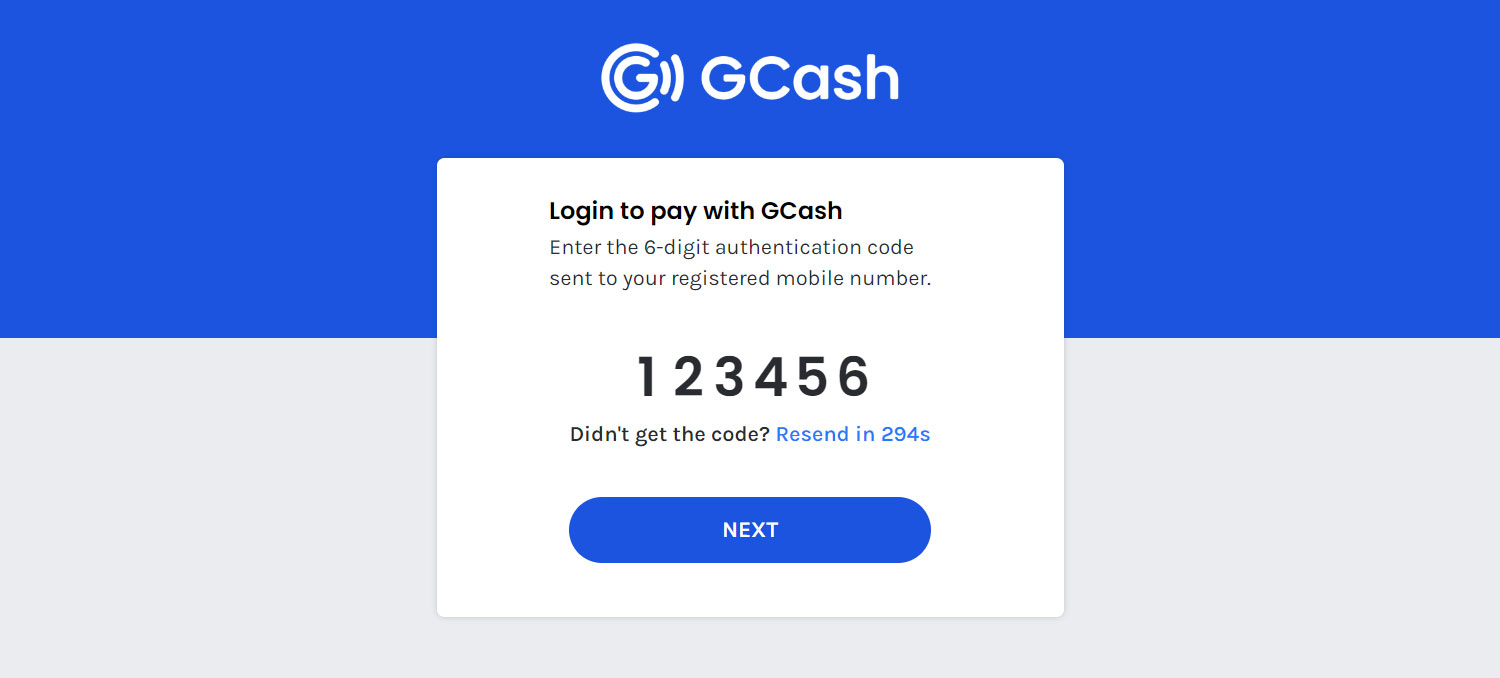
Enter your GCash number (usually starting with “9”) and then click “NEXT.”

Enter the 6-digit authentication code or one-time password (OTP) that was sent to your registered mobile number. Click “NEXT.”
If you didn’t receive the OTP within 5 minutes, just click “Resend” to have a new one sent to you.
Input your 4-digit GCash MPIN (a.k.a. GCash password), and then click “NEXT.”
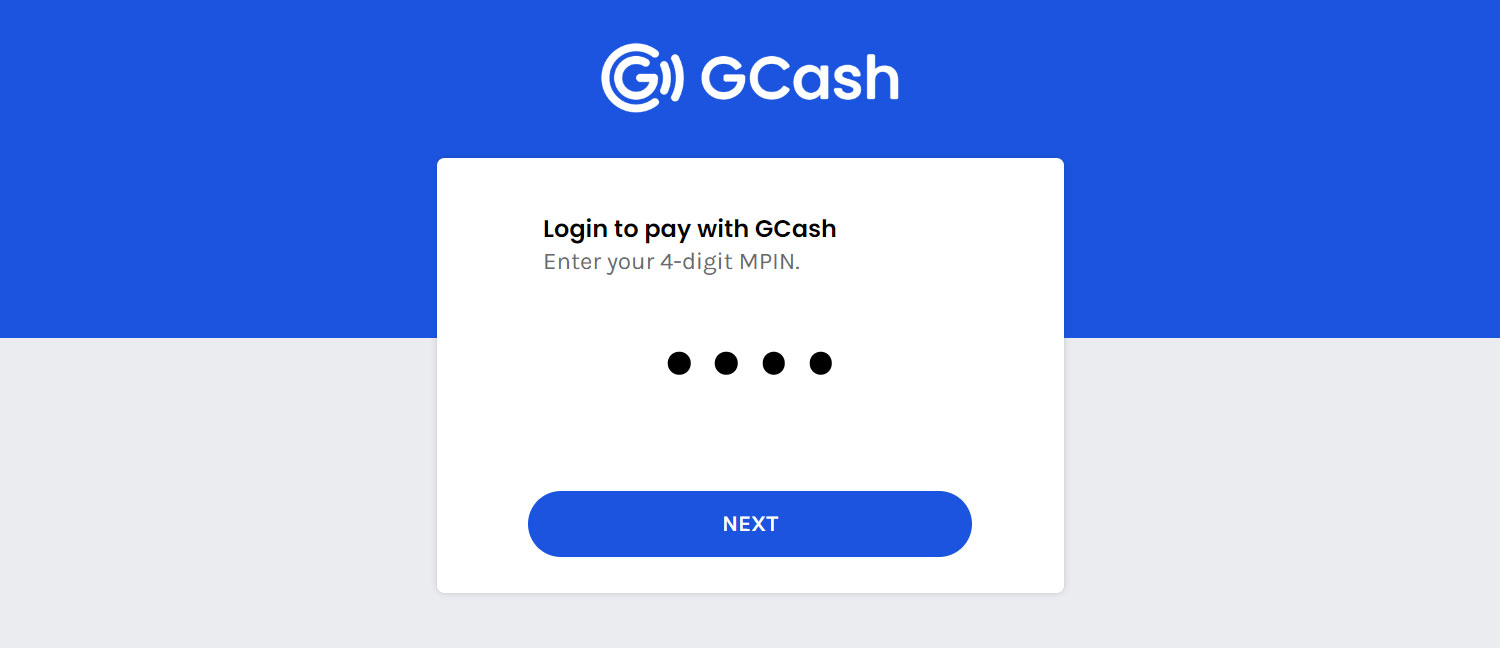
Make sure that you have sufficient balance to pay for the transaction. If not, login to your GCash account and add money to your wallet.
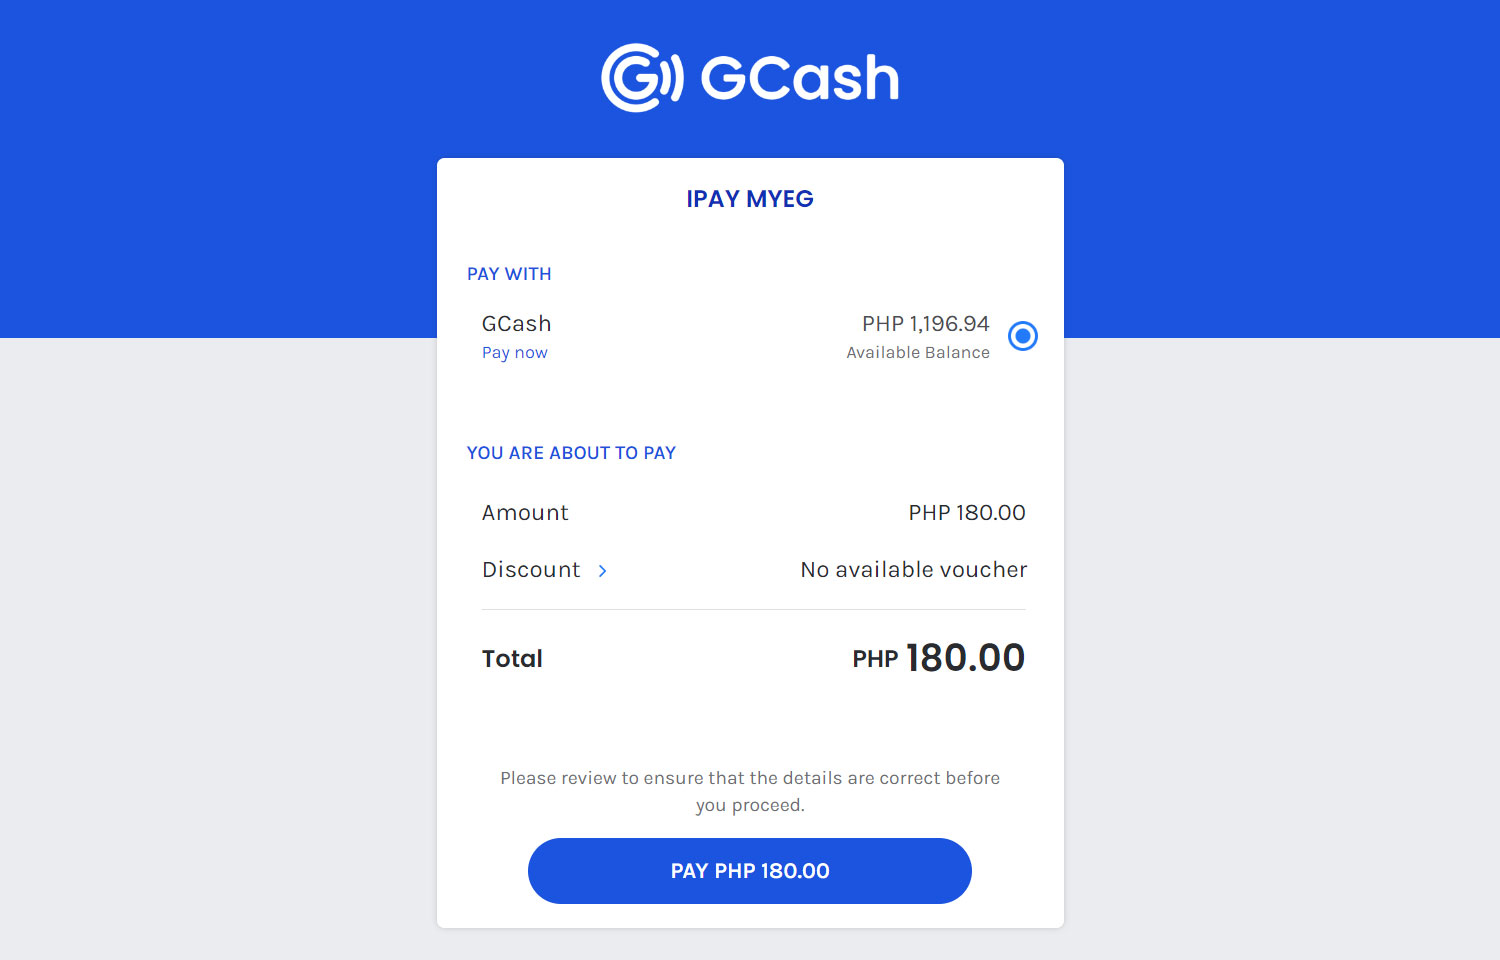
Finally, click the “PAY” button to complete the payment.
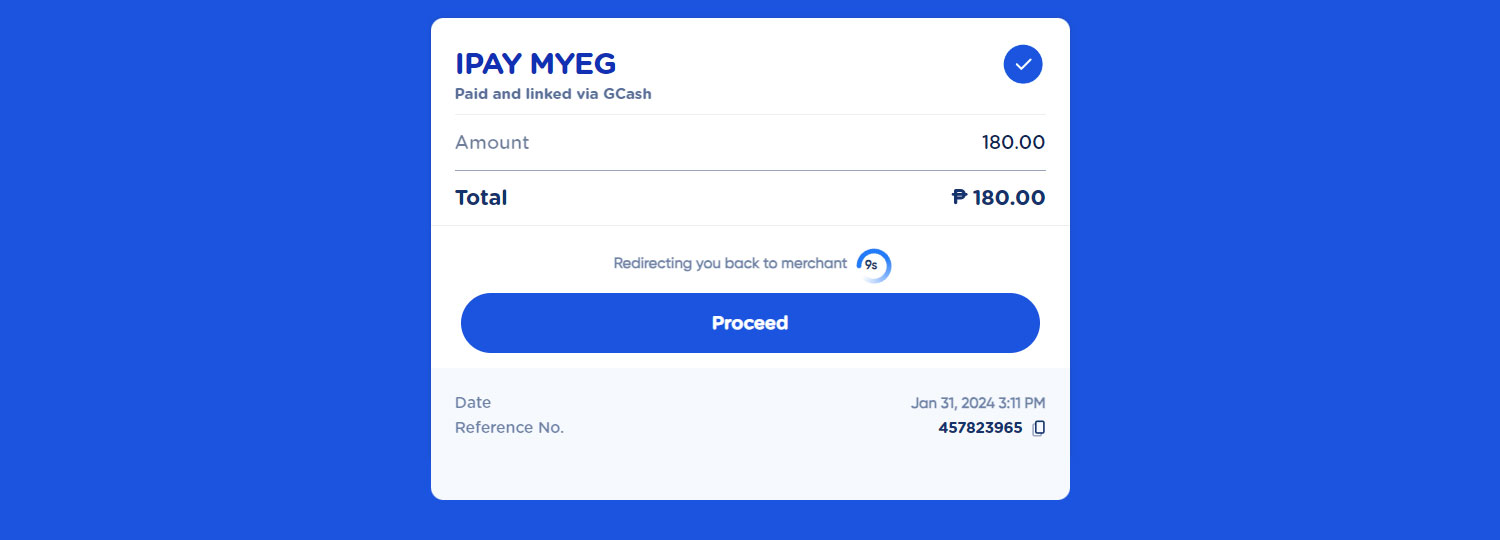
After successful payment, you will be redirected back to the MYEG PH Payment Gateway page. Click the “Proceed” button or wait to be automatically redirected.
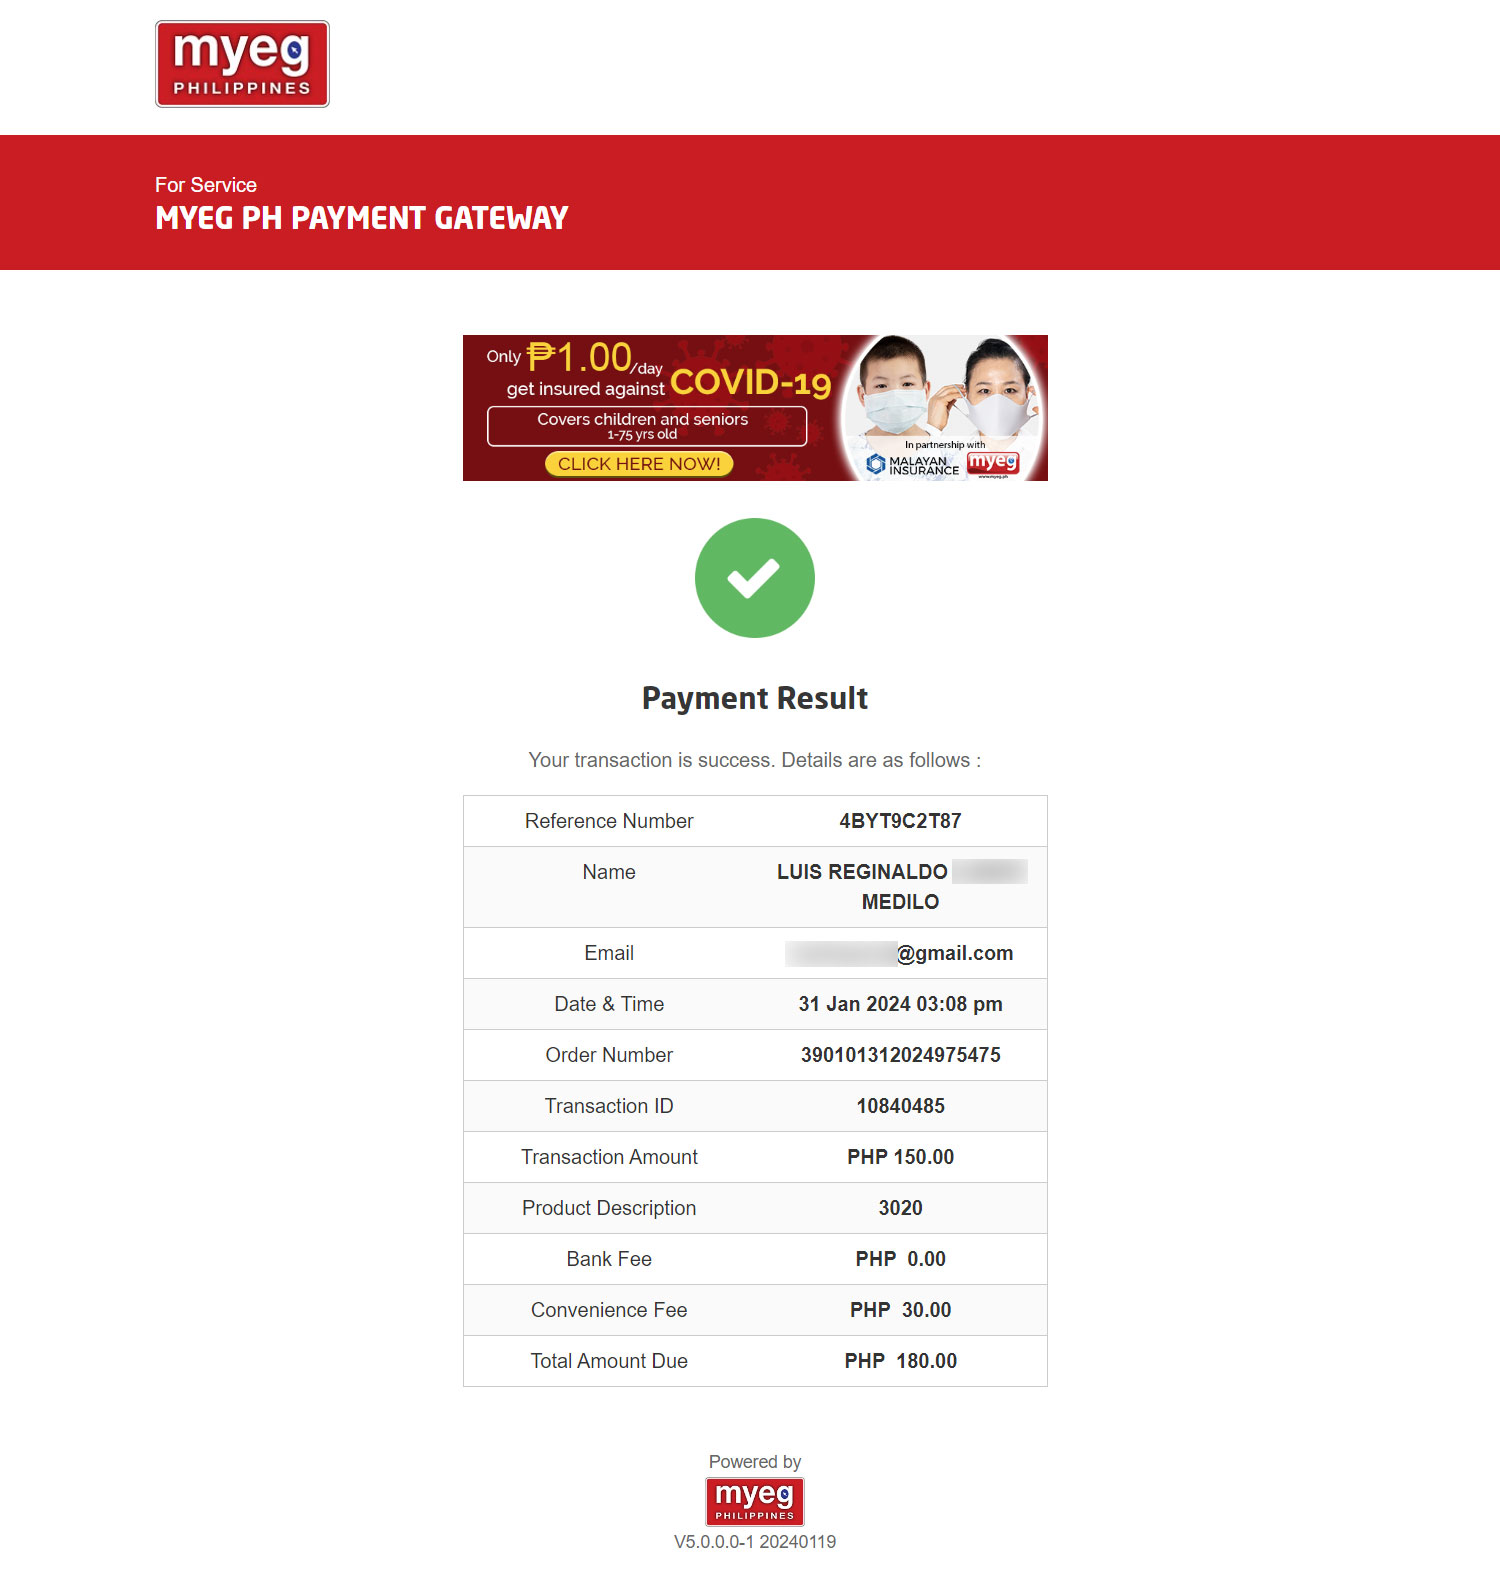
If the transaction is successful, your payment details will be listed including the payment reference number, order number transaction ID. You will also receive a confirmation email of your successful transaction.
Step 8: Go back to your NPCS account
The next step is to go back to your NPCS account to check if your payment has been processed. If you were logged out of your account, just enter your email address and password to log back in.
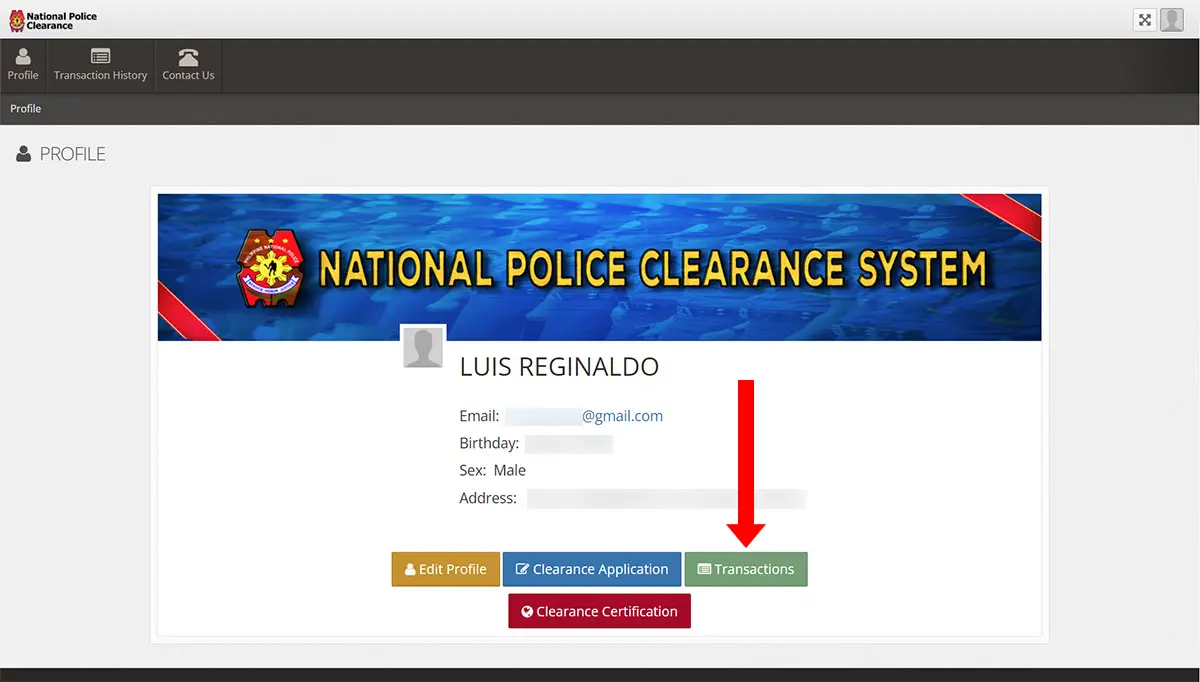
Once logged in, click the “Transactions” button.
Step 9: Print your transaction details (optional)
If your payment has been processed, the status of your application will be changed to “PAID.” If the status is still “PENDING,” you may wait a few minutes and then reload the page.
Click the “Print Transaction Details” button to open or download the receipt. If you don’t have a printer, you may take a photo or screenshot it.
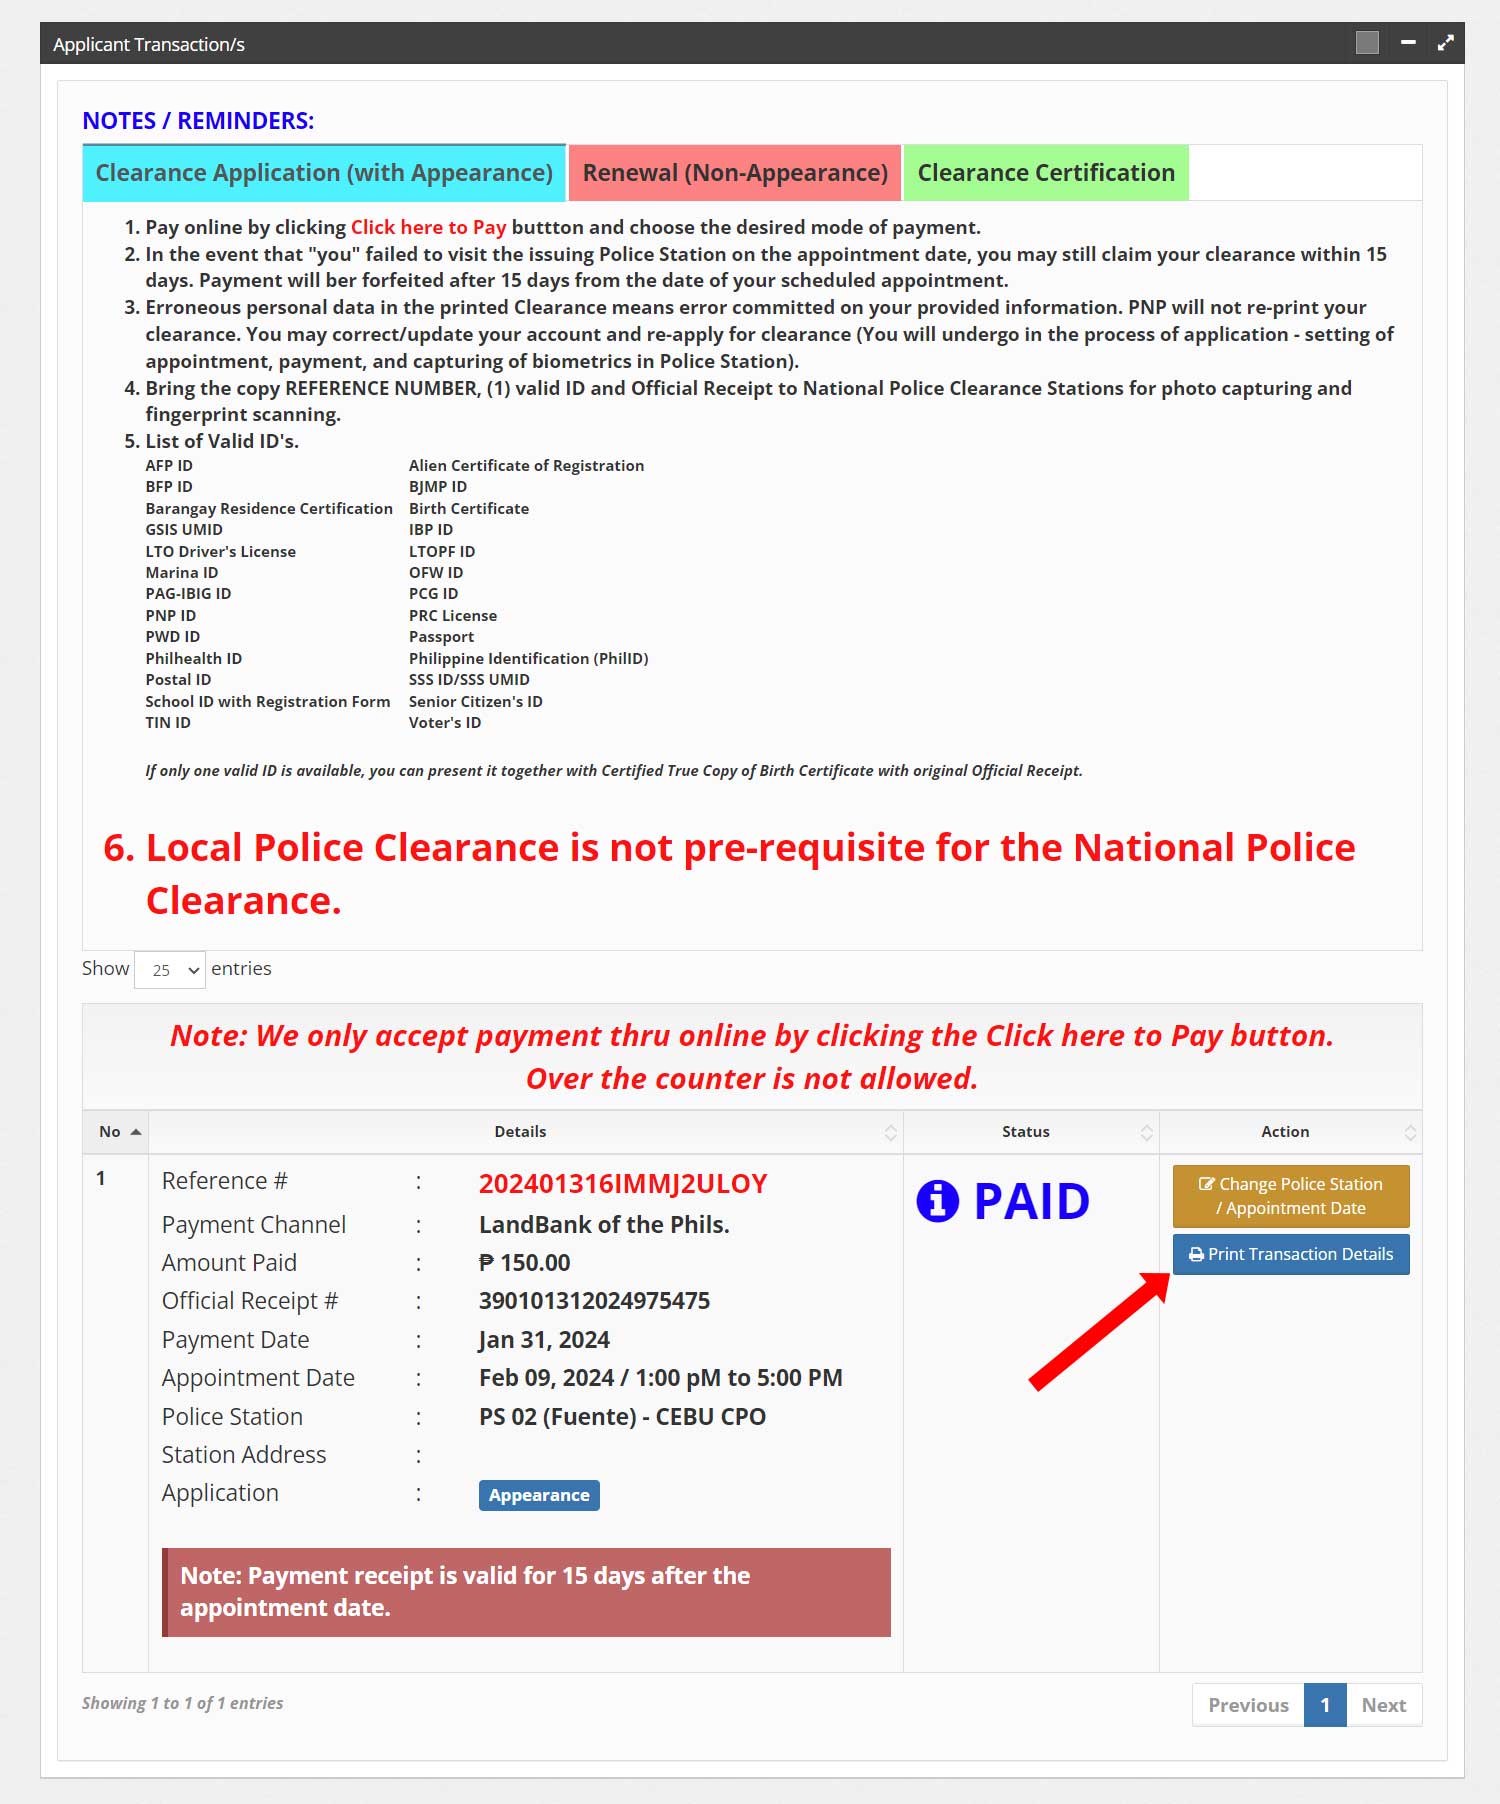
The next step is to go to the police station on the scheduled date of appointment. You can still change your schedule, however, by clicking the “Change Police Station / Appointment Date” button.
Your payment is valid for 15 days so you can still claim your clearance within 15 days even if you failed to appear at the police station during your scheduled appointment date.
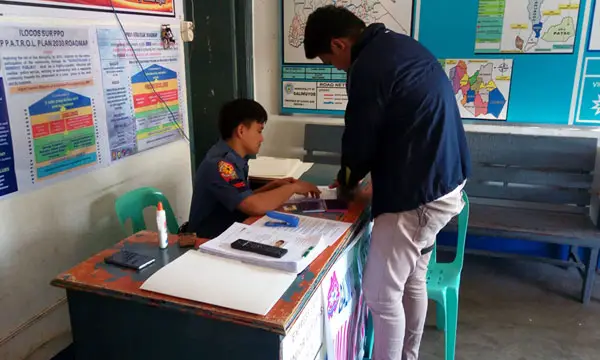
Scheduled Appointment and Verification
Go to the police station on the scheduled date and time of appointment. Bring one (1) valid ID, the reference number, and the payment receipt.
If you don’t have the payment receipt, just give the reference number to the officer-in-charge. He will check it with the system to make sure that you have already paid.
Before your clearance is released, your fingerprints, signature and photo will be taken. Your biometrics and personal data will be checked against the PNP nationwide database for possible criminal records.
If there’s a “hit” (which sometimes happens if you have namesake), your application will undergo further verification. Just wait for the advise or instruction from the verification officer. It will not take too long, however, and you’ll usually get your clearance in less than an hour. In my case, it only took less than 10 minutes.
If you see any errors in your clearance, you may have to edit your profile and reapply for a new clearance. The PNP will not reprint your clearance in case of errors.
Frequently Asked Questions
I forgot my NPCS account password. How can I reset it?
You can reset your account password by going to the login page and clicking the “Forgot password” link (or go to the password reset page directly). Enter your email address and click “Send Password Reset Link.” Follow the instructions in the email to reset your password.
What is the validity of the national police clearance?
The national police clearance is valid for six (6) months only. However, you can renew your clearance online for up to three (3) years from your last appearance. After three years, you will have to go back to the police station for the biometrics and picture-taking.
What happens if I don’t show up for my appointment?
If you failed to show up for your personal appearance on your scheduled appointment date, you can still claim your police clearance within the next 15 days. After 15 days have lapsed, your payment will be forfeited and you may need to re-apply for your clearance.
What happens if I entered wrong or incorrect information in my NPCS profile?
If you erroneously entered the wrong or incorrect information in your NPCS profile, and the errors are printed in the police clearance, the PNP will not re-print it. You will need to update your profile information and re-apply for your clearance.
What happens if there is a “Hit” on my record?
A “hit” occurs when your name is found in the PNP crime database. It sometimes happens when you have a namesake listed in the database. Should a “hit” happen, then your application will undergo further verification. All “hit” records of the applicant will be printed in the police clearance along with the corresponding status of such records.
How can I renew my national police clearance?
You can renew your police clearance online within three years from your last appearance. To renew your clearance, you’ll need to update your NPCS profile, upload a 2×2 photo with white background, and take a selfie holding a valid government-issued ID.
How can I have my national police clearance certified?
Clearance certification is only available to Filipino citizens who are working or based in another country, bedridden, deceased, or a petitioner applying for probation. To apply for certification, login to your NPCS account and click “Clearance Certification.”
How can I reschedule my appointment?
You can easily reschedule your national police clearance online appointment by going to the Transaction History page and then clicking “Change Police Station / Appointment Date.” Select the new appointment timeslot and then click “Save Changes.” You can also select a different police station.
Final Thoughts
That’s it! The National Police Clearance System has really made it easier and more convenient to get your police clearance. Be sure to share this article with your friends who are interested in getting their police clearances online.